Samsung SGH-A667 User Manual (user Manual) (ver.f10) (English) - Page 46
Adding a New Contact - ringtones
 |
View all Samsung SGH-A667 manuals
Add to My Manuals
Save this manual to your list of manuals |
Page 46 highlights
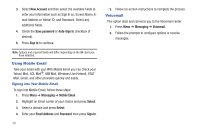
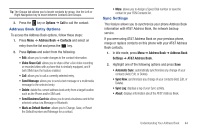
• AT&T Address Book: allows you to enable synchronization on any change made to your contacts between your phone Address Book and the AT&T Address Book. • Own Number: to display your current phone number (page 45). • FDN Contacts: assigns phone numbers as FDN entries (page 45). • Used Space: displays the memory storage allocation (total available and remaining) within your Phone, SIM card, Additional No. 1, Additional No. 2, Email, and FDN Contacts. Adding a New Contact Use the following procedure to store a new contact to your Address Book. New contacts are stored on your phone by default. Add contacts into your Address Book one at a time or easily import them all by logging into your online AT&T Address Book at att.com/addressbook. Saving a Number from the Idle screen 1. Press Menu ➔ Address Book ➔ Add New Contact. The Create contact screen displays. 2. Highlight the First Name, Last Name, and Display Name fields and use the QWERTY keypad to enter names for this contact. For more information, refer to "Entering Text" on page 19. 3. Press the Mobile, private field and use the QWERTY keypad to enter the phone number for this contact. 4. Highlight the Landline, private field and use the QWERTY keypad to enter the landline number for this contact. 5. Highlight the Email, private field and use the QWERTY keypad to enter a private email address for this contact. 6. Highlight the Group field and press name and press . . Select a group 7. Highlight the Picture field and press . 8. Highlight the Ringtone field and press . 9. Select a tone to represent this contact and press Select. 10. Highlight the Notes field and use the QWERTY keypad to enter a note. For more information, refer to "Entering Text" on page 19. 11. Press Options ➔ Save. Note: By default, Contacts are saved on the phone. To copy them to a SIM card, see "Copying an Entry to the SIM Card" on page 47. 41
-
 1
1 -
2
-
3
-
4
-
5
-
6
-
7
-
8
-
9
-
10
-
11
-
12
-
13
-
14
-
15
-
16
-
17
-
18
-
19
-
20
-
21
-
22
-
23
-
24
-
25
-
26
-
27
-
28
-
29
-
30
-
31
-
32
-
33
-
34
-
35
-
36
-
37
-
38
-
39
-
40
-
 41
41 -
 42
42 -
 43
43 -
 44
44 -
 45
45 -
 46
46 -
 47
47 -
 48
48 -
 49
49 -
 50
50 -
 51
51 -
52
-
53
-
54
-
55
-
56
-
57
-
58
-
59
-
60
-
61
-
62
-
63
-
64
-
65
-
66
-
67
-
68
-
69
-
70
-
71
-
72
-
73
-
74
-
75
-
76
-
77
-
78
-
79
-
80
-
81
-
82
-
83
-
84
-
85
-
86
-
87
-
88
-
89
-
90
-
91
-
92
-
93
-
94
-
95
-
96
-
97
-
98
-
99
-
100
-
101
-
102
-
103
-
104
-
105
-
106
-
107
-
108
-
109
-
110
-
111
-
112
-
113
-
114
-
115
-
116
-
117
-
118
-
119
-
120
-
121
-
122
-
123
-
124
-
125
-
126
-
127
-
128
-
129
-
130
-
131
-
132
-
133
-
134
-
135
-
136
-
137
-
138
-
139
-
140
-
141
-
142
-
143
-
144
-
145
-
146
-
147
-
148
-
149
-
150
-
151
-
152
-
153
 |
 |