Texas Instruments TIPRESENTER Reference Guide - Page 45
Scaling and cropping an image, To scale and/or crop an image
 |
UPC - 842740000045
View all Texas Instruments TIPRESENTER manuals
Add to My Manuals
Save this manual to your list of manuals |
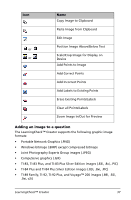
Page 45 highlights
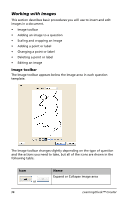
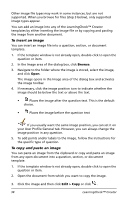
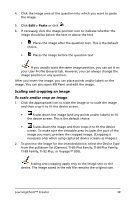
4. Click the image area of the question into which you want to paste the image. 5. Click Edit > Paste or click . 6. If necessary, click the image position icon to indicate whether the image should be below the text or above the text. • Places the image after the question text. This is the default choice. • Places the image before the question text If you usually want the same image position, you can set it on your User Profile General tab. However, you can always change the image position in any question. After you insert the image, you can place points and/or labels on the image. You can also open MS Paint and edit the image. Scaling and cropping an image To scale and/or crop an image 1. Click the appropriate icon to scale the image or to scale the image and then crop it to fit the device screen. • Scales down the image (and any points and/or labels) to fit the device screen. This is the default choice. • Scales down the image and then crops it to fit the device screen. To make sure the viewable area includes the part of the image you want, preview the cropped image. (Cropping is necessary only when using captured device screens as images.) 2. To preview the image for the intended device, select the Device Type from the pulldown list (General, TI-83 Plus Family, TI-84 Plus Family, TI-89 Family, TI-92 Plus, or Voyage™ 200). Scaling and cropping apply only to the image sent to the device. The image saved in the edc file remains the original size. LearningCheck™ Creator 39
-
 1
1 -
2
-
3
-
4
-
5
-
6
-
7
-
8
-
9
-
10
-
11
-
12
-
13
-
14
-
15
-
16
-
17
-
18
-
19
-
20
-
21
-
22
-
23
-
24
-
25
-
26
-
27
-
28
-
29
-
30
-
31
-
32
-
33
-
34
-
35
-
36
-
37
-
38
-
39
-
 40
40 -
 41
41 -
 42
42 -
 43
43 -
 44
44 -
 45
45 -
 46
46 -
 47
47 -
 48
48 -
 49
49 -
 50
50 -
51
-
52
-
53
-
54
-
55
-
56
-
57
-
58
-
59
-
60
-
61
-
62
-
63
-
64
-
65
-
66
-
67
-
68
-
69
-
70
-
71
-
72
-
73
-
74
-
75
-
76
-
77
-
78
-
79
-
80
-
81
 |
 |