Brother International MFC 9420CN Users Manual - English - Page 170
Close both of the side covers by putting, the notch over the hook of the lower tray
 |
UPC - 012502614074
View all Brother International MFC 9420CN manuals
Add to My Manuals
Save this manual to your list of manuals |
Page 170 highlights
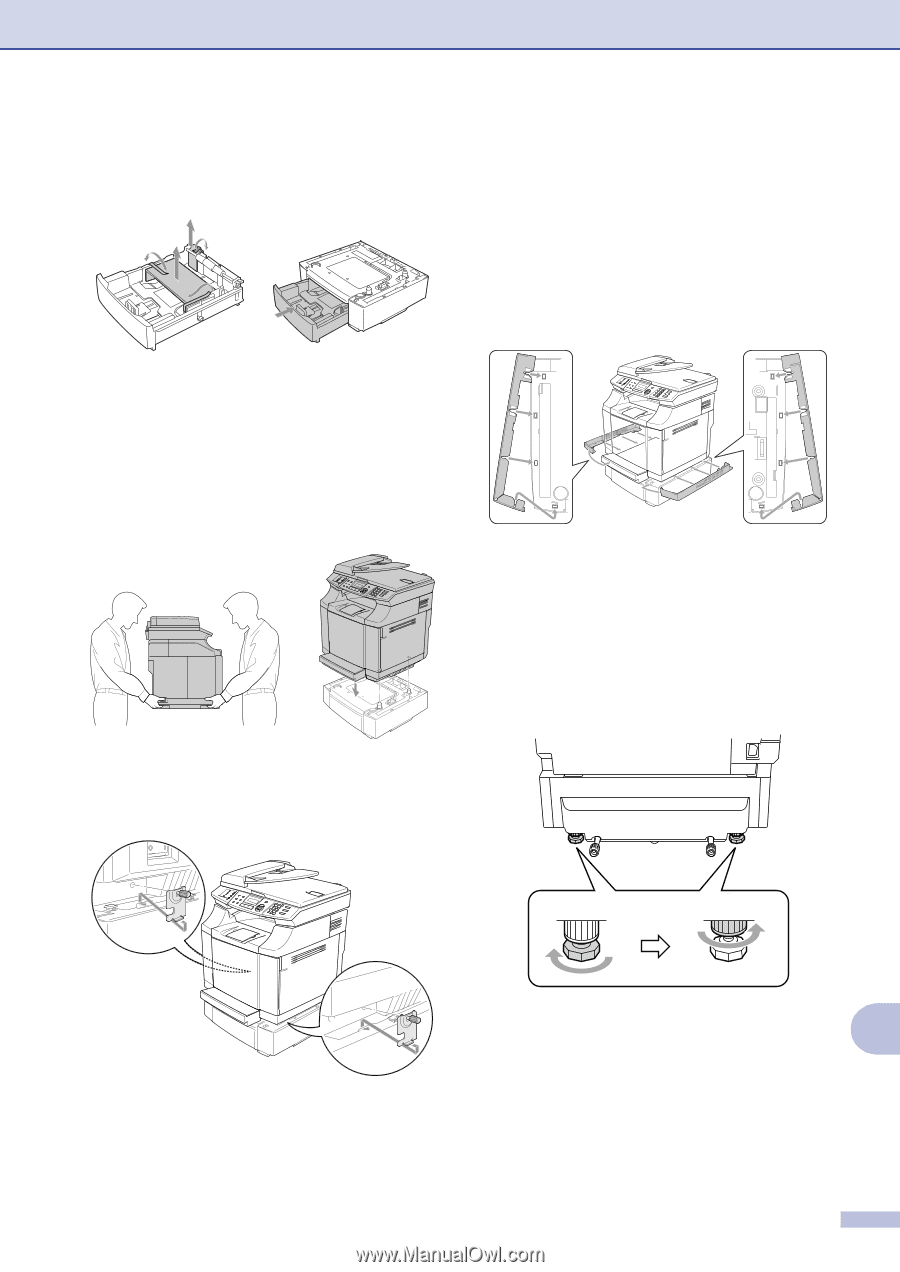
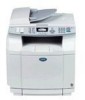
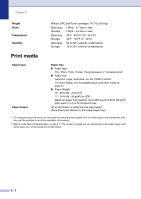
5 Remove the protective parts and then put the paper tray back in the lower tray unit. 6 Check the two alignment pins on the lower tray unit. Use two people to lift the machine and place it on top of the lower tray unit. Make sure you use the handholds at the bottom four corners of the machine. Check that the pins are properly inserted into the machine. Check that the connector is inserted. 7 Install the two stopper fittings on the right and left hand sides of the lower tray unit. Optional accessories 8 Cover the gap on the right hand side with the right-hand side cover by first inserting the hook at the back. Cover the gap on the left hand side with the left-hand side cover by first inserting the hook at the back. Close both of the side covers by putting the notch over the hook of the lower tray unit. 9 To level the machine, adjust the feet of the lower tray unit at the front and back on the right-hand side. Turn the feet to move them up or down until they touch the work surface and the tray unit is level. Turn the lock screw on each foot to secure it. D D - 2
-
 1
1 -
2
-
3
-
4
-
5
-
6
-
7
-
8
-
9
-
10
-
11
-
12
-
13
-
14
-
15
-
16
-
17
-
18
-
19
-
20
-
21
-
22
-
23
-
24
-
25
-
26
-
27
-
28
-
29
-
30
-
31
-
32
-
33
-
34
-
35
-
36
-
37
-
38
-
39
-
40
-
41
-
42
-
43
-
44
-
45
-
46
-
47
-
48
-
49
-
50
-
51
-
52
-
53
-
54
-
55
-
56
-
57
-
58
-
59
-
60
-
61
-
62
-
63
-
64
-
65
-
66
-
67
-
68
-
69
-
70
-
71
-
72
-
73
-
74
-
75
-
76
-
77
-
78
-
79
-
80
-
81
-
82
-
83
-
84
-
85
-
86
-
87
-
88
-
89
-
90
-
91
-
92
-
93
-
94
-
95
-
96
-
97
-
98
-
99
-
100
-
101
-
102
-
103
-
104
-
105
-
106
-
107
-
108
-
109
-
110
-
111
-
112
-
113
-
114
-
115
-
116
-
117
-
118
-
119
-
120
-
121
-
122
-
123
-
124
-
125
-
126
-
127
-
128
-
129
-
130
-
131
-
132
-
133
-
134
-
135
-
136
-
137
-
138
-
139
-
140
-
141
-
142
-
143
-
144
-
145
-
146
-
147
-
148
-
149
-
150
-
151
-
152
-
153
-
154
-
155
-
156
-
157
-
158
-
159
-
160
-
161
-
162
-
163
-
164
-
 165
165 -
 166
166 -
 167
167 -
 168
168 -
 169
169 -
 170
170 -
 171
171 -
 172
172 -
 173
173 -
 174
174 -
 175
175 -
176
-
177
-
178
-
179
-
180
-
181
-
182
-
183
-
184
-
185
-
186
-
187
-
188
-
189
-
190
-
191
-
192
-
193
-
194
-
195
 |
 |