Brother International PT-9700PC Users Manual - English and Spanish - Page 41
Database-assisted label printing - replacement
 |
View all Brother International PT-9700PC manuals
Add to My Manuals
Save this manual to your list of manuals |
Page 41 highlights
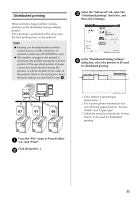
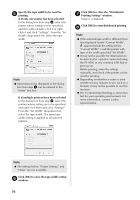
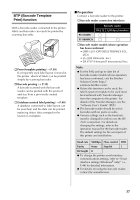
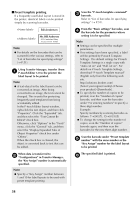
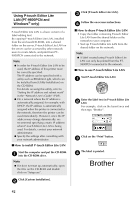
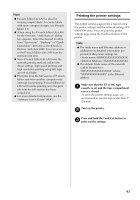
Scan the barcode whose data is to be 6 used. (CODE128/9-digit) Scan the "Begin printing" barcode. 7 The barcode is printed with the protocol 8 and size specified in the template. ■ Database-assisted label printing First, a database field must be connected to an object in the label layout. Then, when a key barcode is scanned with the barcode reader, the barcode data can be printed replacing data from the connected database file in the object of the specified template. Note ● The key barcode is the barcode for the information appearing in the database file at the leftmost column in record view (field "A" in form view). These key barcodes must be created in advance. ● The database information in field "A" of the form view must not include any other data. In addition, even if the information contains two lines of data, only the first line of data is recognized when the barcode is scanned with the barcode reader. Therefore, enter only one line of data into the information in field "A" of the form view. ● For details on the barcodes that can be scanned for the various settings, refer to "List of barcodes for specifying settings" (→ P.51). Connect the database file to the label 1 layout to be printed. For details on specifying the settings, refer to the "P-touch Editor Help". Using Transfer Manager, transfer the 2 label layout from P-touch Editor 5.0 to the printer. The database file is also transferred. When data is transferred to 3 "Configurations" in Transfer Manager, the "Key Assign" number is automatically specified. 40
-
 1
1 -
2
-
3
-
4
-
5
-
6
-
7
-
8
-
9
-
10
-
11
-
12
-
13
-
14
-
15
-
16
-
17
-
18
-
19
-
20
-
21
-
22
-
23
-
24
-
25
-
26
-
27
-
28
-
29
-
30
-
31
-
32
-
33
-
34
-
35
-
 36
36 -
 37
37 -
 38
38 -
 39
39 -
 40
40 -
 41
41 -
 42
42 -
 43
43 -
 44
44 -
 45
45 -
 46
46 -
47
-
48
-
49
-
50
-
51
-
52
-
53
-
54
-
55
-
56
-
57
-
58
-
59
-
60
-
61
-
62
-
63
-
64
-
65
-
66
-
67
-
68
-
69
-
70
-
71
-
72
-
73
-
74
-
75
-
76
-
77
-
78
-
79
-
80
-
81
-
82
-
83
-
84
-
85
-
86
-
87
-
88
-
89
-
90
-
91
-
92
-
93
-
94
-
95
-
96
-
97
-
98
-
99
-
100
-
101
-
102
-
103
-
104
-
105
-
106
-
107
-
108
-
109
-
110
-
111
-
112
-
113
-
114
-
115
-
116
-
117
-
118
 |
 |
