Canon PIXMA MX532 Troubleshooting Guide - Page 105
Did you install the MP Drivers after registering the printer for printing via, Bluetooth
 |
View all Canon PIXMA MX532 manuals
Add to My Manuals
Save this manual to your list of manuals |
Page 105 highlights
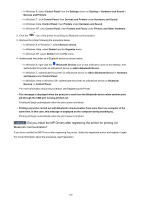
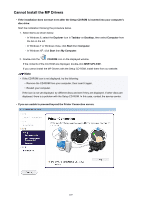
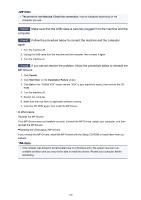
• In Windows 8, select Control Panel from the Settings charm on Desktop > Hardware and Sound > Devices and Printers. • In Windows 7, click Control Panel, then Devices and Printers under Hardware and Sound. • In Windows Vista, Control Panel, then Printers under Hardware and Sound. • In Windows XP, click Control Panel, then Printers and Faxes under Printers and Other Hardware. 2. Click the icon of the printer for printing via Bluetooth communication. 3. Remove the printer following the procedure below. • In Windows 8 or Windows 7, select Remove device. • In Windows Vista, select Delete from the Organize menu. • In Windows XP, select Delete from the File menu. 4. Authenticate the printer as a Bluetooth device as shown below. • In Windows 8, right-click the Bluetooth Devices icon on the notification area on the desktop, then authenticate the printer as a Bluetooth device on Add a Bluetooth Device. • In Windows 7, authenticate the printer as a Bluetooth device on Add a Bluetooth Device in Hardware and Sound under Control Panel. • In Windows Vista or Windows XP, authenticate the printer as a Bluetooth device on Bluetooth Devices, in Control Panel. For more information about the procedure, see Registering the Printer. • This message is displayed when the print job is sent from the Bluetooth device while another print job through the USB port is being printed out. Printing will begin automatically when the print queue is finished. • Printing cannot be carried out with Bluetooth communication from more than one computer at the same time. In this case, this message is displayed on the computer during standing by. Printing will begin automatically when the print queue is finished. Check5 Did you install the MP Drivers after registering the printer for printing via Bluetooth communication? If you have installed the MP Drivers after registering the printer, delete the registered printer and register it again. For more information about the procedure, see Preparation. 105
-
 1
1 -
2
-
3
-
4
-
5
-
6
-
7
-
8
-
9
-
10
-
11
-
12
-
13
-
14
-
15
-
16
-
17
-
18
-
19
-
20
-
21
-
22
-
23
-
24
-
25
-
26
-
27
-
28
-
29
-
30
-
31
-
32
-
33
-
34
-
35
-
36
-
37
-
38
-
39
-
40
-
41
-
42
-
43
-
44
-
45
-
46
-
47
-
48
-
49
-
50
-
51
-
52
-
53
-
54
-
55
-
56
-
57
-
58
-
59
-
60
-
61
-
62
-
63
-
64
-
65
-
66
-
67
-
68
-
69
-
70
-
71
-
72
-
73
-
74
-
75
-
76
-
77
-
78
-
79
-
80
-
81
-
82
-
83
-
84
-
85
-
86
-
87
-
88
-
89
-
90
-
91
-
92
-
93
-
94
-
95
-
96
-
97
-
98
-
99
-
 100
100 -
 101
101 -
 102
102 -
 103
103 -
 104
104 -
 105
105 -
 106
106 -
 107
107 -
 108
108 -
 109
109 -
 110
110 -
111
-
112
-
113
-
114
-
115
-
116
-
117
-
118
-
119
-
120
-
121
-
122
-
123
-
124
-
125
-
126
-
127
-
128
-
129
-
130
-
131
-
132
-
133
-
134
-
135
-
136
-
137
-
138
-
139
-
140
-
141
-
142
-
143
-
144
-
145
-
146
-
147
-
148
-
149
-
150
-
151
-
152
-
153
-
154
-
155
-
156
-
157
-
158
-
159
-
160
-
161
-
162
-
163
-
164
-
165
-
166
-
167
-
168
-
169
-
170
-
171
-
172
-
173
-
174
-
175
-
176
-
177
-
178
-
179
-
180
-
181
-
182
-
183
-
184
-
185
-
186
-
187
-
188
-
189
-
190
-
191
-
192
-
193
-
194
-
195
-
196
-
197
-
198
-
199
-
200
-
201
-
202
-
203
-
204
-
205
-
206
-
207
-
208
-
209
-
210
-
211
-
212
-
213
-
214
-
215
-
216
-
217
-
218
-
219
-
220
-
221
-
222
 |
 |