Epson 1715C User's Guide - Page 24
Using Keystone Correction, menu, and press
 |
UPC - 010343858237
View all Epson 1715C manuals
Add to My Manuals
Save this manual to your list of manuals |
Page 24 highlights
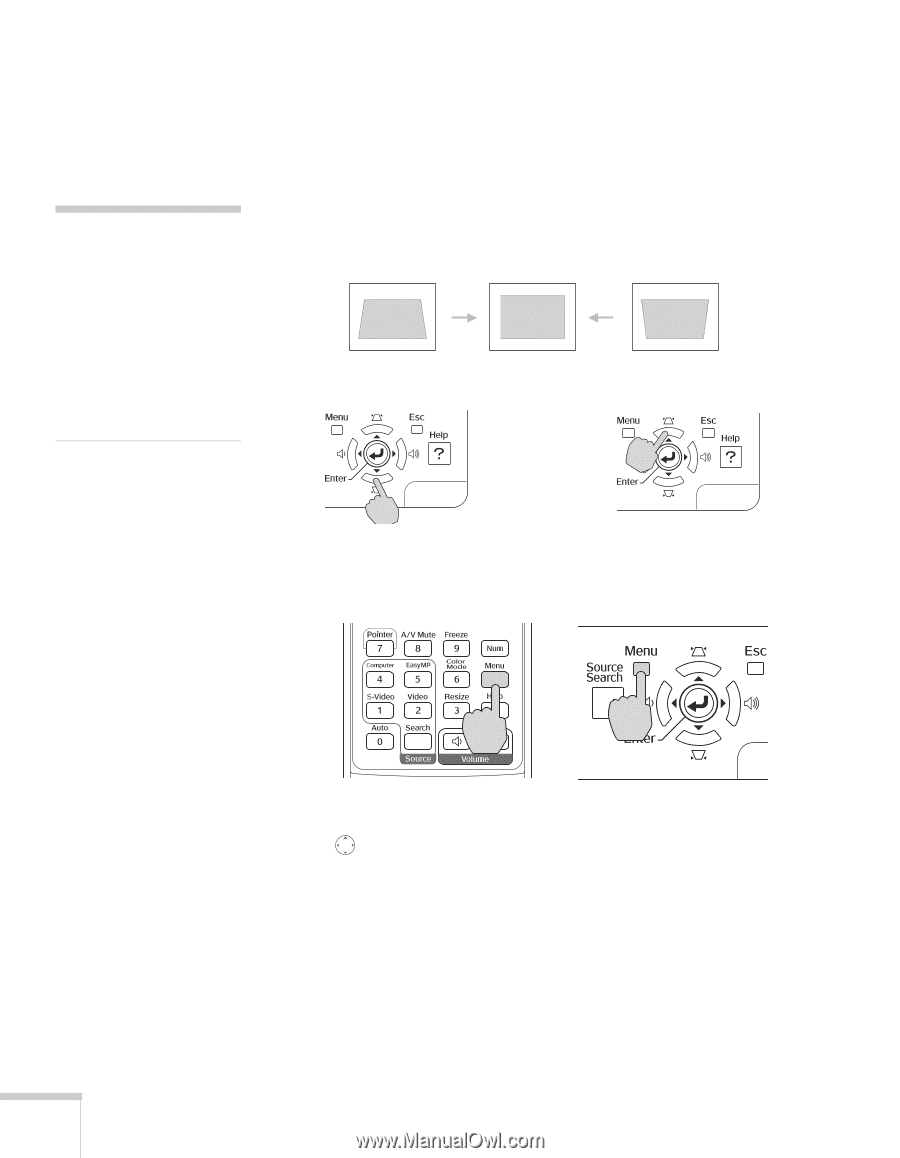
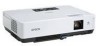
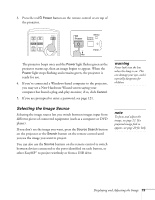
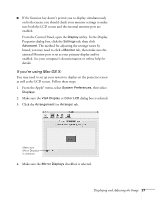
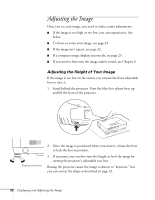
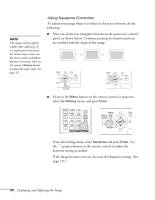
note The image will be slightly smaller after adjusting. If it's important to maintain the correct aspect ratio, use the menu system to perform keystone correction, then use the remote's Resize button to adjust the aspect ratio. See page 32. Using Keystone Correction To adjust your image when it is wider on the top or bottom, do the following: ■ Press one of the two triangular buttons on the projector's control panel, as shown below. Continue pressing the button until you are satisfied with the shape of the image. ■ Or press the Menu button on the remote control or projector, select the Setting menu, and press Enter. From the Setting menu, select Keystone and press Enter. Use the pointer button on the remote control to adjust the keystone setting as needed. If the image becomes uneven, decrease the sharpness setting. (See page 117.) 24 Displaying and Adjusting the Image
-
 1
1 -
2
-
3
-
4
-
5
-
6
-
7
-
8
-
9
-
10
-
11
-
12
-
13
-
14
-
15
-
16
-
17
-
18
-
 19
19 -
 20
20 -
 21
21 -
 22
22 -
 23
23 -
 24
24 -
 25
25 -
 26
26 -
 27
27 -
 28
28 -
 29
29 -
30
-
31
-
32
-
33
-
34
-
35
-
36
-
37
-
38
-
39
-
40
-
41
-
42
-
43
-
44
-
45
-
46
-
47
-
48
-
49
-
50
-
51
-
52
-
53
-
54
-
55
-
56
-
57
-
58
-
59
-
60
-
61
-
62
-
63
-
64
-
65
-
66
-
67
-
68
-
69
-
70
-
71
-
72
-
73
-
74
-
75
-
76
-
77
-
78
-
79
-
80
-
81
-
82
-
83
-
84
-
85
-
86
-
87
-
88
-
89
-
90
-
91
-
92
-
93
-
94
-
95
-
96
-
97
-
98
-
99
-
100
-
101
-
102
-
103
-
104
-
105
-
106
-
107
-
108
-
109
-
110
-
111
-
112
-
113
-
114
-
115
-
116
-
117
-
118
-
119
-
120
-
121
-
122
-
123
-
124
-
125
-
126
-
127
-
128
-
129
-
130
-
131
-
132
-
133
-
134
-
135
-
136
-
137
-
138
-
139
-
140
-
141
-
142
-
143
-
144
-
145
-
146
-
147
-
148
-
149
-
150
-
151
-
152
-
153
-
154
-
155
-
156
-
157
-
158
-
159
-
160
-
161
-
162
-
163
-
164
-
165
-
166
-
167
-
168
-
169
-
170
-
171
-
172
-
173
-
174
-
175
-
176
-
177
-
178
-
179
-
180
-
181
-
182
-
183
-
184
-
185
-
186
-
187
-
188
-
189
-
190
-
191
-
192
-
193
-
194
-
195
-
196
-
197
-
198
 |
 |