Epson 1715C User's Guide - Page 76
Using the Control Bar, segments of the IP address should be identical. The last segment
 |
UPC - 010343858237
View all Epson 1715C manuals
Add to My Manuals
Save this manual to your list of manuals |
Page 76 highlights
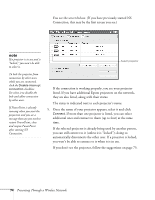
note The AirPort network name may be different than the AirPort base station name. To check the network name, start the AirPort Admin utility, select your base station, and click Configure. Then click Show All Settings. The network name appears on the AirPort tab. 2. Make sure you're trying to connect to the right network. In Windows, verify that you've enabled your computer's connection to the access point or that your wireless card or adapter is enabled, and that its SSID matches the projector's ESSID. In Mac OS X, check the AirPort status menu (click the AirPort icon on your menu bar) to make sure AirPort is turned on and the projector's ESSID or your AirPort network is selected. 3. Make sure you aren't projecting one of the EasyMP configuration screens. (You should see a message that the projector is ready to connect.) If you have to exit a configuration screen, restart NS Connection. 4. Make sure the ESSID for your projector matches the SSID for your wireless card, adapter, or access point. If you have an AirPort base station, make sure the projector's ESSID matches the AirPort network name. Remember that the ESSID is case-sensitive. 5. Check the IP address for both your projector and your wireless card, adapter, access point, or AirPort base station. The first three segments of the IP address should be identical. The last segment of the projector's IP address should be close, but not identical, to the last segment of the IP address for your wireless interface, access point, or base station. 6. Restart your computer and start NS Connection again. 7. If you still don't see your projector, follow the instructions in "Connecting in Advanced Connection Mode" on page 77 to connect to the projector. Using the Control Bar From the control bar, you can access these NS Connection features: Displays the Select target projector dialog box. Stops projection of computer images while connecting to the projector. The projector projects the computer image. Pauses projection of computer images. Click again to restart projection. 76 Presenting Through a Wireless Network
-
 1
1 -
2
-
3
-
4
-
5
-
6
-
7
-
8
-
9
-
10
-
11
-
12
-
13
-
14
-
15
-
16
-
17
-
18
-
19
-
20
-
21
-
22
-
23
-
24
-
25
-
26
-
27
-
28
-
29
-
30
-
31
-
32
-
33
-
34
-
35
-
36
-
37
-
38
-
39
-
40
-
41
-
42
-
43
-
44
-
45
-
46
-
47
-
48
-
49
-
50
-
51
-
52
-
53
-
54
-
55
-
56
-
57
-
58
-
59
-
60
-
61
-
62
-
63
-
64
-
65
-
66
-
67
-
68
-
69
-
70
-
 71
71 -
 72
72 -
 73
73 -
 74
74 -
 75
75 -
 76
76 -
 77
77 -
 78
78 -
 79
79 -
 80
80 -
 81
81 -
82
-
83
-
84
-
85
-
86
-
87
-
88
-
89
-
90
-
91
-
92
-
93
-
94
-
95
-
96
-
97
-
98
-
99
-
100
-
101
-
102
-
103
-
104
-
105
-
106
-
107
-
108
-
109
-
110
-
111
-
112
-
113
-
114
-
115
-
116
-
117
-
118
-
119
-
120
-
121
-
122
-
123
-
124
-
125
-
126
-
127
-
128
-
129
-
130
-
131
-
132
-
133
-
134
-
135
-
136
-
137
-
138
-
139
-
140
-
141
-
142
-
143
-
144
-
145
-
146
-
147
-
148
-
149
-
150
-
151
-
152
-
153
-
154
-
155
-
156
-
157
-
158
-
159
-
160
-
161
-
162
-
163
-
164
-
165
-
166
-
167
-
168
-
169
-
170
-
171
-
172
-
173
-
174
-
175
-
176
-
177
-
178
-
179
-
180
-
181
-
182
-
183
-
184
-
185
-
186
-
187
-
188
-
189
-
190
-
191
-
192
-
193
-
194
-
195
-
196
-
197
-
198
 |
 |