Epson 9600 User Manual - Page 117
Choosing Advanced Print Options
 |
UPC - 010343841888
View all Epson 9600 manuals
Add to My Manuals
Save this manual to your list of manuals |
Page 117 highlights
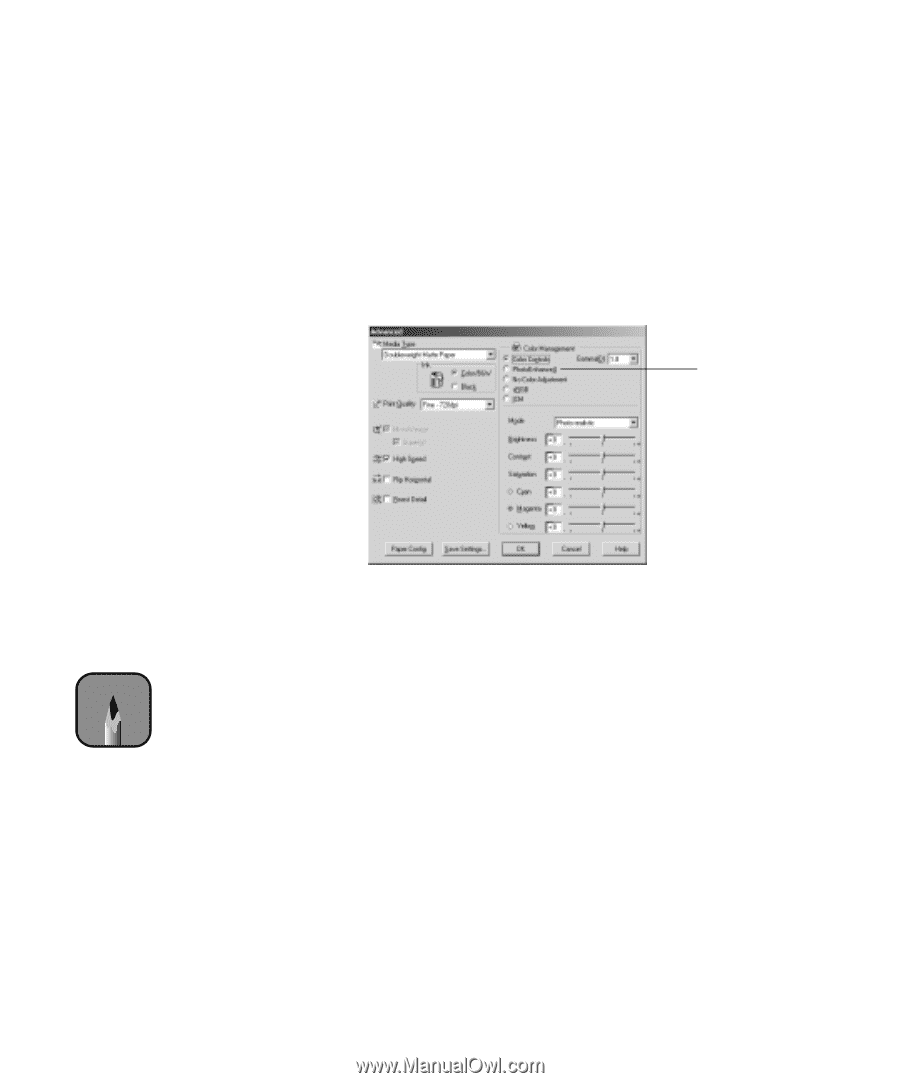
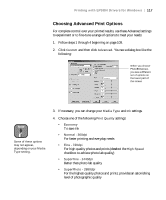
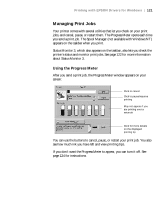
Printing with EPSON Drivers for Windows | 117 Choosing Advanced Print Options For complete control over your printed results, use these Advanced settings to experiment or to fine-tune a range of options to meet your needs: 1. Follow steps 1 through 4 beginning on page 109. 2. Click Custom and then click Advanced. You see a dialog box like the following: When you choose PhotoEnhance4, you see a different set of options on the lower part of the screen Note Some of these options may not appear, depending on your Media Type setting. 3. If necessary, you can change your Media Type and Ink settings. 4. Choose one of the following Print Quality settings: • Economy To save ink • Normal - 360dpi For faster printing and everyday needs • Fine - 720dpi For high quality photos and prints (deselect the High Speed checkbox to achieve photo lab quality) • SuperFine - 1440dpi Better than photo lab quality • SuperPhoto - 2880dpi For the highest quality photos and prints; provides an astonishing level of photographic quality 4-117
-
 1
1 -
2
-
3
-
4
-
5
-
6
-
7
-
8
-
9
-
10
-
11
-
12
-
13
-
14
-
15
-
16
-
17
-
18
-
19
-
20
-
21
-
22
-
23
-
24
-
25
-
26
-
27
-
28
-
29
-
30
-
31
-
32
-
33
-
34
-
35
-
36
-
37
-
38
-
39
-
40
-
41
-
42
-
43
-
44
-
45
-
46
-
47
-
48
-
49
-
50
-
51
-
52
-
53
-
54
-
55
-
56
-
57
-
58
-
59
-
60
-
61
-
62
-
63
-
64
-
65
-
66
-
67
-
68
-
69
-
70
-
71
-
72
-
73
-
74
-
75
-
76
-
77
-
78
-
79
-
80
-
81
-
82
-
83
-
84
-
85
-
86
-
87
-
88
-
89
-
90
-
91
-
92
-
93
-
94
-
95
-
96
-
97
-
98
-
99
-
100
-
101
-
102
-
103
-
104
-
105
-
106
-
107
-
108
-
109
-
110
-
111
-
 112
112 -
 113
113 -
 114
114 -
 115
115 -
 116
116 -
 117
117 -
 118
118 -
 119
119 -
 120
120 -
 121
121 -
 122
122 -
123
-
124
-
125
-
126
-
127
-
128
-
129
-
130
-
131
-
132
-
133
-
134
-
135
-
136
-
137
-
138
-
139
-
140
-
141
-
142
-
143
-
144
-
145
-
146
-
147
-
148
-
149
-
150
-
151
-
152
-
153
-
154
-
155
-
156
-
157
-
158
-
159
-
160
-
161
-
162
-
163
-
164
-
165
-
166
-
167
-
168
-
169
-
170
-
171
-
172
-
173
-
174
-
175
-
176
-
177
-
178
-
179
-
180
-
181
-
182
-
183
-
184
-
185
-
186
-
187
-
188
-
189
-
190
-
191
-
192
 |
 |