Epson 9600 User Manual - Page 55
Macintosh, Windows, then click
 |
UPC - 010343841888
View all Epson 9600 manuals
Add to My Manuals
Save this manual to your list of manuals |
Page 55 highlights
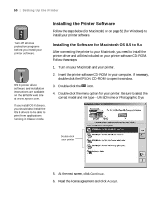
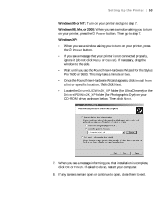
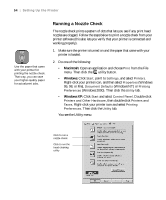
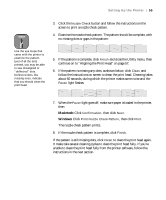
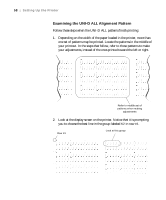
Setting Up the Printer | 55 3. Click the Nozzle Check button and follow the instructions on the screen to print a nozzle check pattern. Note 4. Examine the nozzle check pattern. The pattern should be complete, with no missing dots or gaps in the pattern: Use the eye loupe that came with the printer to examine the pattern. Even if all the dots printed, you may be able to see misaligned or "deflected" dots. Deflected dots, like missing ones, indicate that you should clean the print head. 5. If the pattern is complete, click Finish and close the Utility menu, then continue on to "Aligning the Print Head" on page 57. 6. If the pattern is missing any dots, as shown below, click Clean and follow the instructions on screen to clean the print head. Cleaning takes about 60 seconds, during which the printer makes some noise and the Pause light flashes. 7. When the Pause light goes off, make sure paper is loaded in the printer, then: Macintosh: Click Confirmation, then click Next. Windows: Click Print Nozzle Check Pattern, then click Print. The nozzle check pattern prints. 8. If the nozzle check pattern is complete, click Finish. If the pattern is still missing dots, click Clean to clean the print head again. It make take several cleaning cycles to clean the print head fully. If you're unable to clean the print head fully from the printer software, follow the instructions in the next section. 1-55
-
 1
1 -
2
-
3
-
4
-
5
-
6
-
7
-
8
-
9
-
10
-
11
-
12
-
13
-
14
-
15
-
16
-
17
-
18
-
19
-
20
-
21
-
22
-
23
-
24
-
25
-
26
-
27
-
28
-
29
-
30
-
31
-
32
-
33
-
34
-
35
-
36
-
37
-
38
-
39
-
40
-
41
-
42
-
43
-
44
-
45
-
46
-
47
-
48
-
49
-
 50
50 -
 51
51 -
 52
52 -
 53
53 -
 54
54 -
 55
55 -
 56
56 -
 57
57 -
 58
58 -
 59
59 -
 60
60 -
61
-
62
-
63
-
64
-
65
-
66
-
67
-
68
-
69
-
70
-
71
-
72
-
73
-
74
-
75
-
76
-
77
-
78
-
79
-
80
-
81
-
82
-
83
-
84
-
85
-
86
-
87
-
88
-
89
-
90
-
91
-
92
-
93
-
94
-
95
-
96
-
97
-
98
-
99
-
100
-
101
-
102
-
103
-
104
-
105
-
106
-
107
-
108
-
109
-
110
-
111
-
112
-
113
-
114
-
115
-
116
-
117
-
118
-
119
-
120
-
121
-
122
-
123
-
124
-
125
-
126
-
127
-
128
-
129
-
130
-
131
-
132
-
133
-
134
-
135
-
136
-
137
-
138
-
139
-
140
-
141
-
142
-
143
-
144
-
145
-
146
-
147
-
148
-
149
-
150
-
151
-
152
-
153
-
154
-
155
-
156
-
157
-
158
-
159
-
160
-
161
-
162
-
163
-
164
-
165
-
166
-
167
-
168
-
169
-
170
-
171
-
172
-
173
-
174
-
175
-
176
-
177
-
178
-
179
-
180
-
181
-
182
-
183
-
184
-
185
-
186
-
187
-
188
-
189
-
190
-
191
-
192
 |
 |
