Epson 9600 User Manual - Page 145
if paper isn't loaded., If you see the message
 |
UPC - 010343841888
View all Epson 9600 manuals
Add to My Manuals
Save this manual to your list of manuals |
Page 145 highlights
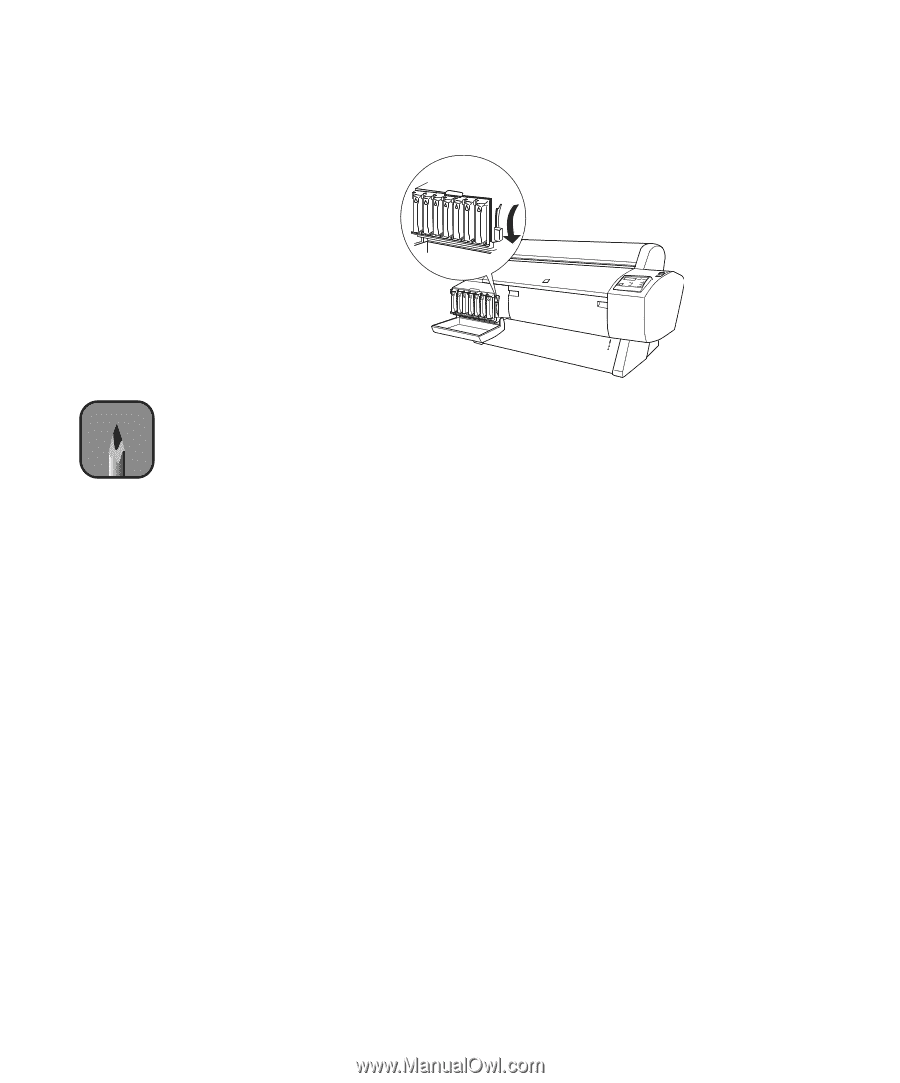
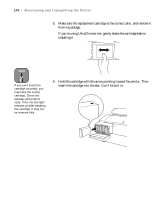
Maintaining and Transporting the Printer | 145 7. Lower the ink lever to its locked position. Note If you notice banding or other printing problems after replacing a cartridge, air may have entered the ink delivery system. Remove the cartridge then reinstall it to make sure it's seated properly. Then run several print head cleaning cycles (see page 132), followed by a nozzle check to verify the results. 8. If you're using 110 ml cartridges, close the ink compartment cover. If you're using 220 ml cartridges, you'll have to leave the cover open. Once the cartridges are installed, the printer returns to its READY state (or says LOAD PAPER if paper isn't loaded). If you see the message WRONG INK CARTRIDGE, you may have loaded an incorrect black ink cartridge for the black ink mode you're currently in, or loaded a cartridge containing the wrong type of ink for your printer (Photographic Dye or UltraChrome). Remove any cartridges indicated by a red Ink Out light on the control panel, and replace them with the correct cartridges. 5-145
-
 1
1 -
2
-
3
-
4
-
5
-
6
-
7
-
8
-
9
-
10
-
11
-
12
-
13
-
14
-
15
-
16
-
17
-
18
-
19
-
20
-
21
-
22
-
23
-
24
-
25
-
26
-
27
-
28
-
29
-
30
-
31
-
32
-
33
-
34
-
35
-
36
-
37
-
38
-
39
-
40
-
41
-
42
-
43
-
44
-
45
-
46
-
47
-
48
-
49
-
50
-
51
-
52
-
53
-
54
-
55
-
56
-
57
-
58
-
59
-
60
-
61
-
62
-
63
-
64
-
65
-
66
-
67
-
68
-
69
-
70
-
71
-
72
-
73
-
74
-
75
-
76
-
77
-
78
-
79
-
80
-
81
-
82
-
83
-
84
-
85
-
86
-
87
-
88
-
89
-
90
-
91
-
92
-
93
-
94
-
95
-
96
-
97
-
98
-
99
-
100
-
101
-
102
-
103
-
104
-
105
-
106
-
107
-
108
-
109
-
110
-
111
-
112
-
113
-
114
-
115
-
116
-
117
-
118
-
119
-
120
-
121
-
122
-
123
-
124
-
125
-
126
-
127
-
128
-
129
-
130
-
131
-
132
-
133
-
134
-
135
-
136
-
137
-
138
-
139
-
 140
140 -
 141
141 -
 142
142 -
 143
143 -
 144
144 -
 145
145 -
 146
146 -
 147
147 -
 148
148 -
 149
149 -
 150
150 -
151
-
152
-
153
-
154
-
155
-
156
-
157
-
158
-
159
-
160
-
161
-
162
-
163
-
164
-
165
-
166
-
167
-
168
-
169
-
170
-
171
-
172
-
173
-
174
-
175
-
176
-
177
-
178
-
179
-
180
-
181
-
182
-
183
-
184
-
185
-
186
-
187
-
188
-
189
-
190
-
191
-
192
 |
 |