Epson 9600 User Manual - Page 148
Selecting the Black Ink Cartridges
 |
UPC - 010343841888
View all Epson 9600 manuals
Add to My Manuals
Save this manual to your list of manuals |
Page 148 highlights
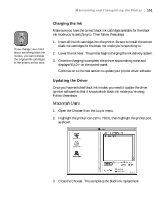
148 | Maintaining and Transporting the Printer If the printer's maintenance tank is almost used up, you'll need to replace it as well. The printer tells you during the process if it needs to be replaced, but you may wish to check it in advance; that way, you can make sure you have one available, in case it's needed. Check the maintenance tank indicator on the control panel: Maintenance tank indicator (showing a new tank) If the indicator is low, make sure you have a spare maintenance tank available (EPSON part number C12C890071). Selecting the Black Ink Cartridges Make sure you have all the needed supplies as described on page 146. Once you remove the ink cartridges from the printer, you must not turn off the printer until you have finished switching black ink modes. Follow these steps to start the process and tell the printer which cartridges you want to install: 1. Make sure the printer is on and READY is displayed on the control panel. 2. Press the SelecType button. You see PRINTER SETUP. 3. Press d until you see MAINTENANCE, then press r. You see PWR CLEANING. 4. Press d until you see BK INK CHANGE, then press r. You see EXEC. 5-148
-
 1
1 -
2
-
3
-
4
-
5
-
6
-
7
-
8
-
9
-
10
-
11
-
12
-
13
-
14
-
15
-
16
-
17
-
18
-
19
-
20
-
21
-
22
-
23
-
24
-
25
-
26
-
27
-
28
-
29
-
30
-
31
-
32
-
33
-
34
-
35
-
36
-
37
-
38
-
39
-
40
-
41
-
42
-
43
-
44
-
45
-
46
-
47
-
48
-
49
-
50
-
51
-
52
-
53
-
54
-
55
-
56
-
57
-
58
-
59
-
60
-
61
-
62
-
63
-
64
-
65
-
66
-
67
-
68
-
69
-
70
-
71
-
72
-
73
-
74
-
75
-
76
-
77
-
78
-
79
-
80
-
81
-
82
-
83
-
84
-
85
-
86
-
87
-
88
-
89
-
90
-
91
-
92
-
93
-
94
-
95
-
96
-
97
-
98
-
99
-
100
-
101
-
102
-
103
-
104
-
105
-
106
-
107
-
108
-
109
-
110
-
111
-
112
-
113
-
114
-
115
-
116
-
117
-
118
-
119
-
120
-
121
-
122
-
123
-
124
-
125
-
126
-
127
-
128
-
129
-
130
-
131
-
132
-
133
-
134
-
135
-
136
-
137
-
138
-
139
-
140
-
141
-
142
-
 143
143 -
 144
144 -
 145
145 -
 146
146 -
 147
147 -
 148
148 -
 149
149 -
 150
150 -
 151
151 -
 152
152 -
 153
153 -
154
-
155
-
156
-
157
-
158
-
159
-
160
-
161
-
162
-
163
-
164
-
165
-
166
-
167
-
168
-
169
-
170
-
171
-
172
-
173
-
174
-
175
-
176
-
177
-
178
-
179
-
180
-
181
-
182
-
183
-
184
-
185
-
186
-
187
-
188
-
189
-
190
-
191
-
192
 |
 |