Epson P-1000 User Manual - Page 32
Copying Photos Between a CD-R/RW and the P-1000, Copying Photos to a CD
 |
UPC - 010343849280
View all Epson P-1000 manuals
Add to My Manuals
Save this manual to your list of manuals |
Page 32 highlights
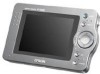
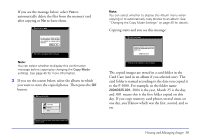
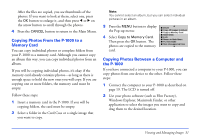
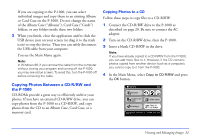
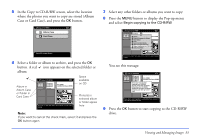
If you are copying to the P-1000, you can select individual images and copy them to an existing Album or Card Case on the P-1000. Do not change the name of the Album Case ("Albums"), Card Case ("Cards") folders, or any folders inside these two folders. 3 When you finish, close the application and/or click the USB device icon on your screen (or drag it to the trash icon) to stop the device. Then you can safely disconnect the USB cable from your computer. You see the Main Menu again. Note: In Windows 98, if you remove the cable from the computer without closing your program and turning off the P-1000, you may see a blue screen. To avoid this, turn the P-1000 off before removing the cable. Copying Photos Between a CD-R/RW and the P-1000 CD-ROMs provide a great way to efficiently archive your photos. If you have an external CD-R/RW drive, you can copy photos from the P-1000 to a CD-R/RW, and copy photos from the CD to an Album Case, Card Case, or a memory card. Copying Photos to a CD Follow these steps to copy files to a CD-R/RW: 1 Connect the CD-R/RW drive to the P-1000 as described on page 20. Be sure to connect the AC adapter. 2 Turn on the CD-R/RW drive, then the P-1000. 3 Insert a blank CD-R/RW in the drive. Note: If you have already copied to a CD-R/RW from the P-1000, you can add more files to it. However, if the CD contains photos copied from another device (such as a computer), you cannot copy to it from the P-1000. 4 In the Main Menu, select Copy to CD-R/RW and press the OK button. Main Menu Browse Copy to the HDD Settings Slide Show Copy to CD-R/RW Copy albums or card folders to a CD-R/RW. Press OK to continue. Viewing and Managing Images 32
-
 1
1 -
2
-
3
-
4
-
5
-
6
-
7
-
8
-
9
-
10
-
11
-
12
-
13
-
14
-
15
-
16
-
17
-
18
-
19
-
20
-
21
-
22
-
23
-
24
-
25
-
26
-
 27
27 -
 28
28 -
 29
29 -
 30
30 -
 31
31 -
 32
32 -
 33
33 -
 34
34 -
 35
35 -
 36
36 -
 37
37 -
38
-
39
-
40
-
41
-
42
-
43
-
44
-
45
-
46
-
47
-
48
-
49
-
50
-
51
-
52
-
53
-
54
-
55
-
56
-
57
-
58
-
59
-
60
-
61
-
62
-
63
-
64
-
65
-
66
-
67
-
68
-
69
-
70
-
71
-
72
-
73
-
74
-
75
-
76
-
77
 |
 |
