Epson P-1000 User Manual - Page 36
Changing an Album’s Name, Copying a Folder
 |
UPC - 010343849280
View all Epson P-1000 manuals
Add to My Manuals
Save this manual to your list of manuals |
Page 36 highlights
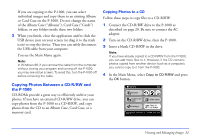
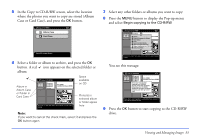
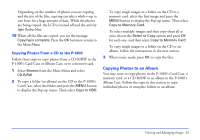
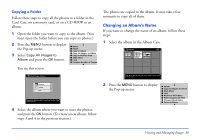
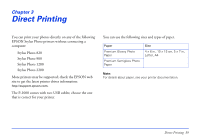
Copying a Folder Follow these steps to copy all the photos in a folder in the Card Case, on a memory card, or on a CD-R/RW to an album: 1 Open the folder you want to copy to the album. (You must open the folder before you can copy its photos.) 2 Press the MENU button to display the Pop-up menu: 3 Select Copy All Images to Album and press the OK button. Delete 20R02o1t2a1t8e.003 20021218.004 Copy to Album Copy All Images to Album Copy to Memory Card Slide Show Lock Increase Number of Copies You see this screen: The photos are copied to the album. It may take a few moments to copy all of them. Changing an Album's Name If you want to change the name of an album, follow these steps: 1 Select the album in the Album Case. 4 Select the album where you want to store the photos, and press the OK button. (To create a new album, follow steps 3 and 4 in the previous section.) 2 Press the MENU button to display the Pop-up menu: Delete ChCriostpmyasAll ImaTgreavseltso Album Slide Show Lock Return to Main Menu Hide Unsupported Files Change Album Name Select to Delete Viewing and Managing Images 36
-
 1
1 -
2
-
3
-
4
-
5
-
6
-
7
-
8
-
9
-
10
-
11
-
12
-
13
-
14
-
15
-
16
-
17
-
18
-
19
-
20
-
21
-
22
-
23
-
24
-
25
-
26
-
27
-
28
-
29
-
30
-
 31
31 -
 32
32 -
 33
33 -
 34
34 -
 35
35 -
 36
36 -
 37
37 -
 38
38 -
 39
39 -
 40
40 -
 41
41 -
42
-
43
-
44
-
45
-
46
-
47
-
48
-
49
-
50
-
51
-
52
-
53
-
54
-
55
-
56
-
57
-
58
-
59
-
60
-
61
-
62
-
63
-
64
-
65
-
66
-
67
-
68
-
69
-
70
-
71
-
72
-
73
-
74
-
75
-
76
-
77
 |
 |
