Epson P-1000 User Manual - Page 42
Printing Your Photos
 |
UPC - 010343849280
View all Epson P-1000 manuals
Add to My Manuals
Save this manual to your list of manuals |
Page 42 highlights
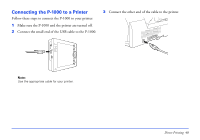
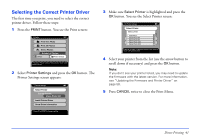
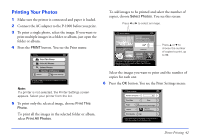
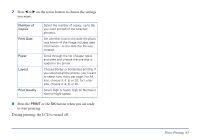
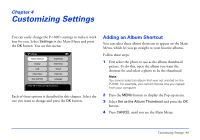
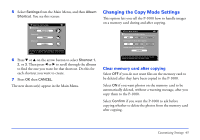
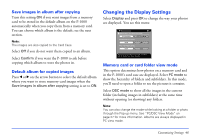
Printing Your Photos 1 Make sure the printer is connected and paper is loaded. 2 Connect the AC adapter to the P-1000 before you print. 3 To print a single photo, select the image. If you want to print multiple images in a folder or album, just open the folder or album. 4 Press the PRINT button. You see the Print menu: Print Print This Photo Print All Photos Select Photos Number of Photos:1 Utilities Printer Settings Press OK or PRINT to continue. Press CANCEL to return to the previous screen. Note: If a printer is not selected, the Printer Settings screen appears. Select your printer from the list. 5 To print only the selected image, choose Print This Photo. To print all the images in the selected folder or album, select Print All Photos. To add images to be printed and select the number of copies, choose Select Photos. You see this screen: Press l or r to select an image. Select Photos 0001/0024 Date:2001.12.31 22:31 Resolution**:1600×1200 01 Total 01 09 09 00 00 Press u or d to choose the number of copies to print, up to 99. Use the left or right button to select a photo. Use the up or down button to select the number of copies to print. Press OK or PRINT to select layout. Select the images you want to print and the number of copies for each one. 6 Press the OK button. You see the Print Settings menu: Print Settings Number of Copies 01 Print Date Print Paper Layout A4 Premium Glossy Photo Paper 1 Picture with borderless Print Quality High Copy number affects the total number of copies. Press OK or Print to start printing. The LCD display turns off. Direct Printing 42
-
 1
1 -
2
-
3
-
4
-
5
-
6
-
7
-
8
-
9
-
10
-
11
-
12
-
13
-
14
-
15
-
16
-
17
-
18
-
19
-
20
-
21
-
22
-
23
-
24
-
25
-
26
-
27
-
28
-
29
-
30
-
31
-
32
-
33
-
34
-
35
-
36
-
 37
37 -
 38
38 -
 39
39 -
 40
40 -
 41
41 -
 42
42 -
 43
43 -
 44
44 -
 45
45 -
 46
46 -
 47
47 -
48
-
49
-
50
-
51
-
52
-
53
-
54
-
55
-
56
-
57
-
58
-
59
-
60
-
61
-
62
-
63
-
64
-
65
-
66
-
67
-
68
-
69
-
70
-
71
-
72
-
73
-
74
-
75
-
76
-
77
 |
 |
