Epson Stylus Pro 7890 User's Guide - Page 203
Printing Using the Auto Take-Up Reel
 |
View all Epson Stylus Pro 7890 manuals
Add to My Manuals
Save this manual to your list of manuals |
Page 203 highlights
Using the Optional Auto Take-Up Reel | 203 WARNING: Do not touch the Auto Take-Up Reel while it is operating; doing so may result in injury. Turn off the Auto Take-Up Reel before removing the reel; if the reel operates unexpectedly, bodily injury may occur. Printing Using the Auto Take-Up Reel Once the Auto Take-Up Reel is installed and paper is attached to it, you can use it to take up your prints. 1. Set the Auto switch to Forward or Backward, depending on how you set up the paper. 2. Send a print job to the printer. The Auto Take-Up Reel takes up the roll paper 1/4 to 1/2 turn at a time. 3. When you are ready to remove your prints, set the Auto switch to Off. 4. Press the button on the printer to cut the paper. 203
-
 1
1 -
2
-
3
-
4
-
5
-
6
-
7
-
8
-
9
-
10
-
11
-
12
-
13
-
14
-
15
-
16
-
17
-
18
-
19
-
20
-
21
-
22
-
23
-
24
-
25
-
26
-
27
-
28
-
29
-
30
-
31
-
32
-
33
-
34
-
35
-
36
-
37
-
38
-
39
-
40
-
41
-
42
-
43
-
44
-
45
-
46
-
47
-
48
-
49
-
50
-
51
-
52
-
53
-
54
-
55
-
56
-
57
-
58
-
59
-
60
-
61
-
62
-
63
-
64
-
65
-
66
-
67
-
68
-
69
-
70
-
71
-
72
-
73
-
74
-
75
-
76
-
77
-
78
-
79
-
80
-
81
-
82
-
83
-
84
-
85
-
86
-
87
-
88
-
89
-
90
-
91
-
92
-
93
-
94
-
95
-
96
-
97
-
98
-
99
-
100
-
101
-
102
-
103
-
104
-
105
-
106
-
107
-
108
-
109
-
110
-
111
-
112
-
113
-
114
-
115
-
116
-
117
-
118
-
119
-
120
-
121
-
122
-
123
-
124
-
125
-
126
-
127
-
128
-
129
-
130
-
131
-
132
-
133
-
134
-
135
-
136
-
137
-
138
-
139
-
140
-
141
-
142
-
143
-
144
-
145
-
146
-
147
-
148
-
149
-
150
-
151
-
152
-
153
-
154
-
155
-
156
-
157
-
158
-
159
-
160
-
161
-
162
-
163
-
164
-
165
-
166
-
167
-
168
-
169
-
170
-
171
-
172
-
173
-
174
-
175
-
176
-
177
-
178
-
179
-
180
-
181
-
182
-
183
-
184
-
185
-
186
-
187
-
188
-
189
-
190
-
191
-
192
-
193
-
194
-
195
-
196
-
197
-
 198
198 -
 199
199 -
 200
200 -
 201
201 -
 202
202 -
 203
203 -
 204
204 -
 205
205 -
 206
206 -
 207
207 -
 208
208 -
209
-
210
-
211
-
212
-
213
-
214
-
215
-
216
-
217
-
218
-
219
-
220
-
221
-
222
-
223
-
224
 |
 |
203
Using the Optional Auto Take-Up Reel
|
203
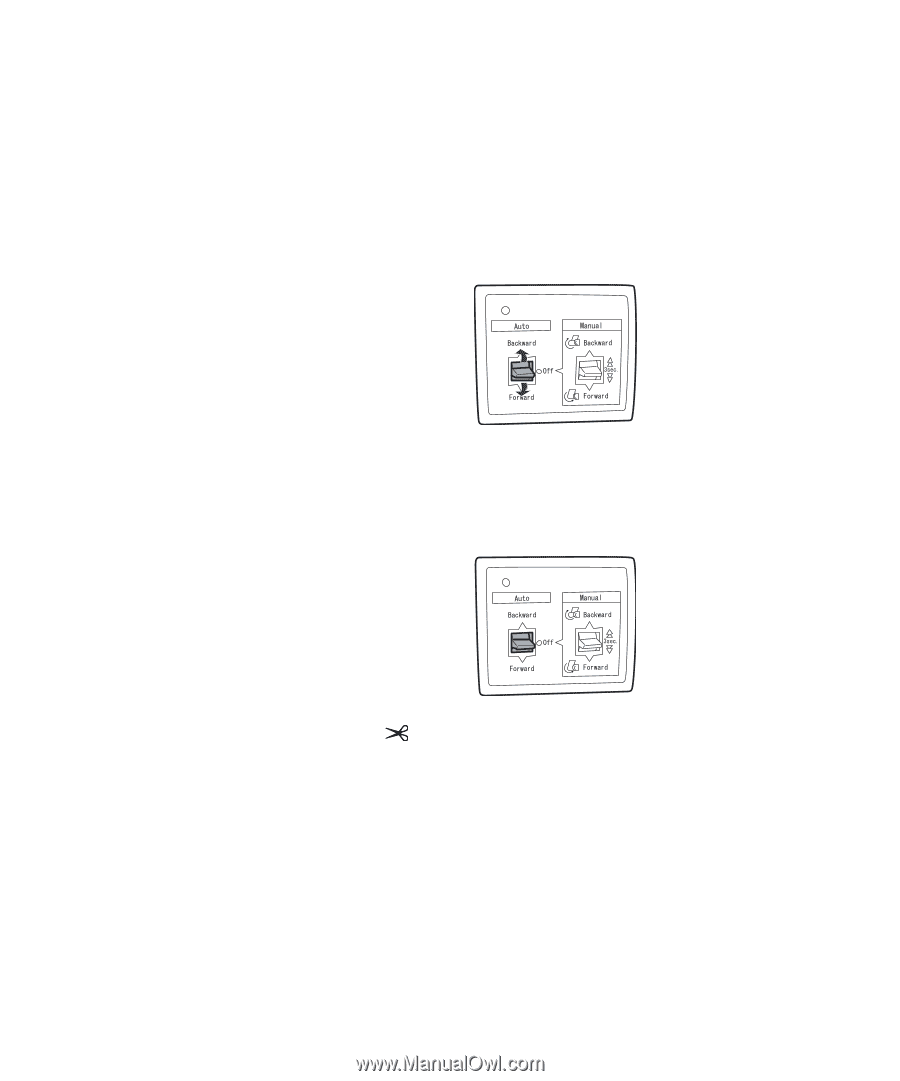
Printing Using the Auto Take-Up Reel
Once the Auto Take-Up Reel is installed and paper is attached to it, you can
use it to take up your prints.
1.
Set the
Auto
switch to
Forward
or
Backward
, depending on how you
set up the paper.
2.
Send a print job to the printer. The Auto Take-Up Reel takes up the roll
paper 1/4 to 1/2 turn at a time.
3.
When you are ready to remove your prints, set the
Auto
switch to
Off.
4.
Press the
button on the printer to cut the paper.
WARNING:
Do not touch
the Auto Take-Up Reel
while it is operating; doing
so may result in injury.
Turn off the Auto Take-Up
Reel before removing the
reel; if the reel operates
unexpectedly, bodily
injury may occur.