Epson Stylus Pro 7890 User's Guide - Page 53
Downloading and Updating the Firmware, support website, Canadian support, website - print head
 |
View all Epson Stylus Pro 7890 manuals
Add to My Manuals
Save this manual to your list of manuals |
Page 53 highlights
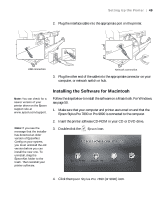
Setting Up the Printer | 53 Caution: Don't turn off the printer while the firmware is updating. Note: After you install the software, you need to load paper and print a test image. If the print quality is satisfactory, your setup is done. If not, you may need to align the print head, as described on page 152. Downloading and Updating the Firmware 1. Click the EPSON LFP Remote Panel 2 icon on your desktop. You see the LFP Remote Panel. 2. Select your printer, then click the Firmware Updater button. When you see the prompt, click OK to have the EPSON LFP Remote Panel utility automatically locate and download the latest firmware from the Epson website. If you need to download the firmware manually, visit Epson's U.S. support website (www.epson.com/support) or Canadian support website (www.epson.ca/support), select your product, then click Drivers & Downloads. Choose the firmware update version for Macintosh or Windows and follow the instructions on the screen. 3. Make sure your printer is turned on, its LCD screen displays READY, and it is connected to your computer or network, then choose your printer. 4. Click Browse and find the firmware file that you just downloaded and extracted. Select the file and click Choose or Open. 5. If the firmware version of the file is newer, click Update to start the firmware updating process. (If it is the same, you don't need to update.) 6. When the update is complete, close the Firmware Updater window and Epson LFP Remote window. If you connected your printer to a network, follow the instructions in the next section to configure the printer for your network. Note: For more information on using the LFP Remote Panel, click Help to see the on-screen guide. 53
-
 1
1 -
2
-
3
-
4
-
5
-
6
-
7
-
8
-
9
-
10
-
11
-
12
-
13
-
14
-
15
-
16
-
17
-
18
-
19
-
20
-
21
-
22
-
23
-
24
-
25
-
26
-
27
-
28
-
29
-
30
-
31
-
32
-
33
-
34
-
35
-
36
-
37
-
38
-
39
-
40
-
41
-
42
-
43
-
44
-
45
-
46
-
47
-
 48
48 -
 49
49 -
 50
50 -
 51
51 -
 52
52 -
 53
53 -
 54
54 -
 55
55 -
 56
56 -
 57
57 -
 58
58 -
59
-
60
-
61
-
62
-
63
-
64
-
65
-
66
-
67
-
68
-
69
-
70
-
71
-
72
-
73
-
74
-
75
-
76
-
77
-
78
-
79
-
80
-
81
-
82
-
83
-
84
-
85
-
86
-
87
-
88
-
89
-
90
-
91
-
92
-
93
-
94
-
95
-
96
-
97
-
98
-
99
-
100
-
101
-
102
-
103
-
104
-
105
-
106
-
107
-
108
-
109
-
110
-
111
-
112
-
113
-
114
-
115
-
116
-
117
-
118
-
119
-
120
-
121
-
122
-
123
-
124
-
125
-
126
-
127
-
128
-
129
-
130
-
131
-
132
-
133
-
134
-
135
-
136
-
137
-
138
-
139
-
140
-
141
-
142
-
143
-
144
-
145
-
146
-
147
-
148
-
149
-
150
-
151
-
152
-
153
-
154
-
155
-
156
-
157
-
158
-
159
-
160
-
161
-
162
-
163
-
164
-
165
-
166
-
167
-
168
-
169
-
170
-
171
-
172
-
173
-
174
-
175
-
176
-
177
-
178
-
179
-
180
-
181
-
182
-
183
-
184
-
185
-
186
-
187
-
188
-
189
-
190
-
191
-
192
-
193
-
194
-
195
-
196
-
197
-
198
-
199
-
200
-
201
-
202
-
203
-
204
-
205
-
206
-
207
-
208
-
209
-
210
-
211
-
212
-
213
-
214
-
215
-
216
-
217
-
218
-
219
-
220
-
221
-
222
-
223
-
224
 |
 |