Epson SureColor P7000 Commercial Edition User Manual - Page 39
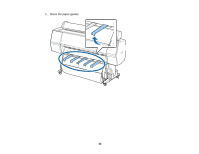
move into position automatically., On the LCD screen, select one of the following
 |
View all Epson SureColor P7000 Commercial Edition manuals
Add to My Manuals
Save this manual to your list of manuals |
Page 39 highlights
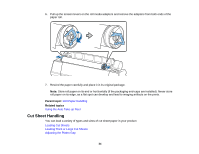
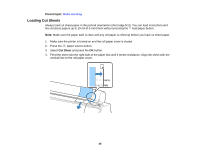
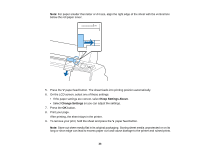
6. Adjust the paper until the right and top edges are aligned with the horizontal and vertical lines on the printer. Note: You may need to increase the suction by pressing the up arrow button. This helps hold the paper in place during loading and printing. 7. Press the load paper button. 8. Press the pause/cancel button to move the paper into printing position or wait for the paper to move into position automatically. 9. On the LCD screen, select one of the following: • If the paper settings are correct, select Keep Settings Above. • Select Change Settings so you can adjust the settings. 10. Press the OK button. 39
-
 1
1 -
2
-
3
-
4
-
5
-
6
-
7
-
8
-
9
-
10
-
11
-
12
-
13
-
14
-
15
-
16
-
17
-
18
-
19
-
20
-
21
-
22
-
23
-
24
-
25
-
26
-
27
-
28
-
29
-
30
-
31
-
32
-
33
-
 34
34 -
 35
35 -
 36
36 -
 37
37 -
 38
38 -
 39
39 -
 40
40 -
 41
41 -
 42
42 -
 43
43 -
 44
44 -
45
-
46
-
47
-
48
-
49
-
50
-
51
-
52
-
53
-
54
-
55
-
56
-
57
-
58
-
59
-
60
-
61
-
62
-
63
-
64
-
65
-
66
-
67
-
68
-
69
-
70
-
71
-
72
-
73
-
74
-
75
-
76
-
77
-
78
-
79
-
80
-
81
-
82
-
83
-
84
-
85
-
86
-
87
-
88
-
89
-
90
-
91
-
92
-
93
-
94
-
95
-
96
-
97
-
98
-
99
-
100
-
101
-
102
-
103
-
104
-
105
-
106
-
107
-
108
-
109
-
110
-
111
-
112
-
113
-
114
-
115
-
116
-
117
-
118
-
119
-
120
-
121
-
122
-
123
-
124
-
125
-
126
-
127
-
128
-
129
-
130
-
131
-
132
-
133
-
134
-
135
-
136
-
137
-
138
-
139
-
140
-
141
-
142
-
143
-
144
-
145
-
146
-
147
-
148
-
149
-
150
-
151
-
152
-
153
-
154
-
155
-
156
-
157
-
158
-
159
-
160
-
161
-
162
-
163
-
164
-
165
-
166
-
167
-
168
-
169
-
170
-
171
-
172
-
173
-
174
-
175
-
176
-
177
-
178
-
179
-
180
-
181
-
182
-
183
-
184
-
185
-
186
-
187
-
188
-
189
-
190
-
191
-
192
-
193
-
194
-
195
-
196
-
197
-
198
-
199
-
200
-
201
-
202
-
203
-
204
-
205
-
206
-
207
-
208
-
209
-
210
-
211
-
212
-
213
-
214
-
215
-
216
-
217
-
218
-
219
-
220
-
221
-
222
-
223
-
224
-
225
-
226
 |
 |
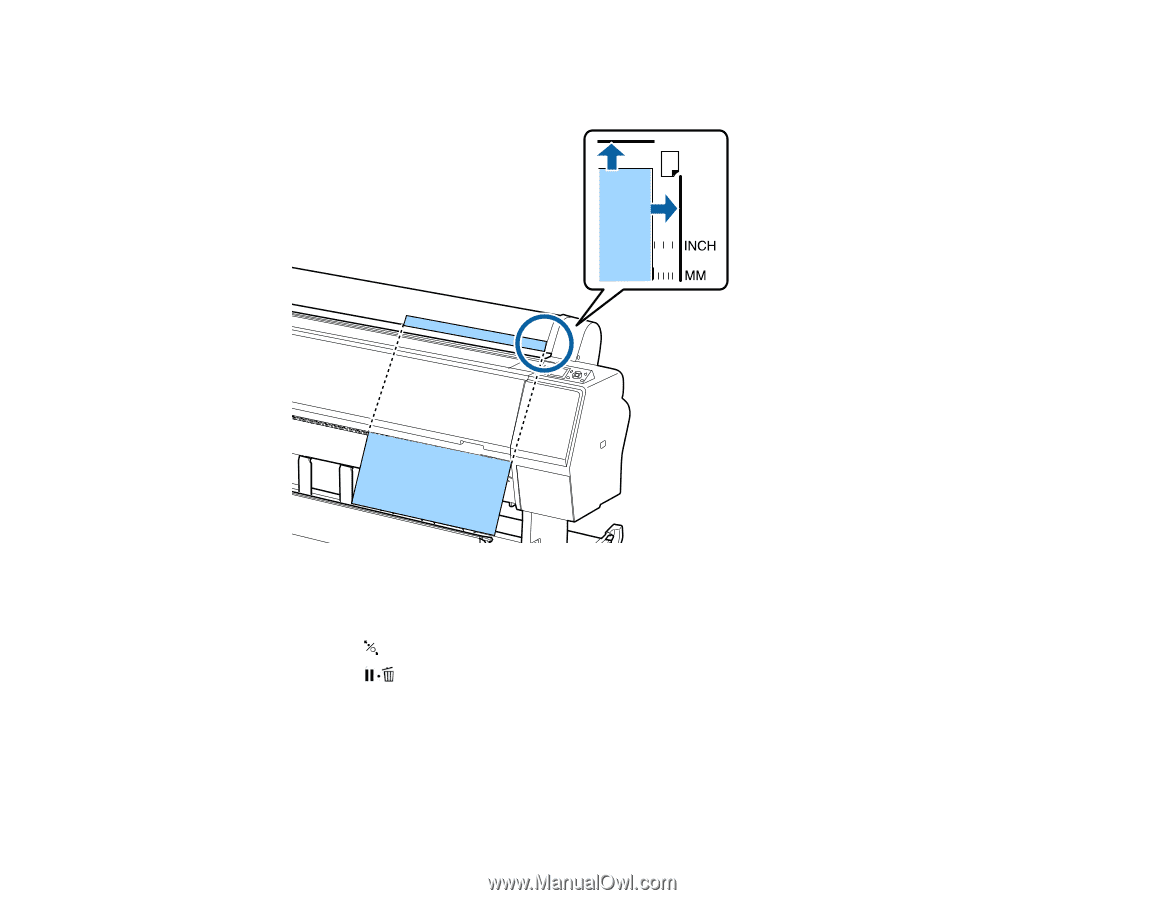
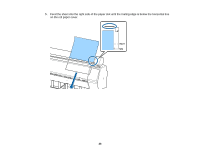
6.
Adjust the paper until the right and top edges are aligned with the horizontal and vertical lines on the
printer.
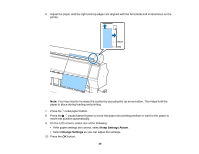
Note:
You may need to increase the suction by pressing the up arrow button. This helps hold the
paper in place during loading and printing.
7.
Press the
load paper button.
8.
Press the
pause/cancel button to move the paper into printing position or wait for the paper to
move into position automatically.
9.
On the LCD screen, select one of the following:
• If the paper settings are correct, select
Keep Settings Above
.
• Select
Change Settings
so you can adjust the settings.
10. Press the
OK
button.
39