HP 2300n HP Business Inkjet 2300 - User Guide - Page 13
Control panel, Cancel Job button - ink
 |
View all HP 2300n manuals
Add to My Manuals
Save this manual to your list of manuals |
Page 13 highlights
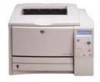
Control panel 12 3 456 7 8 9 10 1 Power button ( ): Turns the printer off and on. 2 Help button ( ): Provides additional information about printer messages or menus. 3 LCD display: Shows status and error messages, as well as ink cartridge levels. 4 Back button ( ): Navigates backward one level in the menus. 5 Up ( ) and Down ( ) arrow button: Navigates through menu items and increases or decreases numerical values. 6 Select button ( ): Enters the menus and selects highlighted menu items. 7 Cancel Job button ( ): Cancels the current print job. Press this button only once to cancel the print job. The time it takes to cancel depends on the size of the print job. This button also exits all menus. 8 Resume button ( ): Restarts printing after continuable errors. This button also exits all menus. 9 Ready light: Indicates one of three possible states: On - The printer is online and ready to accept print jobs. Off - The printer is turned off. Flashing - The printer is initializing, canceling a print job, or turning off. 10 Attention light: Indicates one of three possible states: Off - No conditions exist that require attention. A printer-status message usually accompanies this indicator. Flashing - The printer has encountered an error that requires user attention (such as an open door or a paper jam). An error message usually accompanies this indicator. Flashing alternately with Ready light - A critical error has occurred, and the printer requires attention. A critical-error message usually accompanies this indicator. For a list of messages that can appear in the control panel display, see "Control panel messages." For a menu map of the settings that can be accessed through the control panel, see "Printing a control panel menu map." ENWW 1-5
-
 1
1 -
2
-
3
-
4
-
5
-
6
-
7
-
 8
8 -
 9
9 -
 10
10 -
 11
11 -
 12
12 -
 13
13 -
 14
14 -
 15
15 -
 16
16 -
 17
17 -
 18
18 -
19
-
20
-
21
-
22
-
23
-
24
-
25
-
26
-
27
-
28
-
29
-
30
-
31
-
32
-
33
-
34
-
35
-
36
-
37
-
38
-
39
-
40
-
41
-
42
-
43
-
44
-
45
-
46
-
47
-
48
-
49
-
50
-
51
-
52
-
53
-
54
-
55
-
56
-
57
-
58
-
59
-
60
-
61
-
62
-
63
-
64
-
65
-
66
-
67
-
68
-
69
-
70
-
71
-
72
-
73
-
74
-
75
-
76
-
77
-
78
-
79
-
80
-
81
-
82
-
83
-
84
-
85
-
86
-
87
-
88
-
89
-
90
-
91
-
92
-
93
-
94
-
95
-
96
-
97
-
98
-
99
-
100
-
101
-
102
-
103
-
104
-
105
-
106
-
107
-
108
-
109
-
110
-
111
-
112
-
113
-
114
-
115
-
116
-
117
-
118
-
119
-
120
-
121
-
122
-
123
-
124
-
125
-
126
-
127
-
128
-
129
-
130
-
131
-
132
 |
 |
