HP 3500cp Service Manual - Page 307
water based only to a soft, lintĆfree rag and apply it to the drive roller - designjet driver windows 7
 |
View all HP 3500cp manuals
Add to My Manuals
Save this manual to your list of manuals |
Page 307 highlights
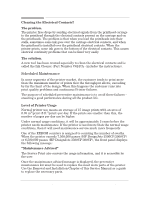
Cleaning the Drive Roller WĂAĂRĂNĂIĂNĂG The drive roller cleaning procedure should be performed only by HP trained personnel: otherwise personal injury may occur. If ink is spilled on the drive roller, remove the ink. Due to the ink's reflectance, ink on the roller can disrupt the Printer's edgeĆsensing function. To remove any ink from the roller, perform the following procedure: 1 Make sure the printer is switched OFF from the power switch on the back of the printer and not from the standby button on the front of the printer. 2 Hold the UP and ENTER keys down and switch the printer ON. Wait until the message Status/Initializing" is displayed on the frontĆpanel before releasing the UP and ENTER keys. 3 Once the message Status/Ready" is displayed on the frontĆpanel, press the Enter key. 4 Use the Arrow keys to scroll to the Utilities" menu display and press the Enter button. Make sure that you are in the Full menu mode because otherwise you will not be able to access the Service Tests" submenu. 5 Use the Arrow keys to scroll to the Service Tests" menu display and press the Enter button. 6 Use the Arrow keys to scroll to the Diagnostics" menu display and press the Enter button. 7 Using the Up Arrow button, scroll to reach the following display and press Enter: Diagnostics D15 Clean Roller 8 The Unload Media" message is displayed on the frontĆpanel. Remove the media (if loaded). 9 The Move Roller" message is displayed on the frontĆpanel. Use the Up Arrow to rotate the drive roller clockwise and the Down Arrow to rotate the drive roller counterĆclockwise. 10 Open the window and apply any common household cleaning solution (water based only) to a soft, lintĆfree rag and apply it to the drive roller surface while it is rotating. Thoroughly clean the roller surface. Also make sure that you clean the mark encoder on the left side of the driver roller. 11 Press Previous when you have completed the cleaning procedure. The D1500 Done" message is displayed on the frontĆpanel. 12 Switch the Printer OFF and then ON again after a few seconds. 13 Allow the drive roller to dry before inserting media in the Printer. Preventive Maintenance HP DesignJet CP Series printers 9-3
-
 1
1 -
2
-
3
-
4
-
5
-
6
-
7
-
8
-
9
-
10
-
11
-
12
-
13
-
14
-
15
-
16
-
17
-
18
-
19
-
20
-
21
-
22
-
23
-
24
-
25
-
26
-
27
-
28
-
29
-
30
-
31
-
32
-
33
-
34
-
35
-
36
-
37
-
38
-
39
-
40
-
41
-
42
-
43
-
44
-
45
-
46
-
47
-
48
-
49
-
50
-
51
-
52
-
53
-
54
-
55
-
56
-
57
-
58
-
59
-
60
-
61
-
62
-
63
-
64
-
65
-
66
-
67
-
68
-
69
-
70
-
71
-
72
-
73
-
74
-
75
-
76
-
77
-
78
-
79
-
80
-
81
-
82
-
83
-
84
-
85
-
86
-
87
-
88
-
89
-
90
-
91
-
92
-
93
-
94
-
95
-
96
-
97
-
98
-
99
-
100
-
101
-
102
-
103
-
104
-
105
-
106
-
107
-
108
-
109
-
110
-
111
-
112
-
113
-
114
-
115
-
116
-
117
-
118
-
119
-
120
-
121
-
122
-
123
-
124
-
125
-
126
-
127
-
128
-
129
-
130
-
131
-
132
-
133
-
134
-
135
-
136
-
137
-
138
-
139
-
140
-
141
-
142
-
143
-
144
-
145
-
146
-
147
-
148
-
149
-
150
-
151
-
152
-
153
-
154
-
155
-
156
-
157
-
158
-
159
-
160
-
161
-
162
-
163
-
164
-
165
-
166
-
167
-
168
-
169
-
170
-
171
-
172
-
173
-
174
-
175
-
176
-
177
-
178
-
179
-
180
-
181
-
182
-
183
-
184
-
185
-
186
-
187
-
188
-
189
-
190
-
191
-
192
-
193
-
194
-
195
-
196
-
197
-
198
-
199
-
200
-
201
-
202
-
203
-
204
-
205
-
206
-
207
-
208
-
209
-
210
-
211
-
212
-
213
-
214
-
215
-
216
-
217
-
218
-
219
-
220
-
221
-
222
-
223
-
224
-
225
-
226
-
227
-
228
-
229
-
230
-
231
-
232
-
233
-
234
-
235
-
236
-
237
-
238
-
239
-
240
-
241
-
242
-
243
-
244
-
245
-
246
-
247
-
248
-
249
-
250
-
251
-
252
-
253
-
254
-
255
-
256
-
257
-
258
-
259
-
260
-
261
-
262
-
263
-
264
-
265
-
266
-
267
-
268
-
269
-
270
-
271
-
272
-
273
-
274
-
275
-
276
-
277
-
278
-
279
-
280
-
281
-
282
-
283
-
284
-
285
-
286
-
287
-
288
-
289
-
290
-
291
-
292
-
293
-
294
-
295
-
296
-
297
-
298
-
299
-
300
-
301
-
 302
302 -
 303
303 -
 304
304 -
 305
305 -
 306
306 -
 307
307 -
 308
308 -
 309
309 -
 310
310 -
 311
311 -
 312
312 -
313
-
314
-
315
-
316
-
317
-
318
-
319
-
320
-
321
-
322
-
323
-
324
-
325
-
326
-
327
-
328
-
329
-
330
-
331
-
332
 |
 |
