HP 4650n HP Color LaserJet 4650 series printer - User Guide - Page 71
Jam recovery, To set color supply out response, To set jam recovery response - changing memory
 |
UPC - 829160046532
View all HP 4650n manuals
Add to My Manuals
Save this manual to your list of manuals |
Page 71 highlights
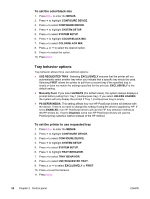
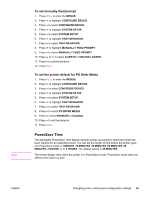
To set color supply out response 1. Press MENU to enter the MENUS. 2. Press to highlight CONFIGURE DEVICE. 3. Press to select CONFIGURE DEVICE. 4. Press to highlight SYSTEM SETUP. 5. Press to select SYSTEM SETUP. 6. Press to highlight COLOR SUPPLY OUT. 7. Press to select COLOR SUPPLY OUT. 8. Press or to select the appropriate setting. 9. Press to set the selection. 10. Press MENU. Jam recovery This option allows you to configure the printer response to paper jams, including how it handles the pages involved. AUTO is the default value. ● AUTO - the printer automatically turns jam recovery on when sufficient memory is available. ● ON- the printer reprints any page involved in a paper jam. Additional memory is allocated to store the last few pages printed, and this may cause overall printer performance to suffer. ● OFF - the printer will not reprint any page that was involved in a paper jam. Since no memory is used to store the most recent pages, performance may be optimal. To set jam recovery response 1. Press MENU to enter the MENUS. 2. Press to highlight CONFIGURE DEVICE. 3. Press to select CONFIGURE DEVICE. 4. Press to highlight SYSTEM SETUP. 5. Press to select SYSTEM SETUP. 6. Press to highlight JAM RECOVERY. 7. Press to select JAM RECOVERY. 8. Press or to select the appropriate setting. 9. Press to set the selection. 10. Press MENU. ENWW Changing printer control panel configuration settings 57
-
 1
1 -
2
-
3
-
4
-
5
-
6
-
7
-
8
-
9
-
10
-
11
-
12
-
13
-
14
-
15
-
16
-
17
-
18
-
19
-
20
-
21
-
22
-
23
-
24
-
25
-
26
-
27
-
28
-
29
-
30
-
31
-
32
-
33
-
34
-
35
-
36
-
37
-
38
-
39
-
40
-
41
-
42
-
43
-
44
-
45
-
46
-
47
-
48
-
49
-
50
-
51
-
52
-
53
-
54
-
55
-
56
-
57
-
58
-
59
-
60
-
61
-
62
-
63
-
64
-
65
-
 66
66 -
 67
67 -
 68
68 -
 69
69 -
 70
70 -
 71
71 -
 72
72 -
 73
73 -
 74
74 -
 75
75 -
 76
76 -
77
-
78
-
79
-
80
-
81
-
82
-
83
-
84
-
85
-
86
-
87
-
88
-
89
-
90
-
91
-
92
-
93
-
94
-
95
-
96
-
97
-
98
-
99
-
100
-
101
-
102
-
103
-
104
-
105
-
106
-
107
-
108
-
109
-
110
-
111
-
112
-
113
-
114
-
115
-
116
-
117
-
118
-
119
-
120
-
121
-
122
-
123
-
124
-
125
-
126
-
127
-
128
-
129
-
130
-
131
-
132
-
133
-
134
-
135
-
136
-
137
-
138
-
139
-
140
-
141
-
142
-
143
-
144
-
145
-
146
-
147
-
148
-
149
-
150
-
151
-
152
-
153
-
154
-
155
-
156
-
157
-
158
-
159
-
160
-
161
-
162
-
163
-
164
-
165
-
166
-
167
-
168
-
169
-
170
-
171
-
172
-
173
-
174
-
175
-
176
-
177
-
178
-
179
-
180
-
181
-
182
-
183
-
184
-
185
-
186
-
187
-
188
-
189
-
190
-
191
-
192
-
193
-
194
-
195
-
196
-
197
-
198
-
199
-
200
-
201
-
202
-
203
-
204
-
205
-
206
-
207
-
208
-
209
-
210
-
211
-
212
-
213
-
214
-
215
-
216
-
217
-
218
-
219
-
220
-
221
-
222
-
223
-
224
-
225
-
226
-
227
-
228
-
229
-
230
-
231
-
232
-
233
-
234
-
235
-
236
-
237
-
238
-
239
-
240
-
241
-
242
-
243
-
244
-
245
-
246
-
247
-
248
-
249
-
250
-
251
-
252
-
253
-
254
-
255
-
256
-
257
-
258
-
259
-
260
-
261
-
262
-
263
-
264
-
265
-
266
-
267
-
268
-
269
-
270
-
271
-
272
-
273
-
274
-
275
-
276
 |
 |