HP Deskjet F2200 Full User Guide - Page 30
Load index cards, To load photo paper in the input tray, Related topics
 |
View all HP Deskjet F2200 manuals
Add to My Manuals
Save this manual to your list of manuals |
Page 30 highlights
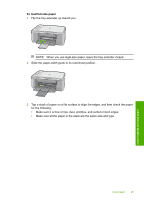
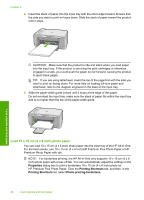
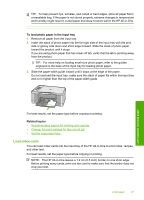
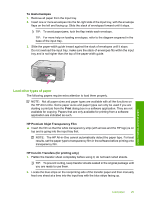
TIP: To help prevent rips, wrinkles, and curled or bent edges, store all paper flat in a resealable bag. If the paper is not stored properly, extreme changes in temperature and humidity might result in curled paper that does not work well in the HP All-in-One. To load photo paper in the input tray 1. Remove all paper from the input tray. 2. Insert the stack of photo paper into the far-right side of the input tray with the print side or glossy side down and short edge forward. Slide the stack of photo paper toward the product until it stops. If you are using photo paper that has a tear-off tab, verify that the tab is pointing away from the product. TIP: For more help on loading small-size photo paper, refer to the guides engraved in the base of the input tray for loading photo paper. 3. Slide the paper-width guide inward until it stops at the edge of the paper. Do not overload the input tray; make sure the stack of paper fits within the input tray and is no higher than the top of the paper-width guide. Load originals and load paper For best results, set the paper type before copying or printing. Related topics • Recommended papers for printing and copying • Change the print settings for the current job • Set the copy paper type Load index cards You can load index cards into the input tray of the HP All-in-One to print notes, recipes, and other text. For best results, set the paper type before copying or printing. NOTE: The HP All-in-One leaves a 1.2 cm (0.5 inch) border on one short edge. Before printing many cards, print one test card to make sure that the border does not crop your text. Load paper 27
-
 1
1 -
2
-
3
-
4
-
5
-
6
-
7
-
8
-
9
-
10
-
11
-
12
-
13
-
14
-
15
-
16
-
17
-
18
-
19
-
20
-
21
-
22
-
23
-
24
-
 25
25 -
 26
26 -
 27
27 -
 28
28 -
 29
29 -
 30
30 -
 31
31 -
 32
32 -
 33
33 -
 34
34 -
 35
35 -
36
-
37
-
38
-
39
-
40
-
41
-
42
-
43
-
44
-
45
-
46
-
47
-
48
-
49
-
50
-
51
-
52
-
53
-
54
-
55
-
56
-
57
-
58
-
59
-
60
-
61
-
62
-
63
-
64
-
65
-
66
-
67
-
68
-
69
-
70
-
71
-
72
-
73
-
74
-
75
-
76
-
77
-
78
-
79
-
80
-
81
-
82
-
83
-
84
-
85
-
86
-
87
-
88
-
89
-
90
-
91
-
92
-
93
-
94
-
95
-
96
-
97
-
98
-
99
-
100
-
101
-
102
-
103
-
104
-
105
-
106
-
107
-
108
-
109
-
110
-
111
-
112
-
113
-
114
-
115
-
116
-
117
-
118
-
119
-
120
-
121
-
122
-
123
-
124
-
125
-
126
-
127
-
128
-
129
-
130
-
131
-
132
-
133
-
134
-
135
-
136
-
137
-
138
-
139
-
140
-
141
-
142
-
143
-
144
-
145
-
146
-
147
-
148
-
149
-
150
-
151
-
152
-
153
-
154
-
155
-
156
-
157
-
158
-
159
-
160
-
161
-
162
-
163
-
164
-
165
-
166
-
167
-
168
-
169
-
170
-
171
-
172
-
173
-
174
-
175
-
176
-
177
-
178
-
179
-
180
-
181
-
182
-
183
-
184
-
185
-
186
-
187
-
188
-
189
-
190
-
191
-
192
-
193
-
194
-
195
-
196
-
197
-
198
-
199
-
200
-
201
-
202
-
203
-
204
-
205
-
206
-
207
-
208
-
209
-
210
-
211
-
212
-
213
-
214
-
215
-
216
-
217
-
218
-
219
-
220
-
221
-
222
-
223
-
224
-
225
 |
 |
