HP Media Center m1200 Microsoft Windows XP Media Center Edition 2005 Software - Page 81
Importing, Editing, and Burning Videos, Getting Started with InterVideo WinDVD Creator
 |
View all HP Media Center m1200 manuals
Add to My Manuals
Save this manual to your list of manuals |
Page 81 highlights
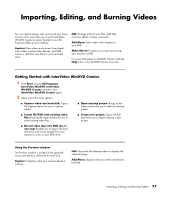
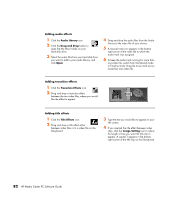
Importing, Editing, and Burning Videos You can capture (copy), edit, and record your home movies in four easy steps by using the InterVideo WinDVD Creator program located in your All Programs folder on your desktop. Capture: Take videos and pictures from digital camcorders, analog video devices, and Web cameras, and then save them to your hard disk drive. Edit: Arrange and trim your files. Add titles, transition effects, images, and audio. Add Menu: Add a menu with chapters to your DVD. Make Movie: Finalize your project by burning your movie to a DVD. For more information on WinDVD Creator, click the Help menu in the WinDVD Creator menu bar. with Getting Started with InterVideo WinDVD Creator 1 Click Start, choose All Programs, InterVideo WinDVD, InterVideo WinDVD Creator, and then click InterVideo WinDVD Creator again. 2 Select one of the menu options: ■ Capture video into hard disk: Opens the Capture section for you to capture media. ■ Open existing project: Brings up the Open window for you to select an existing project. ■ Create CD/DVD with existing video file: Brings up the Open window for you to select existing video files. ■ Create new project: Opens the Edit section for you to begin creating a new project. ■ Record video tape into DVD disc in one step: Enables you to bypass the hard disk drive and record straight from your camera to a disc in your DVD drive. Using the Preview window The Preview window is located in the upper-left corner and behaves differently for each task. Capture: It displays what your capture device is viewing. Edit: Plays back the selected video or displays the selected image. Add Menu: Displays what your menu and buttons look like. Importing, Editing, and Burning Videos 77
-
 1
1 -
2
-
3
-
4
-
5
-
6
-
7
-
8
-
9
-
10
-
11
-
12
-
13
-
14
-
15
-
16
-
17
-
18
-
19
-
20
-
21
-
22
-
23
-
24
-
25
-
26
-
27
-
28
-
29
-
30
-
31
-
32
-
33
-
34
-
35
-
36
-
37
-
38
-
39
-
40
-
41
-
42
-
43
-
44
-
45
-
46
-
47
-
48
-
49
-
50
-
51
-
52
-
53
-
54
-
55
-
56
-
57
-
58
-
59
-
60
-
61
-
62
-
63
-
64
-
65
-
66
-
67
-
68
-
69
-
70
-
71
-
72
-
73
-
74
-
75
-
 76
76 -
 77
77 -
 78
78 -
 79
79 -
 80
80 -
 81
81 -
 82
82 -
 83
83 -
 84
84 -
 85
85 -
 86
86 -
87
-
88
-
89
-
90
-
91
-
92
-
93
-
94
-
95
-
96
-
97
-
98
-
99
-
100
-
101
-
102
-
103
-
104
 |
 |