HP Media Center m1200 Microsoft Windows XP Media Center Edition 2005 Software - Page 82
Identifying Requirements for Capturing Video, Using the Media Library, Using the Storyboard
 |
View all HP Media Center m1200 manuals
Add to My Manuals
Save this manual to your list of manuals |
Page 82 highlights
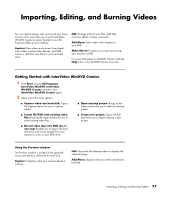
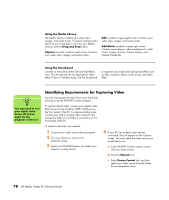
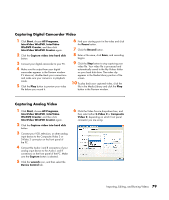
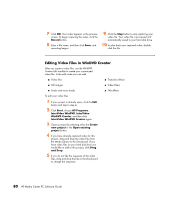
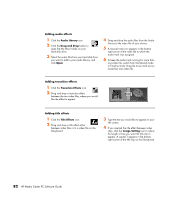
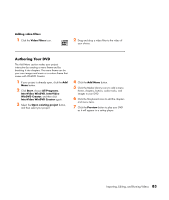
Using the Media Library The Media Library contains your video clips, images, and audio tracks. To import existing media files from your hard disk or CDs into your Media Library, click the Drag and Drop button. Capture: Located in bottom right corner. Contains your video clips, images, and audio tracks. Edit: Located in upper-right corner. Contains your video clips, images, and audio tracks. Add Menu: Located in upper-right corner. Contains menu themes, video backgrounds, audio tracks, images, buttons, chapter layouts, and chapter thumbnails. Using the Storyboard Located on the bottom of the Edit and Add Menu area. The Storyboard can be displayed in either Menu Picker or Timeline mode. Use the Storyboard to organize your media and add special effects such as titles, transition effects, audio tracks, and video filters. n You may need to turn your digital video device off and on again for the program to detect it. Identifying Requirements for Capturing Video You can copy (capture) video files to your hard disk drive by using the WinDVD Creator program. To capture digital video, connect your digital video (DV) camera to the FireWire® (IEEE 1394) port on the front panel of the PC. To capture analog video, connect your VCR or analog video camera to the Composite Video 2 or S-Video 2 connectors on the front panel of the PC. To capture video files, you need to: 1 Connect your video source device properly. 2 Turn your device on and set it to playback mode. 3 Make sure WinDVD Creator can detect your digital or analog device. 4 If your PC has multiple video devices connected, they all appear on the Capture screen. You must select the video source you would like to use. a In the WinDVD Creator capture screen, click your input source. b Click the Wrench icon. c Select Device Control tab, and then select your video source from the Video Source drop-down menu. 78 HP Media Center PC Software Guide
-
 1
1 -
2
-
3
-
4
-
5
-
6
-
7
-
8
-
9
-
10
-
11
-
12
-
13
-
14
-
15
-
16
-
17
-
18
-
19
-
20
-
21
-
22
-
23
-
24
-
25
-
26
-
27
-
28
-
29
-
30
-
31
-
32
-
33
-
34
-
35
-
36
-
37
-
38
-
39
-
40
-
41
-
42
-
43
-
44
-
45
-
46
-
47
-
48
-
49
-
50
-
51
-
52
-
53
-
54
-
55
-
56
-
57
-
58
-
59
-
60
-
61
-
62
-
63
-
64
-
65
-
66
-
67
-
68
-
69
-
70
-
71
-
72
-
73
-
74
-
75
-
76
-
 77
77 -
 78
78 -
 79
79 -
 80
80 -
 81
81 -
 82
82 -
 83
83 -
 84
84 -
 85
85 -
 86
86 -
 87
87 -
88
-
89
-
90
-
91
-
92
-
93
-
94
-
95
-
96
-
97
-
98
-
99
-
100
-
101
-
102
-
103
-
104
 |
 |