HP Media Center m1200 Microsoft Windows XP Media Center Edition 2005 Software - Page 84
Editing Video Files in WinDVD Creator, Record, Start, All Programs, InterVideo WinDVD, InterVideo
 |
View all HP Media Center m1200 manuals
Add to My Manuals
Save this manual to your list of manuals |
Page 84 highlights
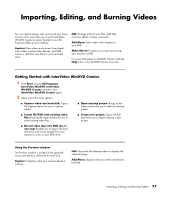
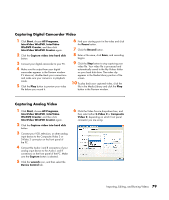
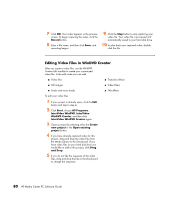
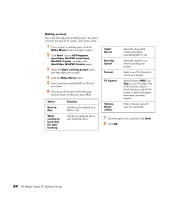
7 Click OK. Your video appears in the preview screen. To begin capturing the video, click the Record button. 8 Enter a file name, and then click Save, and recording begins. 9 Click the Stop button to stop capturing your video file. Your video file is processed and automatically saved to your hard disk drive. 10 To play back your captured video, double- click the file. Editing Video Files in WinDVD Creator After you capture video files, use the WinDVD Creator Edit module to create your customized video file. In the edit mode you can add: ■ Video files ■ Transition effects ■ Still images ■ Video filters ■ Audio and music tracks ■ Title effects To edit your video files: 1 If your project is already open, click the Edit button and skip to step 4. 2 Click Start, choose All Programs, InterVideo WinDVD, InterVideo WinDVD Creator, and then click InterVideo WinDVD Creator again. 3 Open a project by selecting either the Create new project or the Open existing project button. 4 If you have already captured video for this project, drag and drop the video files from the Media Library to the Storyboard. If you have video files on your hard disk drive you would like to add to this project, click Drag and Drop. 5 If you do not like the sequence of the video files, drag and drop the files in the Storyboard to change the sequence. 80 HP Media Center PC Software Guide
-
 1
1 -
2
-
3
-
4
-
5
-
6
-
7
-
8
-
9
-
10
-
11
-
12
-
13
-
14
-
15
-
16
-
17
-
18
-
19
-
20
-
21
-
22
-
23
-
24
-
25
-
26
-
27
-
28
-
29
-
30
-
31
-
32
-
33
-
34
-
35
-
36
-
37
-
38
-
39
-
40
-
41
-
42
-
43
-
44
-
45
-
46
-
47
-
48
-
49
-
50
-
51
-
52
-
53
-
54
-
55
-
56
-
57
-
58
-
59
-
60
-
61
-
62
-
63
-
64
-
65
-
66
-
67
-
68
-
69
-
70
-
71
-
72
-
73
-
74
-
75
-
76
-
77
-
78
-
 79
79 -
 80
80 -
 81
81 -
 82
82 -
 83
83 -
 84
84 -
 85
85 -
 86
86 -
 87
87 -
 88
88 -
 89
89 -
90
-
91
-
92
-
93
-
94
-
95
-
96
-
97
-
98
-
99
-
100
-
101
-
102
-
103
-
104
 |
 |