HP Media Center m1200 Microsoft Windows XP Media Center Edition 2005 Software - Page 83
Capturing Digital Camcorder Video, Capturing Analog Video, InterVideo WinDVD Creator
 |
View all HP Media Center m1200 manuals
Add to My Manuals
Save this manual to your list of manuals |
Page 83 highlights
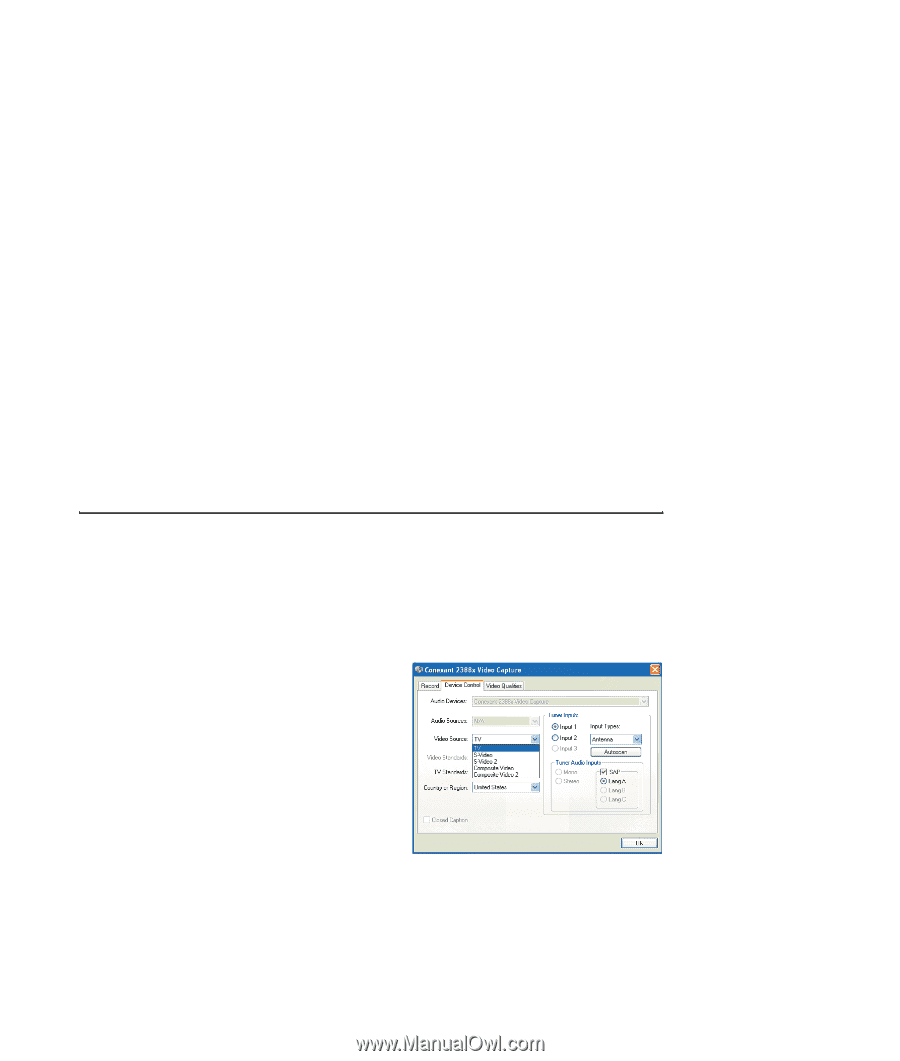
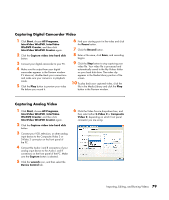
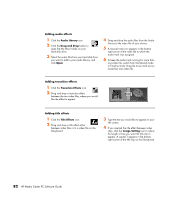
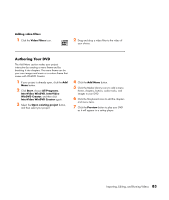
Capturing Digital Camcorder Video 1 Click Start, choose All Programs, InterVideo WinDVD, InterVideo WinDVD Creator, and then click InterVideo WinDVD Creator again. 2 Click the Capture video into hard disk button. 3 Connect your digital camcorder to your PC. 4 Make sure the output from your digital camcorder appears in the Preview window. If it does not, double-check your connections and make sure your camera is in playback mode. 5 Click the Play button to preview your video file before you record it. 6 Find your starting point in the video and click the Pause button. 7 Click the Record button. 8 Enter a file name, click Save, and recording begins. 9 Click the Stop button to stop capturing your video file. Your video file is processed and automatically saved to the My Videos folder on your hard disk drive. The video clip appears in the Media Library portion of the screen. 10 To play back your captured video, click the file in the Media Library and click the Play button in the Preview window. Capturing Analog Video 1 Click Start, choose All Programs, InterVideo WinDVD, InterVideo WinDVD Creator, and then click InterVideo WinDVD Creator again. 2 Click the Capture video into hard disk button. 3 Connect your VCR, television, or other analog input device to the Composite Video 2 or S-Video 2 connector on the front panel of the PC. 4 Connect the Audio L and R connectors of your analog input device to the Audio L and R connectors on the front panel of the PC. Make sure the Capture button is selected. 5 Click the wrench icon, and then select the Device Control tab. 6 Click the Video Source drop-down box, and then select either S-Video 2 or Composite Video 2, depending on which front panel connector you are using. Importing, Editing, and Burning Videos 79
-
 1
1 -
2
-
3
-
4
-
5
-
6
-
7
-
8
-
9
-
10
-
11
-
12
-
13
-
14
-
15
-
16
-
17
-
18
-
19
-
20
-
21
-
22
-
23
-
24
-
25
-
26
-
27
-
28
-
29
-
30
-
31
-
32
-
33
-
34
-
35
-
36
-
37
-
38
-
39
-
40
-
41
-
42
-
43
-
44
-
45
-
46
-
47
-
48
-
49
-
50
-
51
-
52
-
53
-
54
-
55
-
56
-
57
-
58
-
59
-
60
-
61
-
62
-
63
-
64
-
65
-
66
-
67
-
68
-
69
-
70
-
71
-
72
-
73
-
74
-
75
-
76
-
77
-
 78
78 -
 79
79 -
 80
80 -
 81
81 -
 82
82 -
 83
83 -
 84
84 -
 85
85 -
 86
86 -
 87
87 -
 88
88 -
89
-
90
-
91
-
92
-
93
-
94
-
95
-
96
-
97
-
98
-
99
-
100
-
101
-
102
-
103
-
104
 |
 |