HP Presario B1000 Compaq Presario B1000 Notebook PC Series - Notebook Computer - Page 38
Adjusting the Display Controls
 |
View all HP Presario B1000 manuals
Add to My Manuals
Save this manual to your list of manuals |
Page 38 highlights
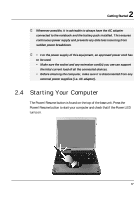
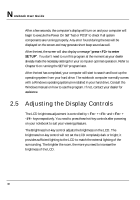
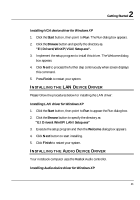
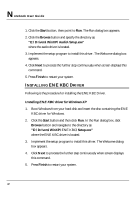
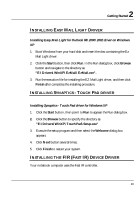
Notebook User Guide After a few seconds, the computer's display will turn on and your computer will begin to execute the Power On Self Test or POST to check if all system components are running properly. Any error found during the test will be displayed on the screen and may generate short beep sound as well. After the test, the screen will also display a message "press to enter SETUP". You don't need to run this program at the moment as your dealer already made the necessary settings for your co mputer optimal operation. Refer to Chapter 6 on running the SETUP program later. After the test has completed, your computer will start to search and boot up the operating system from your hard drive. The notebook computer normally comes with a Windows operating system pre-installed in your hard drive. Consult the Windows manual on how to use the program. If not, contact your dealer for assistance. 2.5 Adjusting the Display Controls The LCD brightness adjustment is controlled by + and + keys respectively. You need to press these hot-key controls after powering on your notebook to suit your viewing pleasure. The Brightness hot-key control adjusts the brightness on the LCD. The brightness hot-key control will not set the LCD completely dark or bright; it provides sufficient lighting to the LCD to match the external lighting of the surrounding. The brighter the room, the more you need to increase the brightness of the LCD. 38
-
 1
1 -
2
-
3
-
4
-
5
-
6
-
7
-
8
-
9
-
10
-
11
-
12
-
13
-
14
-
15
-
16
-
17
-
18
-
19
-
20
-
21
-
22
-
23
-
24
-
25
-
26
-
27
-
28
-
29
-
30
-
31
-
32
-
 33
33 -
 34
34 -
 35
35 -
 36
36 -
 37
37 -
 38
38 -
 39
39 -
 40
40 -
 41
41 -
 42
42 -
 43
43 -
44
-
45
-
46
-
47
-
48
-
49
-
50
-
51
-
52
-
53
-
54
-
55
-
56
-
57
-
58
-
59
-
60
-
61
-
62
-
63
-
64
-
65
-
66
-
67
-
68
-
69
-
70
-
71
-
72
-
73
-
74
-
75
-
76
-
77
-
78
-
79
-
80
-
81
-
82
-
83
-
84
-
85
-
86
-
87
-
88
-
89
-
90
-
91
-
92
-
93
-
94
-
95
-
96
-
97
-
98
-
99
-
100
-
101
-
102
-
103
-
104
-
105
-
106
-
107
-
108
-
109
-
110
-
111
-
112
-
113
-
114
-
115
-
116
-
117
-
118
-
119
-
120
-
121
-
122
-
123
-
124
-
125
-
126
-
127
-
128
-
129
-
130
-
131
-
132
-
133
-
134
-
135
-
136
 |
 |
