HP Presario B1000 Compaq Presario B1000 Notebook PC Series - Notebook Computer - Page 46
Installing The Wireless Device Utility
 |
View all HP Presario B1000 manuals
Add to My Manuals
Save this manual to your list of manuals |
Page 46 highlights
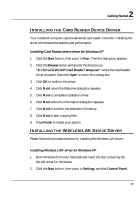
Notebook User Guide 3. Double-click on the System icon, change to Hardware tag then click on the Device Manager folder tab. You will find the Other devices. 4. Double-click Network Controller to show the Network Controller Properties box, then click the Reinstall Driver. 5. Tick Install from a list of specific location (Advanced) and then click Next. 6. Choose "Search for the best driver in these locations" and "Include this location in the search". Then, click Browse button and point to the Wireless LAN driver location as "E:\Drivers\WinXP\Wireless LAN\Driver", then click OK to confirm this driver.. 7. Click Next to search and install the driver. 8. Click Finish button to finalize the Wireless LAN driver installation. INSTALLING THE WIRELESS LAN DEVICE UTILITY Please follow the procedures below for installing the Wireless LAN device utility: Installing Wireless LAN device utility for Windows XP 1. Click the Start button and then click Run. The Run dialog box appears. 2. Click Browse button and specify the directory as "E:\Drivers\WinXP\WLAN\WLAN Utility\Setup.exe", where the WLAN driver is located, then click Open to return Run dialog box. 3. Click OK to confirm this driver. 4. Click Next. when the Welcome dialog box appears. 5. Click Yes for the license agreement and to install this driver. 46
-
 1
1 -
2
-
3
-
4
-
5
-
6
-
7
-
8
-
9
-
10
-
11
-
12
-
13
-
14
-
15
-
16
-
17
-
18
-
19
-
20
-
21
-
22
-
23
-
24
-
25
-
26
-
27
-
28
-
29
-
30
-
31
-
32
-
33
-
34
-
35
-
36
-
37
-
38
-
39
-
40
-
 41
41 -
 42
42 -
 43
43 -
 44
44 -
 45
45 -
 46
46 -
 47
47 -
 48
48 -
 49
49 -
 50
50 -
 51
51 -
52
-
53
-
54
-
55
-
56
-
57
-
58
-
59
-
60
-
61
-
62
-
63
-
64
-
65
-
66
-
67
-
68
-
69
-
70
-
71
-
72
-
73
-
74
-
75
-
76
-
77
-
78
-
79
-
80
-
81
-
82
-
83
-
84
-
85
-
86
-
87
-
88
-
89
-
90
-
91
-
92
-
93
-
94
-
95
-
96
-
97
-
98
-
99
-
100
-
101
-
102
-
103
-
104
-
105
-
106
-
107
-
108
-
109
-
110
-
111
-
112
-
113
-
114
-
115
-
116
-
117
-
118
-
119
-
120
-
121
-
122
-
123
-
124
-
125
-
126
-
127
-
128
-
129
-
130
-
131
-
132
-
133
-
134
-
135
-
136
 |
 |