HP Presario B1000 Compaq Presario B1000 Notebook PC Series - Notebook Computer - Page 66
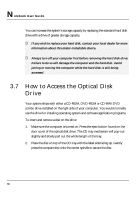
How to Access the Optical Disk, Drive
 |
View all HP Presario B1000 manuals
Add to My Manuals
Save this manual to your list of manuals |
Page 66 highlights
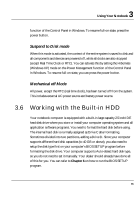
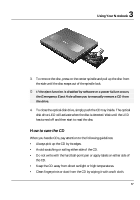
Notebook User Guide You can increase the system's storage capacity by replacing the standard hard disk drive with a drive of greater storage capacity. + If you wish to replace your hard disk, contact your local dealer for more information about this dealer-installable device. + Always turn off your computer first before removing the hard disk drive. Failure to do so will damage the computer and the hard disk. Avoid jarring or moving the computer while the hard disk is still being accessed. 3.7 How to Access the Optical Disk Drive Your system ships with either a CD-ROM, DVD-ROM or CD-RW/DVD combo drive installed on the right side of your computer. You would normally use the drive for installing operating system and software application programs. To insert and remove a disc on the drive: 1. Make sure the computer is turned on. Press the eject button found on the door cover of the optical disk drive. The CD tray mechanism will pop-out slightly and slowly pull out the whole length of the tray. 2. Place the disc on top of the CD tray with the label side facing up. Gently press the compact disc onto the center spindle to secure the disc. 66
-
 1
1 -
2
-
3
-
4
-
5
-
6
-
7
-
8
-
9
-
10
-
11
-
12
-
13
-
14
-
15
-
16
-
17
-
18
-
19
-
20
-
21
-
22
-
23
-
24
-
25
-
26
-
27
-
28
-
29
-
30
-
31
-
32
-
33
-
34
-
35
-
36
-
37
-
38
-
39
-
40
-
41
-
42
-
43
-
44
-
45
-
46
-
47
-
48
-
49
-
50
-
51
-
52
-
53
-
54
-
55
-
56
-
57
-
58
-
59
-
60
-
 61
61 -
 62
62 -
 63
63 -
 64
64 -
 65
65 -
 66
66 -
 67
67 -
 68
68 -
 69
69 -
 70
70 -
 71
71 -
72
-
73
-
74
-
75
-
76
-
77
-
78
-
79
-
80
-
81
-
82
-
83
-
84
-
85
-
86
-
87
-
88
-
89
-
90
-
91
-
92
-
93
-
94
-
95
-
96
-
97
-
98
-
99
-
100
-
101
-
102
-
103
-
104
-
105
-
106
-
107
-
108
-
109
-
110
-
111
-
112
-
113
-
114
-
115
-
116
-
117
-
118
-
119
-
120
-
121
-
122
-
123
-
124
-
125
-
126
-
127
-
128
-
129
-
130
-
131
-
132
-
133
-
134
-
135
-
136
 |
 |
