HP Presario B1000 Compaq Presario B1000 Notebook PC Series - Notebook Computer - Page 39
Installing the Notebook Device, Drivers
 |
View all HP Presario B1000 manuals
Add to My Manuals
Save this manual to your list of manuals |
Page 39 highlights
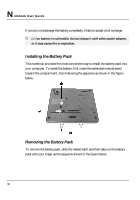
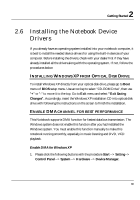
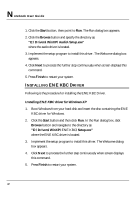
2 Getting Started 2.6 Installing the Notebook Device Drivers If you already have an operating system installed into your notebook computer, it is best to install the needed device drivers for using the built-in devices of your computer. Before installing the drivers, check with your dealer first if they have already installed all the drivers along with the operating system. If not, follow the procedures below: INSTALLING WINDOWS XP FROM OPTICAL DISK DRIVE To install Windows XP directly from your optical disk drive, please go to Boot menu of BIOS setup menu. Use arrow key to select "CD-ROM Drive", then use "+" or "-" to move it to the top. Go to Exit menu and select "Exit Saving Changes". Accordingly, insert the Windows XP installation CD into optical disk drive with following the instructions on the screen to finish the installation. ENABLE DMA CHANNEL FOR BEST PERFORMANCE This Notebook supports DMA function for fastest data bus transmission. The Windows system does not enable this function after you had installed the Windows system. You must enable this function manually to make this notebook running smoothly, especially in music listening and DVD, VCD playback. Enable DMA for Windows XP 1. Please click the following buttons with the procedure Start --> Setting--> Control Panel --> System --> Hardware --> Device Manager. 39
-
 1
1 -
2
-
3
-
4
-
5
-
6
-
7
-
8
-
9
-
10
-
11
-
12
-
13
-
14
-
15
-
16
-
17
-
18
-
19
-
20
-
21
-
22
-
23
-
24
-
25
-
26
-
27
-
28
-
29
-
30
-
31
-
32
-
33
-
 34
34 -
 35
35 -
 36
36 -
 37
37 -
 38
38 -
 39
39 -
 40
40 -
 41
41 -
 42
42 -
 43
43 -
 44
44 -
45
-
46
-
47
-
48
-
49
-
50
-
51
-
52
-
53
-
54
-
55
-
56
-
57
-
58
-
59
-
60
-
61
-
62
-
63
-
64
-
65
-
66
-
67
-
68
-
69
-
70
-
71
-
72
-
73
-
74
-
75
-
76
-
77
-
78
-
79
-
80
-
81
-
82
-
83
-
84
-
85
-
86
-
87
-
88
-
89
-
90
-
91
-
92
-
93
-
94
-
95
-
96
-
97
-
98
-
99
-
100
-
101
-
102
-
103
-
104
-
105
-
106
-
107
-
108
-
109
-
110
-
111
-
112
-
113
-
114
-
115
-
116
-
117
-
118
-
119
-
120
-
121
-
122
-
123
-
124
-
125
-
126
-
127
-
128
-
129
-
130
-
131
-
132
-
133
-
134
-
135
-
136
 |
 |