HP Vectra VEi8 HP Vectra VEi7, Troubleshooting and Upgrade Guide - Page 53
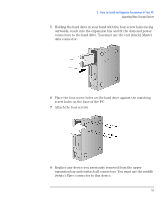
Attach the four screws., screw holes on the base of the PC.
 |
View all HP Vectra VEi8 manuals
Add to My Manuals
Save this manual to your list of manuals |
Page 53 highlights
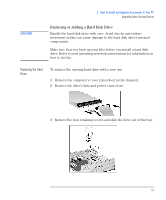
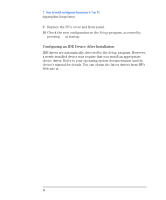
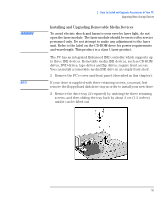
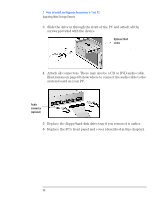
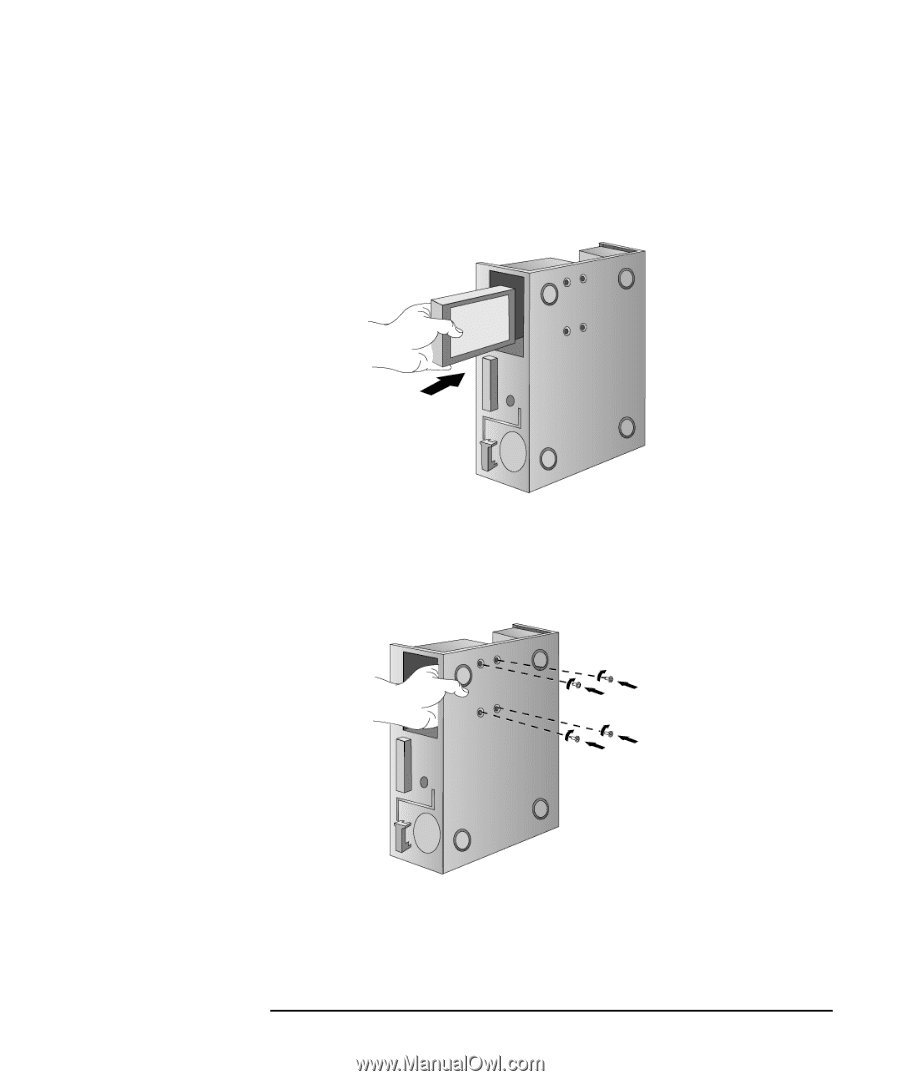
2 How to Install and Upgrade Accessories In Your PC Upgrading Mass Storage Devices 5 Holding the hard drive in your hand with the four screw holes facing outwards, reach into the expansion bay and fit the data and power connectors to the hard drive. You must use the end (black) Master data connector. 6 Place the four screw holes on the hard drive against the matching screw holes on the base of the PC. 7 Attach the four screws. 8 Replace any device you previously removed from the upper expansion bay and reattach all connectors. You must use the middle (white) Slave connector to this device. 53
-
 1
1 -
2
-
3
-
4
-
5
-
6
-
7
-
8
-
9
-
10
-
11
-
12
-
13
-
14
-
15
-
16
-
17
-
18
-
19
-
20
-
21
-
22
-
23
-
24
-
25
-
26
-
27
-
28
-
29
-
30
-
31
-
32
-
33
-
34
-
35
-
36
-
37
-
38
-
39
-
40
-
41
-
42
-
43
-
44
-
45
-
46
-
47
-
 48
48 -
 49
49 -
 50
50 -
 51
51 -
 52
52 -
 53
53 -
 54
54 -
 55
55 -
 56
56 -
 57
57 -
 58
58 -
59
-
60
-
61
-
62
-
63
-
64
-
65
-
66
-
67
-
68
-
69
-
70
-
71
-
72
-
73
-
74
-
75
-
76
-
77
-
78
-
79
-
80
 |
 |
53
2
How to Install and Upgrade Accessories In Your PC
Upgrading Mass Storage Devices
5
Holding the hard drive in your hand with the four screw holes facing
outwards, reach into the expansion bay and fit the data and power
connectors to the hard drive. You must use the end (black) Master
data connector.
6
Place the four screw holes on the hard drive against the matching
screw holes on the base of the PC.
7
Attach the four screws.
8
Replace any device you previously removed from the upper
expansion bay and reattach all connectors. You must use the middle
(white) Slave connector to this device.