HP Vectra VEi8 HP Vectra VEi7, Troubleshooting and Upgrade Guide - Page 55
Installing and Upgrading Removable Media Devices
 |
View all HP Vectra VEi8 manuals
Add to My Manuals
Save this manual to your list of manuals |
Page 55 highlights
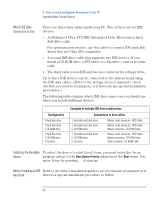
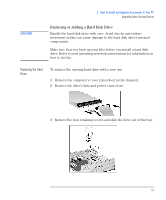
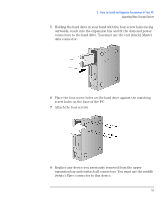
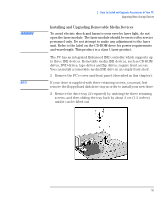
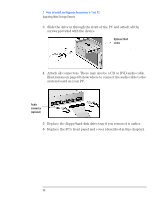
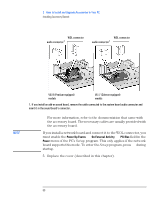
WARNING NOTE 2 How to Install and Upgrade Accessories In Your PC Upgrading Mass Storage Devices Installing and Upgrading Removable Media Devices To avoid electric shock and harm to your eyes by laser light, do not open the laser module. The laser module should be serviced by service personnel only. Do not attempt to make any adjustment to the laser unit. Refer to the label on the CD-ROM drive for power requirements and wavelength. This product is a class 1 laser product. The PC has an integrated Enhanced IDE controller which supports up to three IDE devices. Removable media IDE devices, such as CD-ROM drives, DVD drives, tape drives and Zip drives, require front access. You can install a removable media IDE drive in an empty front shelf. 1 Remove the PC's cover and front panel (described in this chapter). If your drive is supplied with three retaining screws, you must first remove the floppy/hard disk drive tray in order to install your new drive. 2 Remove the drive tray (if required) by undoing the three retaining screws, and then sliding the tray back by about 3 cm (1.2 inches) until it can be lifted out. 55
-
 1
1 -
2
-
3
-
4
-
5
-
6
-
7
-
8
-
9
-
10
-
11
-
12
-
13
-
14
-
15
-
16
-
17
-
18
-
19
-
20
-
21
-
22
-
23
-
24
-
25
-
26
-
27
-
28
-
29
-
30
-
31
-
32
-
33
-
34
-
35
-
36
-
37
-
38
-
39
-
40
-
41
-
42
-
43
-
44
-
45
-
46
-
47
-
48
-
49
-
 50
50 -
 51
51 -
 52
52 -
 53
53 -
 54
54 -
 55
55 -
 56
56 -
 57
57 -
 58
58 -
 59
59 -
 60
60 -
61
-
62
-
63
-
64
-
65
-
66
-
67
-
68
-
69
-
70
-
71
-
72
-
73
-
74
-
75
-
76
-
77
-
78
-
79
-
80
 |
 |
