HP XM600 hp kayak xm600 series 1, user's guide for minitower models - Page 72
Performing a Full Recovery
 |
View all HP XM600 manuals
Add to My Manuals
Save this manual to your list of manuals |
Page 72 highlights
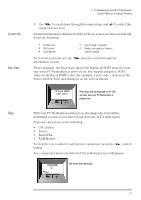
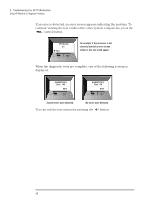
3 Troubleshooting Your HP PC Workstation Image Creation and Recovery CD-ROM Performing a Recovery, Upgrade or Downgrade Running HP DiagTools NOTE Ì The PC model must match the CD-ROM, which contains a BIOS lock. Ì Save (if possible) data files and software applications. Ì It is recommended upgrading to the latest BIOS version. Ì Setup program settings: Clear any BIOS-level passwords. In the Security menu, set all Hardware Protection items to "Enabled" or "Unlocked" (if applicable). Check also that Booting from the CD-ROM is enabled; in the Boot menu, the CD-ROM drive is configured to boot before the hard disk drive in the Boot Device Priority List. Ì Ensure that you have the Certificate of Authenticity from Microsoft available. Ì The PC model must match the CD-ROM, which contains a BIOS lock. Ì Setup program settings: Operating system is set to "No"; all hardware protection items enabled or unlocked (if applicable); the CD-drive has been enabled to boot from it and configured to boot before the hard disk drive in the Boot Device Priority List. Performing a Full Recovery Depending on the hardware configuration, a full system recovery should take from 30 minutes to 2 hours. Remember, this procedure could potentially erase everything from the hard disk drive (primary partition if defined). Ensure that all data files and software applications have been saved. 1 Insert the recovery CD-ROM into the CD-ROM drive and restart the computer. 2 Press the key to select the CD-ROM to boot first. 3 The computer will boot from the CD-ROM and display a DOS-style menu. Select the option to recover the hard disk drive. In some cases, you might have to go through the menu item "Partitioning & Formatting". In this case, there are two options: • Automatic (recommended). • Custom (for advanced users only). 4 Then follow the on-screen instructions. 5 The hard disk drive will be formatted first. Several reboots will be carried out. This is normal: do not interrupt the process. Wait until a message indicates that the operation has been successfully completed. 6 Remove the recovery CD-ROM from the CD-ROM drive. 72
-
 1
1 -
2
-
3
-
4
-
5
-
6
-
7
-
8
-
9
-
10
-
11
-
12
-
13
-
14
-
15
-
16
-
17
-
18
-
19
-
20
-
21
-
22
-
23
-
24
-
25
-
26
-
27
-
28
-
29
-
30
-
31
-
32
-
33
-
34
-
35
-
36
-
37
-
38
-
39
-
40
-
41
-
42
-
43
-
44
-
45
-
46
-
47
-
48
-
49
-
50
-
51
-
52
-
53
-
54
-
55
-
56
-
57
-
58
-
59
-
60
-
61
-
62
-
63
-
64
-
65
-
66
-
 67
67 -
 68
68 -
 69
69 -
 70
70 -
 71
71 -
 72
72 -
 73
73 -
 74
74 -
 75
75 -
 76
76 -
 77
77 -
78
-
79
-
80
-
81
-
82
-
83
-
84
-
85
-
86
-
87
-
88
-
89
-
90
-
91
-
92
-
93
-
94
-
95
-
96
-
97
-
98
 |
 |
