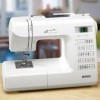
Kenmore 19110 Owners Manual - Page 51
Press the U
 |
UPC - 883073000043
View all Kenmore 19110 manuals
Add to My Manuals
Save this manual to your list of manuals |
Page 51 highlights
Using the Seam Guides The seam guides on the needle plate are engraved to help you measure seam allowance. The numbers on the needle plate indicate the distance between the center needle position and the edge of the fabric. The lines are 1/8" (0.3 cm) apart, and engraved at 3/8", 4/8", 5/8" and 6/8". The lines in millimeters are 5 mm apart, and are engraved at 10 mm, 15 mm and 20 mm. _i_ Seam guides _2_ Needle drop position _3_ Seam allowance Turning Square Corners To maintain a 5/8" seam allowance after square corner, use the cornering guide needle plate. [iq Stop stitching when the front edge reaches the cornerin( _i_ Cornering [21Press the U the needle into position _2_Up/Down [31Raise the counterclock-wise _3_Presser foot [3 Lower the presser foot and begin stitching in the new direction. Sewing from the Edge of Thick Fabric The black button locks the zigzag foot to avoid slipping when sewing from the extreme edge or sewing across the hem. [i_ Lower the needle into the fabric at the point to start sewing. [21 Lower the foot while pushing the black button in. The foot is locked in the horizontal position, [31The foot will be unlocked automatically after sewing several stitches, _i_ Black button \ J
-
 1
1 -
2
-
3
-
4
-
5
-
6
-
7
-
8
-
9
-
10
-
11
-
12
-
13
-
14
-
15
-
16
-
17
-
18
-
19
-
20
-
21
-
22
-
23
-
24
-
25
-
26
-
27
-
28
-
29
-
30
-
31
-
32
-
33
-
34
-
35
-
36
-
37
-
38
-
39
-
40
-
41
-
42
-
43
-
44
-
45
-
 46
46 -
 47
47 -
 48
48 -
 49
49 -
 50
50 -
 51
51 -
 52
52 -
 53
53 -
 54
54 -
 55
55 -
 56
56 -
57
-
58
-
59
-
60
-
61
-
62
-
63
-
64
-
65
-
66
-
67
-
68
-
69
-
70
-
71
-
72
-
73
-
74
-
75
-
76
-
77
-
78
-
79
-
80
-
81
-
82
-
83
-
84
-
85
-
86
-
87
-
88
-
89
-
90
-
91
-
92
-
93
-
94
-
95
-
96
-
97
-
98
-
99
-
100
-
101
-
102
-
103
-
104
-
105
 |
 |
