Kenmore 19110 Owners Manual - Page 93
Thread the needles _6_from front to back.
 |
UPC - 883073000043
View all Kenmore 19110 manuals
Add to My Manuals
Save this manual to your list of manuals |
Page 93 highlights
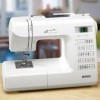
Twin Needle Sewing Machine setting _i_ Pattern _2_LED display _3_Foot _4_Needle (Optional) A: Zigzag foot or F: Satin stitch foot Twin needle (optional item) f _i_ 01 10 11 13 15 16 1 7 22 23 24 25 26 33 34 36 46 47 48 49 CAUTION: Turn off and unplug the machine before chan( needle to the twin needle. Use the additional spool pin and spoo shown (refer to page 22). NOTES: Twin needle is an optional item. Use size #60 or finer Make a test Threading from _i_ same as the single needle (see page 28). Slide one of the threads through the needle bar thread guide _5_on the left and the other one on the right. Thread the needles _6_from front to back. Turn the power switch on, and select the stitch pattern. Reduce the stitch width to 3.0 or less. Do not set the stitch width wider than 3.0, otherwise I CthAeUnTeIOedNle: will hit the needle plate and break. Sew at a medium speed. At corners, raise the needles until they clear the fabric. Partially raise the presser foot and carefully turn the fabric. When twin needle sewing is completed, change needle and reset tension if necessary. NOTES: The needle threader cannot be used with twin needles. To avoid the thread twisting, it is advisable to thread the machine one thread at a time. . J
-
 1
1 -
2
-
3
-
4
-
5
-
6
-
7
-
8
-
9
-
10
-
11
-
12
-
13
-
14
-
15
-
16
-
17
-
18
-
19
-
20
-
21
-
22
-
23
-
24
-
25
-
26
-
27
-
28
-
29
-
30
-
31
-
32
-
33
-
34
-
35
-
36
-
37
-
38
-
39
-
40
-
41
-
42
-
43
-
44
-
45
-
46
-
47
-
48
-
49
-
50
-
51
-
52
-
53
-
54
-
55
-
56
-
57
-
58
-
59
-
60
-
61
-
62
-
63
-
64
-
65
-
66
-
67
-
68
-
69
-
70
-
71
-
72
-
73
-
74
-
75
-
76
-
77
-
78
-
79
-
80
-
81
-
82
-
83
-
84
-
85
-
86
-
87
-
 88
88 -
 89
89 -
 90
90 -
 91
91 -
 92
92 -
 93
93 -
 94
94 -
 95
95 -
 96
96 -
 97
97 -
 98
98 -
99
-
100
-
101
-
102
-
103
-
104
-
105
 |
 |
