Kyocera FS-1050TN User Guide - Page 122
Send a Document to the Form Box, Combine a Stored Form and another Document, Job Name
 |
View all Kyocera FS-1050TN manuals
Add to My Manuals
Save this manual to your list of manuals |
Page 122 highlights
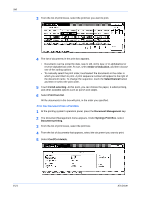
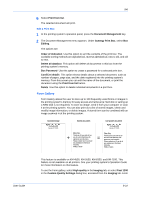
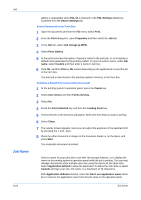
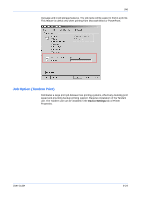
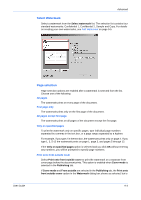
Job Job Name 8-23 gallery is unavailable when PCL 5e is selected in the PDL Settings dialog box, accessed from the Device Settings tab. Send a Document to the Form Box 1 Open the document and from the File menu select Print. 1 2 From the Print dialog box, open Properties and then select the Job tab. 2 3 In the Job tab, select Job storage (e-MPS). 3 4 Select Form Gallery. 4 5 At this point you have the option of giving a name to the print job, or of accepting a default name generated by the printing system. To give it a custom name, under Job name, select Custom and then enter a name in text box. 5 6 Click OK, and then Print or OK (varies depending on the application) to send the job to the form box. 6 The print job is now stored in the printing system's memory, in the form box. Combine a Stored Form and another Document 1 At the printing system's operation panel, press the Copier key. 1 2 Select User choice and then Forms Overlay. 2 3 Select On. 3 4 Press the Form Selected key and then the Loading Form key. 4 5 The list of forms in the form box will appear. Select the form that you want to overlay.5 6 Select Close. 6 7 The overlay screen appears. Here you can adjust the exposure of the selected form by pressing the + and - keys. 7 8 Place the other document or image on the document feeder or on the glass, and press Start. 8 The composite document is printed. Select a name for your print job to use with Job storage features, or to display the name on the printing system's operation panel while the job is printing. This can help manage documents when multiple users are using the device at the same time. Select Application defined to allow the application to define the Job name or select Custom and type your own Job name, to a maximum of 79 characters. With Application defined selected, select the Don't use application name check box to remove the application name from the job name in the operation panel KX Driver
-
 1
1 -
2
-
3
-
4
-
5
-
6
-
7
-
8
-
9
-
10
-
11
-
12
-
13
-
14
-
15
-
16
-
17
-
18
-
19
-
20
-
21
-
22
-
23
-
24
-
25
-
26
-
27
-
28
-
29
-
30
-
31
-
32
-
33
-
34
-
35
-
36
-
37
-
38
-
39
-
40
-
41
-
42
-
43
-
44
-
45
-
46
-
47
-
48
-
49
-
50
-
51
-
52
-
53
-
54
-
55
-
56
-
57
-
58
-
59
-
60
-
61
-
62
-
63
-
64
-
65
-
66
-
67
-
68
-
69
-
70
-
71
-
72
-
73
-
74
-
75
-
76
-
77
-
78
-
79
-
80
-
81
-
82
-
83
-
84
-
85
-
86
-
87
-
88
-
89
-
90
-
91
-
92
-
93
-
94
-
95
-
96
-
97
-
98
-
99
-
100
-
101
-
102
-
103
-
104
-
105
-
106
-
107
-
108
-
109
-
110
-
111
-
112
-
113
-
114
-
115
-
116
-
 117
117 -
 118
118 -
 119
119 -
 120
120 -
 121
121 -
 122
122 -
 123
123 -
 124
124 -
 125
125 -
 126
126 -
 127
127 -
128
-
129
-
130
-
131
-
132
-
133
-
134
-
135
-
136
-
137
-
138
-
139
-
140
-
141
-
142
-
143
-
144
-
145
-
146
-
147
-
148
-
149
-
150
-
151
-
152
-
153
-
154
 |
 |
