Kyocera KM-2030 2030 Instruction Handbook Rev 2C - Page 16
Setting the paper type and size for the multi-bypass
 |
View all Kyocera KM-2030 manuals
Add to My Manuals
Save this manual to your list of manuals |
Page 16 highlights
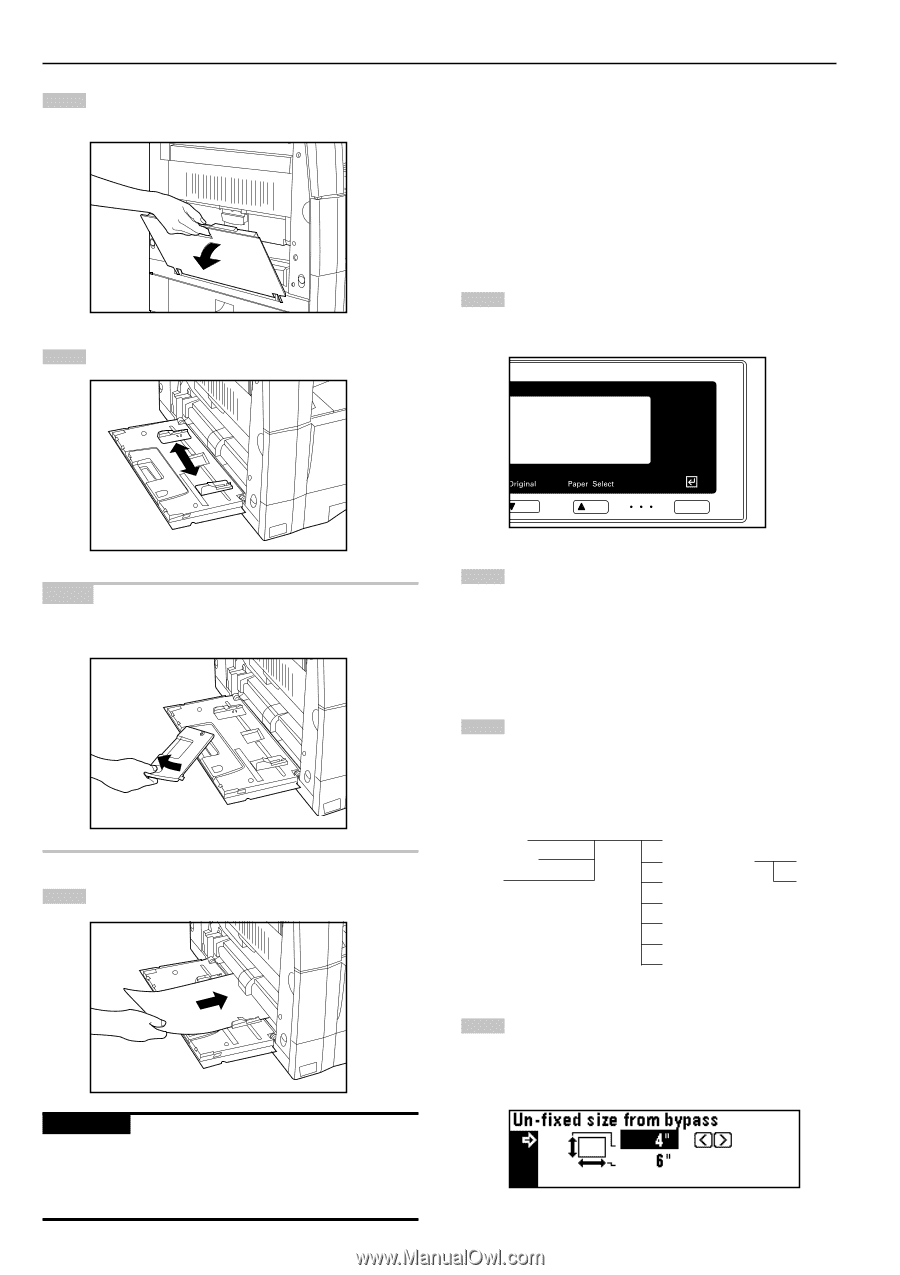
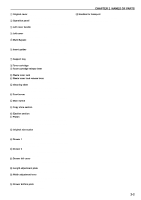
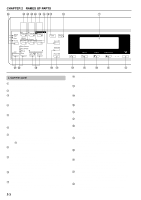
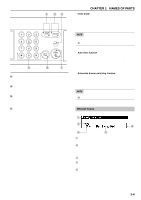
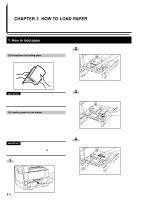
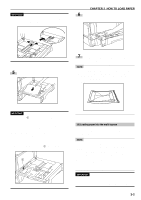
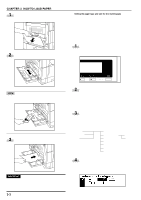
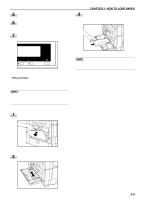
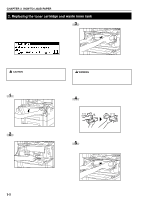
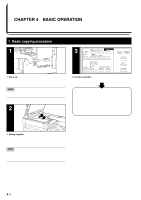
CHAPTER 3 HOW TO LOAD PAPER 1 Open the multi-bypass. 2 Adjust the insert guides to the size of the paper to be loaded. q Setting the paper type and size for the multi-bypass When using transparencies or thick paper with the multi-bypass, select the type of paper by following the procedure given below. If the paper size for the multi-bypass is set, the multi-bypass may be automatically selected according to the original size at times such as when the auto paper selection mode is selected. * If the auto clear function is triggered or the Reset key is pressed after the paper type is set to transparencies or thick paper and copies are made, the paper type setting will be canceled. The paper size setting, however, will be retained until it is changed. 1 Press and hold the Paper Select key for 3 seconds. The screen for setting the paper size for the multi-bypass and selecting either the transparency or thick paper mode appears. NOTE • When loading paper that is longer than 8 1/2" x 11", pull out the support guide. 2 When using transparencies or thick paper, select "Transparency" or "Rough" respectively using the cursor up or down key. To set the paper size for the multi-bypass, select "Size setting". 3 Press the cursor up or down key and select the paper size. When setting a non-standard paper size, select "Custom size" and proceed to the next step. If "No size designation" is selected, the multi-bypass will not be selected automatically even if the auto paper selection mode is set. 3 Insert the paper along the guides as far as it will go. Size setting Transparency Rough No size designation Custom size 11" x 17" 8.5" x 14"R 8.5" x 11" 8.5" x 11"R 5.5" x 8.5" Length Width 4 Press the cursor right or left key and select the paper dimension in the direction of the copier depth, which is shown highlighted. This value can be set from 4" to 11" in 1/ 8" increments. IMPORTANT • When loading paper into the multi-bypass, make sure that the copy side is facing downward. (The copy side is the side facing upward when the package is opened.) If the leading edge of the paper is curled, straighten it out before loading the paper in the multi-bypass. 3-3
-
 1
1 -
2
-
3
-
4
-
5
-
6
-
7
-
8
-
9
-
10
-
 11
11 -
 12
12 -
 13
13 -
 14
14 -
 15
15 -
 16
16 -
 17
17 -
 18
18 -
 19
19 -
 20
20 -
 21
21 -
22
-
23
-
24
-
25
-
26
-
27
-
28
-
29
-
30
-
31
-
32
-
33
-
34
-
35
-
36
-
37
-
38
-
39
-
40
-
41
-
42
-
43
-
44
-
45
-
46
-
47
-
48
-
49
-
50
-
51
-
52
-
53
-
54
-
55
-
56
-
57
-
58
-
59
-
60
-
61
-
62
-
63
-
64
-
65
-
66
-
67
-
68
-
69
-
70
-
71
-
72
-
73
-
74
-
75
 |
 |