Lexmark X5070 User's Guide (Mac) - Page 118
Aligning print cartridges, Cleaning the print cartridge nozzles, Maintenance, Align Cartridges
 |
View all Lexmark X5070 manuals
Add to My Manuals
Save this manual to your list of manuals |
Page 118 highlights
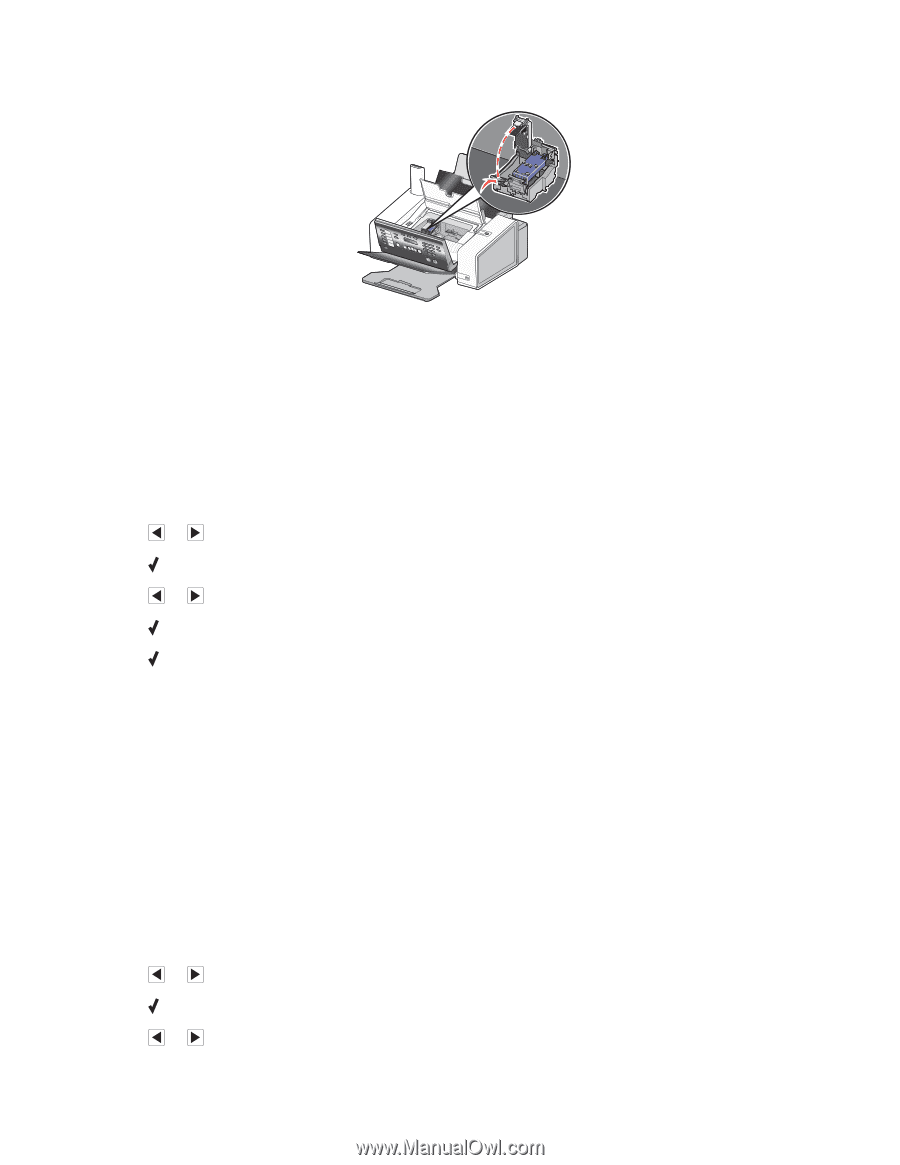
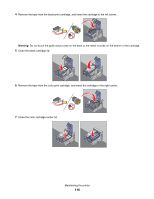
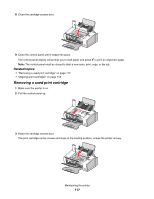
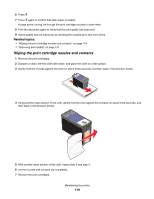
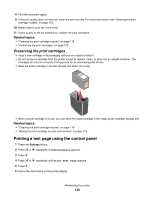
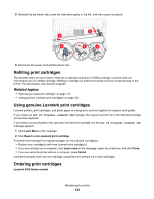
4 Press down on the cartridge carrier latch to raise the cartridge carrier lid. 5 Remove the used print cartridge. Note: If you are removing both cartridges, repeat steps 4 and 5 for the second cartridge. Related topics: • "Installing print cartridges" on page 115 Aligning print cartridges 1 Load plain paper. 2 From the control panel, press Settings. 3 Press or repeatedly until Maintenance appears. 4 Press . 5 Press or repeatedly until Align Cartridges appears. 6 Press . 7 Press again to confirm that plain paper is loaded. An alignment page prints. If you aligned the cartridges to improve print quality, print your document again. If print quality has not improved, clean the print cartridge nozzles. Related topics: • "Cleaning the print cartridge nozzles" on page 118 • "Wiping the print cartridge nozzles and contacts" on page 119 • "Preserving the print cartridges" on page 120 • "Improving print quality" on page 121 Cleaning the print cartridge nozzles 1 Load plain paper. 2 Press Settings. 3 Press or repeatedly until Maintenance appears. 4 Press . 5 Press or repeatedly until Clean Cartridges appears. Maintaining the printer 118
-
 1
1 -
2
-
3
-
4
-
5
-
6
-
7
-
8
-
9
-
10
-
11
-
12
-
13
-
14
-
15
-
16
-
17
-
18
-
19
-
20
-
21
-
22
-
23
-
24
-
25
-
26
-
27
-
28
-
29
-
30
-
31
-
32
-
33
-
34
-
35
-
36
-
37
-
38
-
39
-
40
-
41
-
42
-
43
-
44
-
45
-
46
-
47
-
48
-
49
-
50
-
51
-
52
-
53
-
54
-
55
-
56
-
57
-
58
-
59
-
60
-
61
-
62
-
63
-
64
-
65
-
66
-
67
-
68
-
69
-
70
-
71
-
72
-
73
-
74
-
75
-
76
-
77
-
78
-
79
-
80
-
81
-
82
-
83
-
84
-
85
-
86
-
87
-
88
-
89
-
90
-
91
-
92
-
93
-
94
-
95
-
96
-
97
-
98
-
99
-
100
-
101
-
102
-
103
-
104
-
105
-
106
-
107
-
108
-
109
-
110
-
111
-
112
-
 113
113 -
 114
114 -
 115
115 -
 116
116 -
 117
117 -
 118
118 -
 119
119 -
 120
120 -
 121
121 -
 122
122 -
 123
123 -
124
-
125
-
126
-
127
-
128
-
129
-
130
-
131
-
132
-
133
-
134
-
135
-
136
-
137
-
138
-
139
-
140
-
141
-
142
-
143
-
144
-
145
-
146
-
147
-
148
-
149
-
150
-
151
-
152
-
153
-
154
-
155
-
156
-
157
-
158
-
159
-
160
-
161
-
162
-
163
-
164
-
165
-
166
-
167
-
168
-
169
-
170
-
171
-
172
-
173
-
174
-
175
-
176
-
177
-
178
-
179
-
180
-
181
-
182
-
183
-
184
-
185
-
186
 |
 |