Lexmark X5070 User's Guide (Mac) - Page 29
Changing Caller ID pattern using the control panel, Managing fax jobs, Forwarding faxes
 |
View all Lexmark X5070 manuals
Add to My Manuals
Save this manual to your list of manuals |
Page 29 highlights
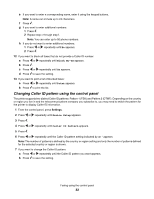
j Press . k If the hour you entered is 12 or less, press or repeatedly until AM, PM, or 24hr appears. l Press to save the setting. Related topics: • "Using the control panel" on page 95 Changing Caller ID pattern using the control panel The printer supports two distinct Caller ID patterns: Pattern 1 (FSK) and Pattern 2 (DTMF). Depending on the country or region you live in and the telecommunications company you subscribe to, you may need to switch the pattern for the printer to display Caller ID information. 1 From the control panel, press Settings. 2 Press or repeatedly until Device Setup appears. 3 Press . 4 Press or repeatedly until Caller ID Pattern appears. 5 Press . 6 Press or repeatedly until the Caller ID pattern setting indicated by an * appears. Note: The number of patterns is defined by the country or region setting and only the number of patterns defined for the selected country or region is shown. 7 If you want to change the Caller ID pattern: a Press or repeatedly until the Caller ID pattern you want appears. b Press to save the setting. Managing fax jobs Forwarding faxes Use the fax forwarding feature if you are going to be away, but still want to receive your faxes. There are three fax forwarding settings: • Off-(Default). • Forward-The printer sends the fax to the designated fax number. • Print & Forward-The printer prints the fax and then sends it to the designated fax number. To set up fax forwarding: 1 From the control panel, press Fax Mode. 2 Press . 3 Press or repeatedly until Fax Setup appears. 4 Press . 5 Press or repeatedly until Ringing and Answering appears. 6 Press . 7 Press or repeatedly until Fax Forward appears. Faxing using the control panel 29
-
 1
1 -
2
-
3
-
4
-
5
-
6
-
7
-
8
-
9
-
10
-
11
-
12
-
13
-
14
-
15
-
16
-
17
-
18
-
19
-
20
-
21
-
22
-
23
-
 24
24 -
 25
25 -
 26
26 -
 27
27 -
 28
28 -
 29
29 -
 30
30 -
 31
31 -
 32
32 -
 33
33 -
 34
34 -
35
-
36
-
37
-
38
-
39
-
40
-
41
-
42
-
43
-
44
-
45
-
46
-
47
-
48
-
49
-
50
-
51
-
52
-
53
-
54
-
55
-
56
-
57
-
58
-
59
-
60
-
61
-
62
-
63
-
64
-
65
-
66
-
67
-
68
-
69
-
70
-
71
-
72
-
73
-
74
-
75
-
76
-
77
-
78
-
79
-
80
-
81
-
82
-
83
-
84
-
85
-
86
-
87
-
88
-
89
-
90
-
91
-
92
-
93
-
94
-
95
-
96
-
97
-
98
-
99
-
100
-
101
-
102
-
103
-
104
-
105
-
106
-
107
-
108
-
109
-
110
-
111
-
112
-
113
-
114
-
115
-
116
-
117
-
118
-
119
-
120
-
121
-
122
-
123
-
124
-
125
-
126
-
127
-
128
-
129
-
130
-
131
-
132
-
133
-
134
-
135
-
136
-
137
-
138
-
139
-
140
-
141
-
142
-
143
-
144
-
145
-
146
-
147
-
148
-
149
-
150
-
151
-
152
-
153
-
154
-
155
-
156
-
157
-
158
-
159
-
160
-
161
-
162
-
163
-
164
-
165
-
166
-
167
-
168
-
169
-
170
-
171
-
172
-
173
-
174
-
175
-
176
-
177
-
178
-
179
-
180
-
181
-
182
-
183
-
184
-
185
-
186
 |
 |
