Lexmark X5070 User's Guide (Mac) - Page 165
Computer not connected, Communication not available, In the paper support, Check computer connection
 |
View all Lexmark X5070 manuals
Add to My Manuals
Save this manual to your list of manuals |
Page 165 highlights
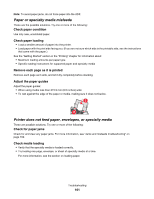
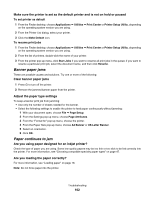
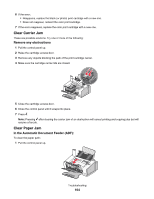
2 Firmly grasp the paper, and gently pull it out. 3 If necessary, push the roller lever gently to the left, pull it forward, and then lift the white roller out of the printer. 4 Reinstall the white roller, push the roller lever gently to the left, and then snap it into place. 5 Close the control panel until it snaps into place. 6 Press . Note: To avoid paper jams, do not force paper into the ADF. In the paper support: Eject the paper automatically To remove the paper jam, eject the paper: 1 Press and hold . 2 Remove the paper from the paper exit tray. Remove the paper manually 1 Press to turn off the printer. 2 Firmly grasp the paper, and gently pull it out. 3 Press to turn the printer back on. Computer not connected These are possible solutions. Try one or more of the following: Check computer connection Make sure your computer is connected to the printer and is turned on. Check USB cable 1 Check the USB cable for any obvious damage. 2 Firmly plug the square end of the USB cable into the USB port on the back of the printer. 3 Firmly plug the rectangular end of the USB cable into the USB port of the computer. The USB port is marked with the USB symbol. Check external print server If you are using an external print server, make sure it is connected. For more information, see the print server documentation. Communication not available The printer and computer may not be able to exchange data. Is the printer receiving power? If is not lit, the printer may not be receiving power. • Plug the printer into a different outlet. • If the printer is plugged into a surge protector, unplug the printer, and plug it directly into an electrical outlet. Troubleshooting 165
-
 1
1 -
2
-
3
-
4
-
5
-
6
-
7
-
8
-
9
-
10
-
11
-
12
-
13
-
14
-
15
-
16
-
17
-
18
-
19
-
20
-
21
-
22
-
23
-
24
-
25
-
26
-
27
-
28
-
29
-
30
-
31
-
32
-
33
-
34
-
35
-
36
-
37
-
38
-
39
-
40
-
41
-
42
-
43
-
44
-
45
-
46
-
47
-
48
-
49
-
50
-
51
-
52
-
53
-
54
-
55
-
56
-
57
-
58
-
59
-
60
-
61
-
62
-
63
-
64
-
65
-
66
-
67
-
68
-
69
-
70
-
71
-
72
-
73
-
74
-
75
-
76
-
77
-
78
-
79
-
80
-
81
-
82
-
83
-
84
-
85
-
86
-
87
-
88
-
89
-
90
-
91
-
92
-
93
-
94
-
95
-
96
-
97
-
98
-
99
-
100
-
101
-
102
-
103
-
104
-
105
-
106
-
107
-
108
-
109
-
110
-
111
-
112
-
113
-
114
-
115
-
116
-
117
-
118
-
119
-
120
-
121
-
122
-
123
-
124
-
125
-
126
-
127
-
128
-
129
-
130
-
131
-
132
-
133
-
134
-
135
-
136
-
137
-
138
-
139
-
140
-
141
-
142
-
143
-
144
-
145
-
146
-
147
-
148
-
149
-
150
-
151
-
152
-
153
-
154
-
155
-
156
-
157
-
158
-
159
-
 160
160 -
 161
161 -
 162
162 -
 163
163 -
 164
164 -
 165
165 -
 166
166 -
 167
167 -
 168
168 -
 169
169 -
 170
170 -
171
-
172
-
173
-
174
-
175
-
176
-
177
-
178
-
179
-
180
-
181
-
182
-
183
-
184
-
185
-
186
 |
 |
