Netgear DG834G DG834Gv5 Reference Manual - Page 42
Connecting Additional Wireless Client Devices After WPS Setup, Apply, Keep Existing Wireless Settings
 |
UPC - 606449029918
View all Netgear DG834G manuals
Add to My Manuals
Save this manual to your list of manuals |
Page 42 highlights
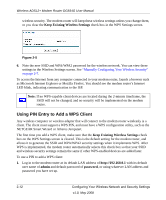
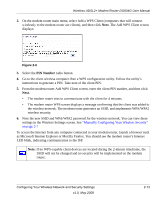
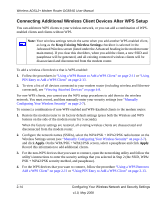
Wireless ADSL2+ Modem Router DG834G User Manual Connecting Additional Wireless Client Devices After WPS Setup You can add more WPS clients to your wireless network, or you can add a combination of WPSenabled clients and clients without WPS. Note: Your wireless settings remain the same when you add another WPS-enabled client, as long as the Keep Existing Wireless Settings checkbox is selected in the Advanced Wireless screen (listed under the Advanced heading in the modem router main menu). If you clear this checkbox, when you add the client, a new SSID and passphrase will be generated, and all existing connected wireless clients will be disassociated and disconnected from the modem router. To add a wireless client device that is WPS-enabled: 1. Follow the procedures in "Using a WPS Button to Add a WPS Client" on page 2-11 or "Using PIN Entry to Add a WPS Client" on page 2-13. 2. To view a list of all devices connected to your modem router (including wireless and Ethernetconnected), see "Viewing Attached Devices" on page 4-8. For non-WPS clients, you cannot use the WPS setup procedures to add them to the wireless network. You must record, and then manually enter your security settings (see "Manually Configuring Your Wireless Security" on page 2-7). To connect a combination of non-WPS enabled and WPS-Enabled clients to the modem router: 1. Restore the modem router to its factory default settings (press both the Wireless and WPS buttons on the side of the modem router for 5 seconds). When the factory settings are restored, all existing wireless clients are disassociated and disconnected from the modem router. 2. Configure the network names (SSIDs), select the WPA/PSK + WPA2/PSK radio button on the Wireless Settings screen (see "Manually Configuring Your Wireless Security" on page 2-7). and click Apply. On the WPA/PSK + WPA2/PSK screen, select a passphrase and click Apply. Record this information to add additional clients. 3. For the non-WPS devices that you want to connect, open the networking utility and follow the utility's instructions to enter the security settings that you selected in Step 2 (the SSID, WPA/ PSK + WPA2/PSK security method, and passphrase). 4. For the WPS devices that you want to connect, follow the procedure "Using a WPS Button to Add a WPS Client" on page 2-11 or "Using PIN Entry to Add a WPS Client" on page 2-13. 2-14 Configuring Your Wireless Network and Security Settings v1.0, May 2008
-
 1
1 -
2
-
3
-
4
-
5
-
6
-
7
-
8
-
9
-
10
-
11
-
12
-
13
-
14
-
15
-
16
-
17
-
18
-
19
-
20
-
21
-
22
-
23
-
24
-
25
-
26
-
27
-
28
-
29
-
30
-
31
-
32
-
33
-
34
-
35
-
36
-
 37
37 -
 38
38 -
 39
39 -
 40
40 -
 41
41 -
 42
42 -
 43
43 -
 44
44 -
 45
45 -
 46
46 -
 47
47 -
48
-
49
-
50
-
51
-
52
-
53
-
54
-
55
-
56
-
57
-
58
-
59
-
60
-
61
-
62
-
63
-
64
-
65
-
66
-
67
-
68
-
69
-
70
-
71
-
72
-
73
-
74
-
75
-
76
-
77
-
78
-
79
-
80
-
81
-
82
-
83
-
84
-
85
-
86
-
87
-
88
-
89
-
90
-
91
-
92
-
93
-
94
-
95
-
96
-
97
-
98
-
99
-
100
-
101
-
102
-
103
-
104
-
105
-
106
-
107
-
108
-
109
-
110
-
111
-
112
-
113
-
114
-
115
-
116
-
117
-
118
-
119
-
120
-
121
-
122
-
123
-
124
-
125
-
126
-
127
-
128
-
129
-
130
-
131
-
132
-
133
-
134
-
135
-
136
-
137
-
138
-
139
-
140
-
141
-
142
-
143
-
144
-
145
-
146
-
147
-
148
-
149
-
150
-
151
-
152
-
153
-
154
-
155
-
156
-
157
-
158
-
159
-
160
-
161
-
162
-
163
-
164
-
165
-
166
-
167
-
168
-
169
-
170
-
171
-
172
-
173
-
174
-
175
-
176
 |
 |
