Pioneer 141FD Owner's Manual - Page 15
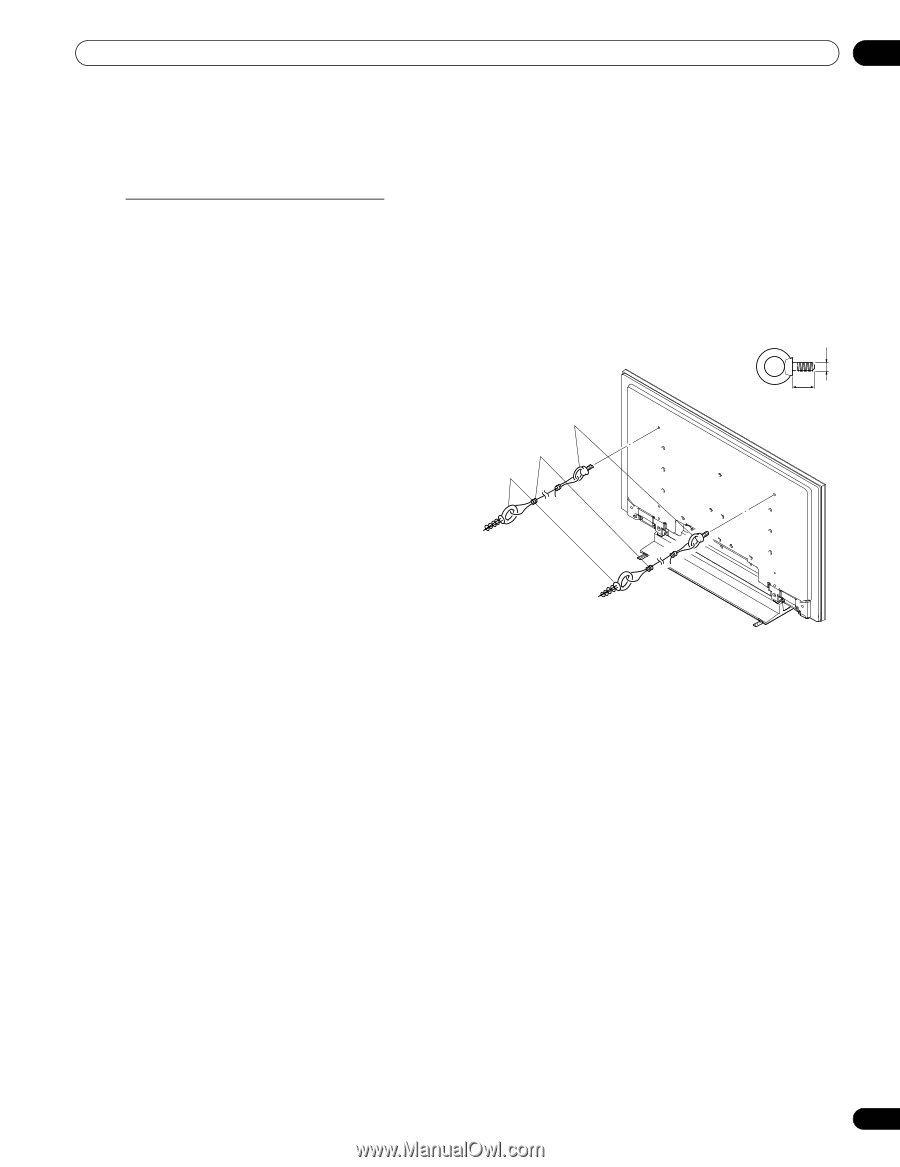
Recommended hook: Nominal diameter 8 mm 3/8 inch, length 12 mm to 18 mm 0.5 inches to 0.7 inches - wall mount
 |
UPC - 012562905761
View all Pioneer 141FD manuals
Add to My Manuals
Save this manual to your list of manuals |
Page 15 highlights
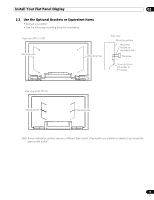
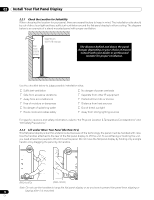
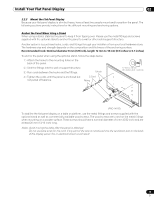
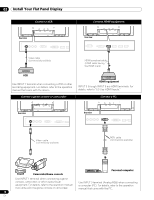
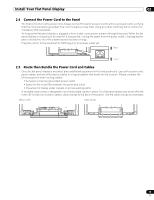
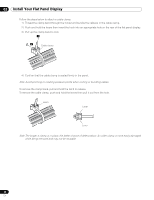
Install Your Flat Panel Display 02 2.2.3 Mount the Flat Panel Display Because your flat panel display is slim but heavy, have at least two people mount and/or position the panel. The following sections provide instructions for the different mounting and anchoring options. Anchor the Panel When Using a Stand When using a stand, stabilize the panel to keep it from tipping over. Please use the metal fittings and screws supplied with the optional stand to anchor the panel to a wall or other solid support structure. Another option is to purchase hooks, cords, and fittings through your installer or from your local hardware store. The hardware size and strength depends on the composition and thickness of the anchoring surface. Recommended hook: Nominal diameter 8 mm (3/8 inch), length 12 mm to 18 mm (0.5 inches to 0.7 inches) To anchor the panel when using the optional stand, follow the steps below. 1 ) Attach the hooks to the mounting holes on the back of the panel. 2 ) Sink the fittings into the wall or support structure. 3 ) Run cords between the hooks and the fittings. 1.Hook 4 ) Tighten the cords until the panel is anchored but 2.Cord not pulled off balance. Fitting 12 mm to 18 mm (0.5 inches to 0.7 inches) M8 (PRO-141FD) To stabilize the flat panel display on a table or platform, use the metal fittings and screws supplied with the optional stand as well as commercially available wood screws. The wood screws are to anchor the metal fittings when mounting on a wooden surface. These screws should have a nominal diameter of 4 mm (5/32 inch) and are at least 20 mm (13/16 inch) long. Notes: Avoid moving the table after the panel is attached. Do not use bare wires for the cord. If any part of the wire is introduced into the ventilation port on the back of the display panel, fire or electrical shock could result. 15 En
-
 1
1 -
2
-
3
-
4
-
5
-
6
-
7
-
8
-
9
-
 10
10 -
 11
11 -
 12
12 -
 13
13 -
 14
14 -
 15
15 -
 16
16 -
 17
17 -
 18
18 -
 19
19 -
 20
20 -
21
-
22
-
23
-
24
-
25
-
26
-
27
-
28
-
29
-
30
-
31
-
32
-
33
-
34
-
35
-
36
-
37
-
38
-
39
-
40
-
41
-
42
-
43
-
44
-
45
-
46
-
47
-
48
-
49
-
50
-
51
-
52
-
53
-
54
-
55
-
56
-
57
-
58
-
59
-
60
-
61
-
62
-
63
-
64
-
65
-
66
-
67
-
68
-
69
-
70
-
71
-
72
-
73
-
74
-
75
-
76
-
77
-
78
-
79
-
80
-
81
-
82
-
83
-
84
-
85
-
86
-
87
-
88
-
89
-
90
-
91
-
92
-
93
-
94
-
95
-
96
-
97
-
98
-
99
-
100
-
101
-
102
-
103
-
104
-
105
-
106
 |
 |