Pioneer 141FD Owner's Manual - Page 26
Home Menu, Enter - contrast
 |
UPC - 012562905761
View all Pioneer 141FD manuals
Add to My Manuals
Save this manual to your list of manuals |
Page 26 highlights
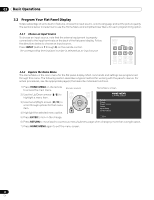
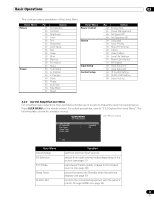
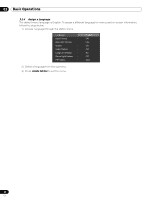
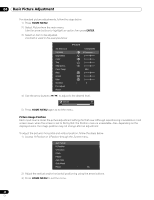
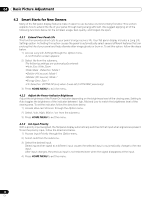
04 Basic Picture Adjustment For standard picture adjustments, follow the steps below. 1 ) Press HOME MENU. 2 ) Select Picture from the main menu. Use the arrow buttons to highlight an option then press ENTER. 3 ) Select an item to be adjusted. Contrast is used in the example below. AV Selection Contrast Brightness Color Tint Sharpness Color Temp Red Green Blue Gamma Pro Adjust Reset Picture : STANDARD : 40 : 0 : 0 : 0 : 0 : Mid : 0 : 0 : 0 : 3 4 ) Use the arrow buttons (/) to adjust to the desired level. Contrast 32 5 ) Press HOME MENU again to exit the menu. Picture Image Position Each input source stores the picture adjustment settings for that view. Although repositioning is available in most screen views, when the screen is set to Dot by Dot, the Position menu is unavailable. Also, depending on the displayed video, the image position may not change after an adjustment. To adjust the picture's horizontal and vertical position, follow the steps below. 1 ) Access H.Position or V.Position through the Screen menu. Auto Setup H.Position V.Position Clock Phase Auto Size Side Mask Reset : No 2 ) Adjust the vertical and/or horizontal positioning using the arrow buttons. 3 ) Press HOME MENU to exit the menu. 26 En
-
 1
1 -
2
-
3
-
4
-
5
-
6
-
7
-
8
-
9
-
10
-
11
-
12
-
13
-
14
-
15
-
16
-
17
-
18
-
19
-
20
-
 21
21 -
 22
22 -
 23
23 -
 24
24 -
 25
25 -
 26
26 -
 27
27 -
 28
28 -
 29
29 -
 30
30 -
 31
31 -
32
-
33
-
34
-
35
-
36
-
37
-
38
-
39
-
40
-
41
-
42
-
43
-
44
-
45
-
46
-
47
-
48
-
49
-
50
-
51
-
52
-
53
-
54
-
55
-
56
-
57
-
58
-
59
-
60
-
61
-
62
-
63
-
64
-
65
-
66
-
67
-
68
-
69
-
70
-
71
-
72
-
73
-
74
-
75
-
76
-
77
-
78
-
79
-
80
-
81
-
82
-
83
-
84
-
85
-
86
-
87
-
88
-
89
-
90
-
91
-
92
-
93
-
94
-
95
-
96
-
97
-
98
-
99
-
100
-
101
-
102
-
103
-
104
-
105
-
106
 |
 |
