Pioneer 141FD Owner's Manual - Page 57
USER MENU, ENTER, KURO LINK, Disc Navigator, Timer REC DVR, Timer REC List DVR, Stop REC DVR, CTRL
 |
UPC - 012562905761
View all Pioneer 141FD manuals
Add to My Manuals
Save this manual to your list of manuals |
Page 57 highlights
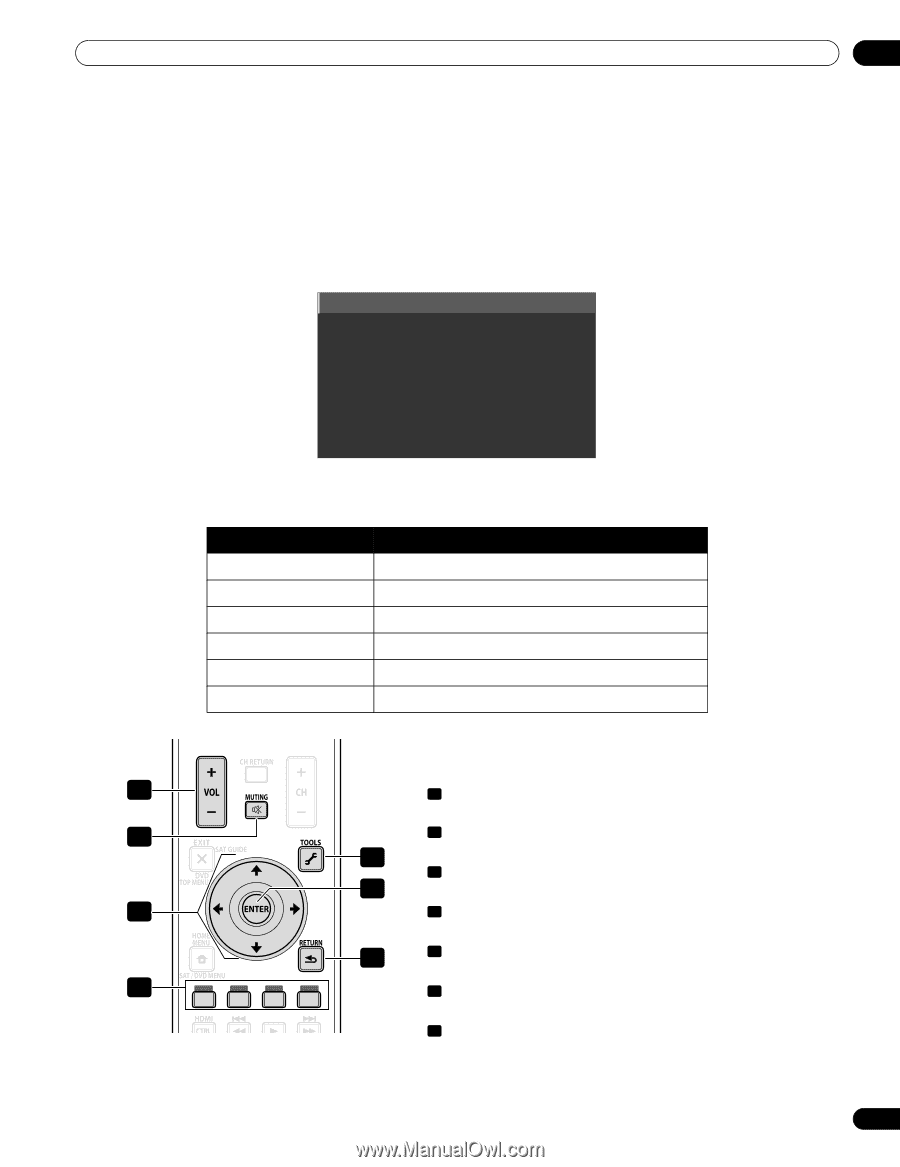
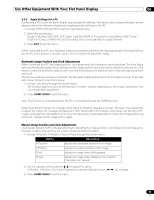
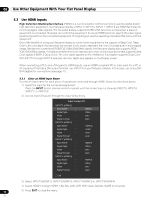
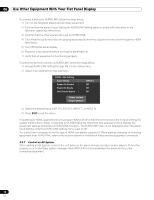
Use Other Equipment With Your Flat Panel Display 06 The flat panel display's remote can control a maximum of two (2) recorders, two (2) playback devices, and one (1) AV system at a time. To select and use the various KURO LINK functions for a connected Pioneer AV system, recorder, or player, use the panel's KURO LINK menu. To access the KURO LINK menu, follow the steps below. 1 ) Press USER MENU on the remote. 2 ) Select KURO LINK from the main menu. Use the arrow buttons to highlight an option then press ENTER. Disc Navigator Timer REC (DVR) Timer REC List (DVR) Stop REC (DVR) CTRL Panel(AV-SYS) Playback CTRL Panel Note: Pressing KURO LINK on the remote also causes the KURO LINK menu to open. Option Disc Navigator Timer REC (DVR) Timer REC List (DVR) Stop REC (DVR) CTRL Panel (AV-SYS) Playback CTRL Panel Description displays the player's or recorder's title list displays the recorder's program guide displays the recorder's timer recording list stops the recorder from recording displays the AV system's control panel displays the player's or recorder's control panel Use the following buttons to control functions such as disc navigation on a recorder or player. 1 • 1 VOL +/- (adjusts the volume for an AV system) 2 • 2 MUTING 5 (turns off the sound while the video continues to play) • 3 Arrow buttons 6 (navigates the menu screen) 3 • 4 Color buttons (Red, Green, Blue, Yellow) (controls a BD player) 7 • 5 TOOLS (assigns the code for a Pioneer BD player) 4 • 6 ENTER (activates the selected function) • 7 RETURN (returns to the previous menu screen) 57 En
-
 1
1 -
2
-
3
-
4
-
5
-
6
-
7
-
8
-
9
-
10
-
11
-
12
-
13
-
14
-
15
-
16
-
17
-
18
-
19
-
20
-
21
-
22
-
23
-
24
-
25
-
26
-
27
-
28
-
29
-
30
-
31
-
32
-
33
-
34
-
35
-
36
-
37
-
38
-
39
-
40
-
41
-
42
-
43
-
44
-
45
-
46
-
47
-
48
-
49
-
50
-
51
-
 52
52 -
 53
53 -
 54
54 -
 55
55 -
 56
56 -
 57
57 -
 58
58 -
 59
59 -
 60
60 -
 61
61 -
 62
62 -
63
-
64
-
65
-
66
-
67
-
68
-
69
-
70
-
71
-
72
-
73
-
74
-
75
-
76
-
77
-
78
-
79
-
80
-
81
-
82
-
83
-
84
-
85
-
86
-
87
-
88
-
89
-
90
-
91
-
92
-
93
-
94
-
95
-
96
-
97
-
98
-
99
-
100
-
101
-
102
-
103
-
104
-
105
-
106
 |
 |