Pioneer 141FD Owner's Manual - Page 69
Assign a Serial Number
 |
UPC - 012562905761
View all Pioneer 141FD manuals
Add to My Manuals
Save this manual to your list of manuals |
Page 69 highlights
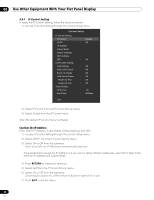
Use Other Equipment With Your Flat Panel Display 06 Sample MS-DOS search screen using "nslookup" C:\> nslookup Server: xxx.xxx.xxx.com Adress: yyy.yyy.yyy.yyy > mailsv.aaa.com Server: xxx.xxx.xxx.com Adress: yyy.yyy.yyy.yyy Non-aurthoritative answer: Name: mailsv.aaa.com Adress: zzz.zzz.zzz.zzz Current name server Mail server searched for Current name server Server: IP Address for mailsv.aaa.com 6.9 Assign a Serial Number 6.9.1 Assign an ID Number This section describes how to enter the required ID number for controlling and adjusting multiple panels through a single PC. To assign the ID Number, follow the directions below. 1 ) Access Serial Setting through the Control Setup menu. 2 ) Select ID No. Set from the Serial Setting menu. Control Setup IP Control Setting IP Control : DHCP : IP Address Subnet Mask Default Gateway MAC Address LED : KURO LINK Setting Input Setting : Power Off Control : Power On Ready : Hold Sound Status : Power On Test Power Off Test Serial Setting ID No.Set : Baud Rate : Disable On On Off Off Off Off All 9600bps Exit 3 ) Select All or 00H-FFH from the submenu. ID No.Set All Parameter 00H-FFH All Description sets an ID Number does not set an ID Number Note: This setting applies to all input sources. 69 En
-
 1
1 -
2
-
3
-
4
-
5
-
6
-
7
-
8
-
9
-
10
-
11
-
12
-
13
-
14
-
15
-
16
-
17
-
18
-
19
-
20
-
21
-
22
-
23
-
24
-
25
-
26
-
27
-
28
-
29
-
30
-
31
-
32
-
33
-
34
-
35
-
36
-
37
-
38
-
39
-
40
-
41
-
42
-
43
-
44
-
45
-
46
-
47
-
48
-
49
-
50
-
51
-
52
-
53
-
54
-
55
-
56
-
57
-
58
-
59
-
60
-
61
-
62
-
63
-
 64
64 -
 65
65 -
 66
66 -
 67
67 -
 68
68 -
 69
69 -
 70
70 -
 71
71 -
 72
72 -
 73
73 -
 74
74 -
75
-
76
-
77
-
78
-
79
-
80
-
81
-
82
-
83
-
84
-
85
-
86
-
87
-
88
-
89
-
90
-
91
-
92
-
93
-
94
-
95
-
96
-
97
-
98
-
99
-
100
-
101
-
102
-
103
-
104
-
105
-
106
 |
 |
