Pioneer 141FD Owner's Manual - Page 36
Assign Advanced Picture Functions - pro picture settings
 |
UPC - 012562905761
View all Pioneer 141FD manuals
Add to My Manuals
Save this manual to your list of manuals |
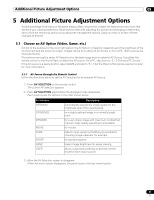
Page 36 highlights
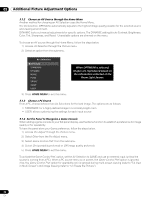
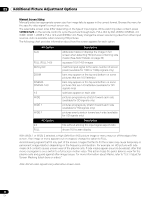
05 Additional Picture Adjustment Options 4 ) Select the desired level for that option using the left/right arrows (/). Contrast 32 5 ) Repeat the process for any additional adjustments. 6 ) Press HOME MENU again to exit the menu after all adjustments are complete. Note: Reset returns all settings to the factory defaults. 5.3 Assign Advanced Picture Functions Your flat panel display provides various advanced functions for optimizing the picture quality that go beyond basic adjustments explained earlier in this manual. This section explores the value offered through Pioneer's Pro Adjust support, top quality blacks, better balanced whites, and overall color improvements. 5.3.1 Adjust for Screen Masking (black bars on sides) Screen Masks fill areas on both sides of a picture. Some content fails to fill the screen so bars appear on each side of the picture. This section explains how to adjust screen masking. Detect Masks Some HD video signals have 4:3 content with side masks. Side masks are black bars that appear on the picture's left and right sides. If the flat panel display's Screen Size is set to Natural during the Auto Size process, gray bars replace the black bars. When the panel is set to Wide Zoom, the bars are hidden. These responses reduce afterimage concerns. To allow the panel to detect side masks, follow the steps below. 1 ) Access Side Mask through the Screen menu. 2 ) Select Detection from the submenu. 3 ) Select Mode 1 or Mode 2 to activate Side Mask Detection. Mode 1 detects only black side masks and Mode 2 detects both black and illustrated side masks. Select Off to deactivate this function. 4 ) Press HOME MENU to exit the menu. Video signals can affect the Side Mask Detection function differently. For High Definition pictures when Side Mask Detection is on, the panel automatically detects images containing side masks and shows the picture in full screen. Cycle the screen size to select Auto for video signals that do not carry aspect ratio information. Video content also can affect the Side Mask Detection function. If a detection error occurs when trying to watch HD content, manually change the screen size to the proper setting for the content. HD Wide Mode The HD Wide Mode allows selecting the display mode (WIDE 1 or WIDE 2) when detecting side masks that appear in a 4:3 image. This option is available when the Auto Size menu is set to Wide Zoom and Side Mask Detection to Mode 1 or Mode 2. To allow the HD Wide Mode, follow the steps below. 1 ) Access Side Mask through the Screen menu. 2 ) Select HD Wide Mode from the submenu. 3 ) Select Mode 1 or Mode 2 to activate HD Wide Mode. • Mode 1: screen mode sets to WIDE 1 when detecting side masks. • Mode 2: screen mode sets to WIDE 2 when detecting side masks. 4 ) Press HOME MENU to exit the menu. 36 En
-
 1
1 -
2
-
3
-
4
-
5
-
6
-
7
-
8
-
9
-
10
-
11
-
12
-
13
-
14
-
15
-
16
-
17
-
18
-
19
-
20
-
21
-
22
-
23
-
24
-
25
-
26
-
27
-
28
-
29
-
30
-
 31
31 -
 32
32 -
 33
33 -
 34
34 -
 35
35 -
 36
36 -
 37
37 -
 38
38 -
 39
39 -
 40
40 -
 41
41 -
42
-
43
-
44
-
45
-
46
-
47
-
48
-
49
-
50
-
51
-
52
-
53
-
54
-
55
-
56
-
57
-
58
-
59
-
60
-
61
-
62
-
63
-
64
-
65
-
66
-
67
-
68
-
69
-
70
-
71
-
72
-
73
-
74
-
75
-
76
-
77
-
78
-
79
-
80
-
81
-
82
-
83
-
84
-
85
-
86
-
87
-
88
-
89
-
90
-
91
-
92
-
93
-
94
-
95
-
96
-
97
-
98
-
99
-
100
-
101
-
102
-
103
-
104
-
105
-
106
 |
 |