Sony DPP-FP50 Operating Instructions - Page 23
Checking the preview image, before printing - printer cartridge
 |
UPC - 027242678583
View all Sony DPP-FP50 manuals
Add to My Manuals
Save this manual to your list of manuals |
Page 23 highlights
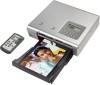
2 Press PRINT. Printing of the image selected with the cursor starts. During printing, the printing process is displayed on the TV monitor. Checking the preview image before printing You can display and check an image in full-screen size before printing. Move the yellow frame to the desired image, then press PICTURE. Making basic printing (MONITOR OUT mode) 3 When printing is complete and the print paper automatically emerges, remove the printed paper from the paper tray. Notes • Do not remove or connect a memory card or an external device while the access indicator is flashing or the access indication is displayed on the TV monitor. • Never move or turn off the printer while it is printing; the print cartridge or paper may become stuck. In case you turn off the power, keep the paper tray inserted and then turn on the printer. If paper being printed remains in the printer, remove it and resume printing from the step 1. • The print paper may emerge a few times during printing. Do not touch nor pull the emerged paper. Wait for the print paper to be fully ejected after printing ends. • Make sure to spare enough space behind the printer during printing. PICTURE The selected image is displayed in fullscreen size (preview image). Preview image Selected input media (Memory card or external device) Print cartridge type (P: Postcard/ L: 3.5 x 5 inch/C: cleaning cassette) Total number of images in the selected media Number of the selected images Print quantity indication Image number Scroll bar indicating the Associated file/DPOF/ position of the image Protect indications among the total number (page 22) of images. Continued 23 GB
-
 1
1 -
2
-
3
-
4
-
5
-
6
-
7
-
8
-
9
-
10
-
11
-
12
-
13
-
14
-
15
-
16
-
17
-
 18
18 -
 19
19 -
 20
20 -
 21
21 -
 22
22 -
 23
23 -
 24
24 -
 25
25 -
 26
26 -
 27
27 -
 28
28 -
29
-
30
-
31
-
32
-
33
-
34
-
35
-
36
-
37
-
38
-
39
-
40
-
41
-
42
-
43
-
44
-
45
-
46
-
47
-
48
-
49
-
50
-
51
-
52
-
53
-
54
-
55
-
56
-
57
-
58
-
59
-
60
-
61
-
62
-
63
-
64
-
65
-
66
-
67
-
68
-
69
-
70
-
71
-
72
-
73
-
74
-
75
-
76
-
77
-
78
-
79
-
80
-
81
-
82
-
83
-
84
-
85
-
86
-
87
-
88
-
89
-
90
-
91
-
92
-
93
-
94
-
95
-
96
-
97
-
98
-
99
-
100
 |
 |
