Sony DPP-FP50 Operating Instructions - Page 59
Installing the printer driver - user manual
 |
UPC - 027242678583
View all Sony DPP-FP50 manuals
Add to My Manuals
Save this manual to your list of manuals |
Page 59 highlights
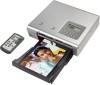
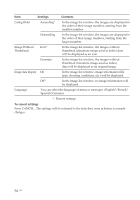
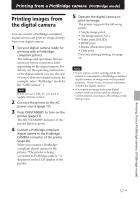
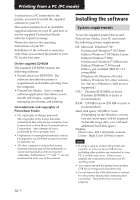
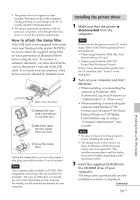
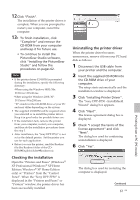
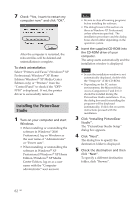
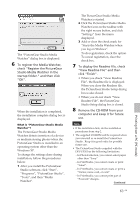
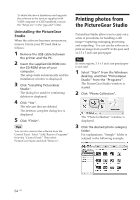
• The printer does not support system standby/hibernate mode of the computer. During printing, do not change your PC to system standby/hibernate mode. • We cannot guarantee operations with all personal computers, even though they may meet or exceed the system requirements. How to attach the clamp filter If the USB cable is not equipped with ferrite cores near the plug to the printer (B-TYPE), be sure to attach the supplied clamp filter for noise prevention as illustrated below before using the unit. To conform to radiation standards, you must attach ferrite cores to the printer's side end of the USB cable. If no ferrite cores are attached, other devices may be affected by radiation noise. Within 10 cm (4 inches) 1 Release the lock with a screwdriver or a similar tool. 2 Wind the cable into the clamp filter one time. 3 Close the clamp filter. Attach the clamp filter as close to the printer's side plug as possible (within 10 cm (4 inches)). Note Use a commercially available A-B TYPE USBcompatible connecting cable shorter than 3m in length. The type of USB cable you should use may differ depending on the computer. For details, see the instructions manual of your computer. Installing the printer driver 1 Make sure that the printer is disconnected from the computer. Note If you connect the printer to your PC in this stage, either of the following dialog boxes are displayed: • When using Windows 98SE/Me: Add New Hardware Wizard • When using Windows 2000/XP: Found New Hardware Wizard If this occurs, disconnect the printer from the PC and then click "Cancel" in the dialog box. 2 Turn on your computer and start Windows. • When installing or uninstalling the software in Windows® 2000 Professional, log on to Windows as "Administrator" or "Power user". • When installing or uninstalling the software with Windows® XP Professional/Windows® XP Home Edition/Windows® XP Media Center Edition, log on using a "Computer administrator" user account. Notes • Be sure to close all running programs before installing the software. • The dialog boxes in this section are those in Windows XP Professional, unless otherwise specified. The installation procedures and the dialog boxes shown differ depending on the operating system. 3 Insert the supplied CD-ROM into the CD-ROM drive of your computer. The setup starts automatically and the installation window is displayed. Continued 59 GB Printing from a PC (PC mode)
-
 1
1 -
2
-
3
-
4
-
5
-
6
-
7
-
8
-
9
-
10
-
11
-
12
-
13
-
14
-
15
-
16
-
17
-
18
-
19
-
20
-
21
-
22
-
23
-
24
-
25
-
26
-
27
-
28
-
29
-
30
-
31
-
32
-
33
-
34
-
35
-
36
-
37
-
38
-
39
-
40
-
41
-
42
-
43
-
44
-
45
-
46
-
47
-
48
-
49
-
50
-
51
-
52
-
53
-
 54
54 -
 55
55 -
 56
56 -
 57
57 -
 58
58 -
 59
59 -
 60
60 -
 61
61 -
 62
62 -
 63
63 -
 64
64 -
65
-
66
-
67
-
68
-
69
-
70
-
71
-
72
-
73
-
74
-
75
-
76
-
77
-
78
-
79
-
80
-
81
-
82
-
83
-
84
-
85
-
86
-
87
-
88
-
89
-
90
-
91
-
92
-
93
-
94
-
95
-
96
-
97
-
98
-
99
-
100
 |
 |