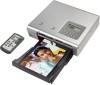
Sony DPP-FP50 Operating Instructions - Page 67
Printing from a PC PC mode, In the Graphics tab, set the color, reproduction and picture quality.
 |
UPC - 027242678583
View all Sony DPP-FP50 manuals
Add to My Manuals
Save this manual to your list of manuals |
Page 67 highlights
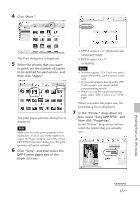
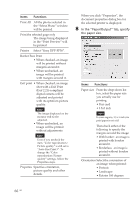
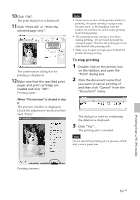
Items Functions Note Depending on the application software you use, orientation may not change even if you change portrait or landscape setting. Copies Specify the number of copies to be printed. Note Depending on the application software you use, the print quantity setting of the application has priority over that specified here. Enlarge/ Reduce Specify the percentage to enlarge or reduce the size of an image when printed. You can set the reference point when an image is enlarged or reduced by checking "Upper left reference". • When unchecked, an image is enlarged or reduced with the center as the reference point. Usually, use this option. • When checked, an image is enlarged or reduced with the upper left corner as the reference point. You need to use this option when using some types of applications. In case printing does not complete satisfactorily with the option unchecked, select this option. Print preview Check this option to display a preview of an image before printed. 9 In the "Graphics" tab, set the color reproduction and picture quality. Items Functions Color reproduction/Picture quality Select the setting from the dropdown list box: •Off: An image will be printed without adjustment. •Auto Fine Print 3:From the "Settings" drop-down list box, select either of the following correction method: - Photographical: An image will be adjusted automatically and printed with natural and beautiful pictures. (Recommended option) -Vivid: An image will be adjusted automatically and printed with more vivid pictures. (In this setting, a stronger sharpness correction is given, making pictures more vivid.) Printing from a PC (PC mode) 67 GB
-
 1
1 -
2
-
3
-
4
-
5
-
6
-
7
-
8
-
9
-
10
-
11
-
12
-
13
-
14
-
15
-
16
-
17
-
18
-
19
-
20
-
21
-
22
-
23
-
24
-
25
-
26
-
27
-
28
-
29
-
30
-
31
-
32
-
33
-
34
-
35
-
36
-
37
-
38
-
39
-
40
-
41
-
42
-
43
-
44
-
45
-
46
-
47
-
48
-
49
-
50
-
51
-
52
-
53
-
54
-
55
-
56
-
57
-
58
-
59
-
60
-
61
-
 62
62 -
 63
63 -
 64
64 -
 65
65 -
 66
66 -
 67
67 -
 68
68 -
 69
69 -
 70
70 -
 71
71 -
 72
72 -
73
-
74
-
75
-
76
-
77
-
78
-
79
-
80
-
81
-
82
-
83
-
84
-
85
-
86
-
87
-
88
-
89
-
90
-
91
-
92
-
93
-
94
-
95
-
96
-
97
-
98
-
99
-
100
 |
 |
