Sony VGX-XL1 User Guide - Page 114
Start VAIO Recovery, Recovery Discs, Windows Start Menu
 |
View all Sony VGX-XL1 manuals
Add to My Manuals
Save this manual to your list of manuals |
Page 114 highlights
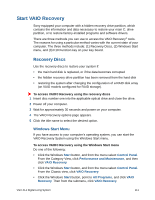
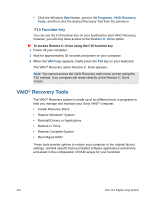
Start VAIO Recovery Sony equipped your computer with a hidden recovery drive partition, which contains the information and data necessary to restore your main C: drive partition, or to restore factory-installed programs and software drivers. There are three methods you can use to access the VAIO Recovery® tools. The reasons for using a particular method varies with the current state of your computer. The three methods include: (1) Recovery Discs, (2) Windows Start menu, and (3) F10 Function key on your key board. Recovery Discs Use the recovery discs to restore your system if: • the main hard disk is replaced, or if the data becomes corrupted • the hidden recovery drive partition has been removed from the hard disk • restoring the system after changing the configuration of a RAID disk array (on VAIO models configured for RAID storage). To access VAIO® Recovery using the recovery discs 1 Insert disc number one into the applicable optical drive and close the drive. 2 Power off your computer. 3 Wait for approximately 30 seconds and power on your computer. 4 The VAIO Recovery options page appears. 5 Click the title name to select the desired option. Windows Start Menu If you have access to your computer's operating system, you can start the VAIO Recovery System using the Windows Start menu. To access VAIO® Recovery using the Windows Start menu Do one of the following: • Click the Windows Start button, and from the menu select Control Panel. From the Category View, click Performance and Maintenance, and then click VAIO Recovery. • Click the Windows Start button, and from the menu select Control Panel. From the Classic view, click VAIO Recovery. • Click the Windows Start button, point to All Programs, and click VAIO Recovery. Then from the submenu, click VAIO Recovery. VGX-XL1 Digital Living System 111
-
 1
1 -
2
-
3
-
4
-
5
-
6
-
7
-
8
-
9
-
10
-
11
-
12
-
13
-
14
-
15
-
16
-
17
-
18
-
19
-
20
-
21
-
22
-
23
-
24
-
25
-
26
-
27
-
28
-
29
-
30
-
31
-
32
-
33
-
34
-
35
-
36
-
37
-
38
-
39
-
40
-
41
-
42
-
43
-
44
-
45
-
46
-
47
-
48
-
49
-
50
-
51
-
52
-
53
-
54
-
55
-
56
-
57
-
58
-
59
-
60
-
61
-
62
-
63
-
64
-
65
-
66
-
67
-
68
-
69
-
70
-
71
-
72
-
73
-
74
-
75
-
76
-
77
-
78
-
79
-
80
-
81
-
82
-
83
-
84
-
85
-
86
-
87
-
88
-
89
-
90
-
91
-
92
-
93
-
94
-
95
-
96
-
97
-
98
-
99
-
100
-
101
-
102
-
103
-
104
-
105
-
106
-
107
-
108
-
 109
109 -
 110
110 -
 111
111 -
 112
112 -
 113
113 -
 114
114 -
 115
115 -
 116
116 -
 117
117 -
 118
118 -
 119
119 -
120
-
121
-
122
-
123
-
124
-
125
-
126
-
127
-
128
-
129
-
130
-
131
-
132
-
133
-
134
-
135
-
136
-
137
-
138
-
139
-
140
-
141
-
142
-
143
-
144
-
145
-
146
-
147
-
148
-
149
-
150
-
151
-
152
-
153
-
154
-
155
-
156
-
157
-
158
-
159
-
160
-
161
-
162
-
163
-
164
-
165
-
166
-
167
-
168
-
169
-
170
-
171
-
172
-
173
-
174
-
175
 |
 |