Sony VGX-XL1 User Guide - Page 43
Step 5:, Turning Power On, Activate Wireless Keyboard Communication, Station, Power, Pointing Device
 |
View all Sony VGX-XL1 manuals
Add to My Manuals
Save this manual to your list of manuals |
Page 43 highlights
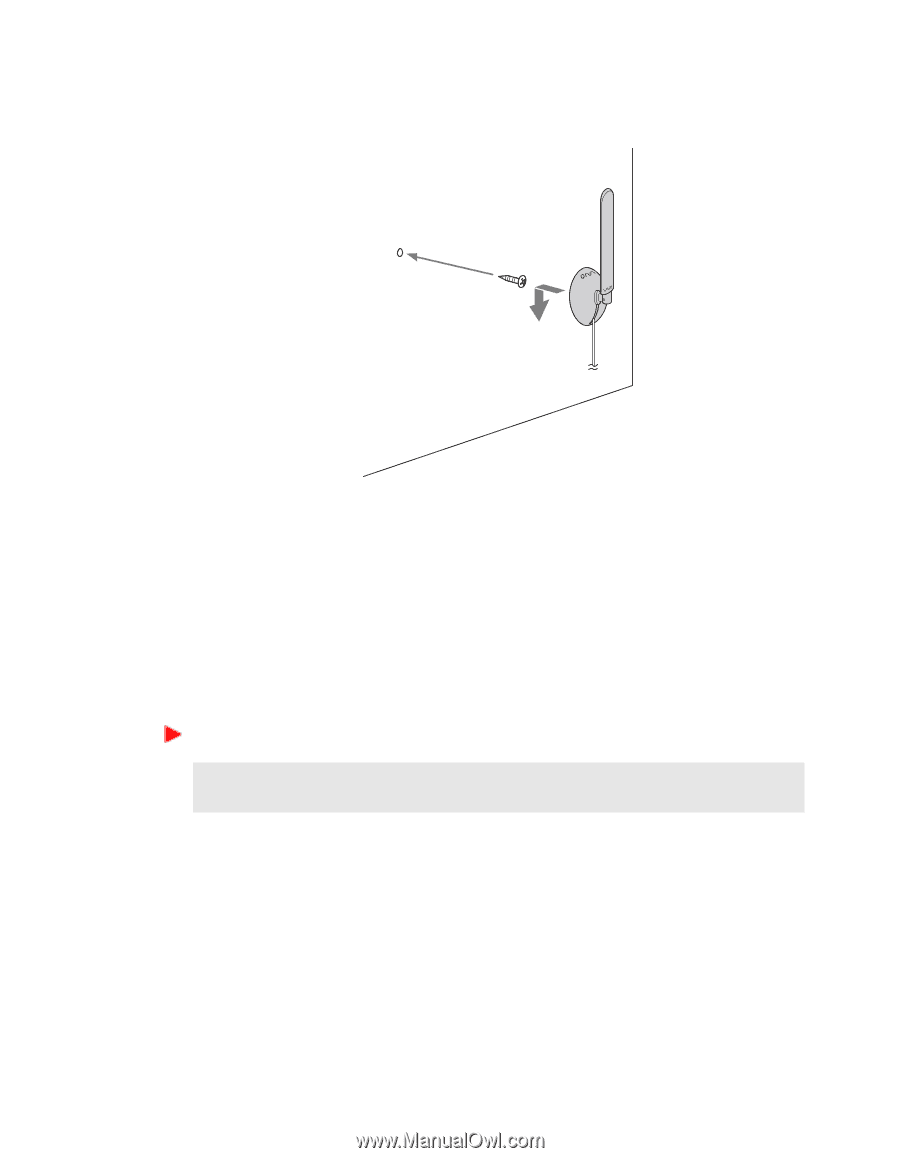
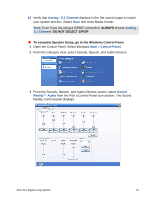
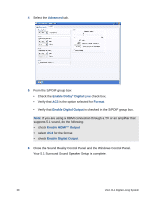
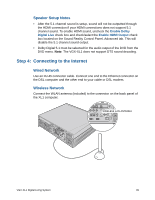
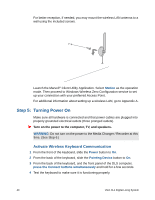
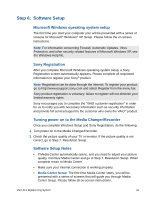
For better reception, if needed, you may mount the wireless LAN antenna to a wall using the included screws. Launch the Marvell® Client Utility Application. Select Station as the operation mode. Then proceed to Windows Wireless Zero Configuration service to set up your connection with your preferred Access Point. For additional information about setting up a wireless LAN, go to Appendix A. Step 5: Turning Power On Make sure all hardware is connected and that power cables are plugged into properly grounded electrical outlets (three pronged outlets). Turn on the power to the computer, TV, and speakers. WARNING: Do not turn on the power to the Media Changer / Recorder at this time. (See Step 6.) Activate Wireless Keyboard Communication 1 From the front of the keyboard, slide the Power button to On. 2 From the back of the keyboard, slide the Pointing Device button to On. 3 From the back of the keyboard, and the front panel of the DLS computer, press the Connect buttons simultaneously and hold for a few seconds. 4 Test the keyboard to make sure it is functioning properly. 40 VGX-XL1 Digital Living System
-
 1
1 -
2
-
3
-
4
-
5
-
6
-
7
-
8
-
9
-
10
-
11
-
12
-
13
-
14
-
15
-
16
-
17
-
18
-
19
-
20
-
21
-
22
-
23
-
24
-
25
-
26
-
27
-
28
-
29
-
30
-
31
-
32
-
33
-
34
-
35
-
36
-
37
-
 38
38 -
 39
39 -
 40
40 -
 41
41 -
 42
42 -
 43
43 -
 44
44 -
 45
45 -
 46
46 -
 47
47 -
 48
48 -
49
-
50
-
51
-
52
-
53
-
54
-
55
-
56
-
57
-
58
-
59
-
60
-
61
-
62
-
63
-
64
-
65
-
66
-
67
-
68
-
69
-
70
-
71
-
72
-
73
-
74
-
75
-
76
-
77
-
78
-
79
-
80
-
81
-
82
-
83
-
84
-
85
-
86
-
87
-
88
-
89
-
90
-
91
-
92
-
93
-
94
-
95
-
96
-
97
-
98
-
99
-
100
-
101
-
102
-
103
-
104
-
105
-
106
-
107
-
108
-
109
-
110
-
111
-
112
-
113
-
114
-
115
-
116
-
117
-
118
-
119
-
120
-
121
-
122
-
123
-
124
-
125
-
126
-
127
-
128
-
129
-
130
-
131
-
132
-
133
-
134
-
135
-
136
-
137
-
138
-
139
-
140
-
141
-
142
-
143
-
144
-
145
-
146
-
147
-
148
-
149
-
150
-
151
-
152
-
153
-
154
-
155
-
156
-
157
-
158
-
159
-
160
-
161
-
162
-
163
-
164
-
165
-
166
-
167
-
168
-
169
-
170
-
171
-
172
-
173
-
174
-
175
 |
 |